Getting Gauge: You are Not Alone

You’re sitting in your favourite knitting chair, frowning. This is supposed to be relaxing. This is supposed to be fun but … your project is not quite right. It’s bigger or smaller than it should be. You measure, knit a bit and measure again because this time it will miraculously be the correct size! What is the matter? Everyone else is knitting this and it’s working fine. Not True.

Lots of those “everyone else” knitters struggle to get their projects to work out to the correct size too. We can’t talk about knitting to size and dimensions, without talking about the G word. Yes, that one. If you struggle with getting gauge you are not alone.

What matters?

  1. How you knit. Which method you use and how you hold your yarn.
  2. The yarn you are knitting with: fine yarn to heavy yarns.
  3. How crucial the dimensions of the project are. Sometime they just aren’t that important or only in one spot. Gotta’ love those projects.

Know who you are:

When I comment to knitters that they are a loose or tight they seem insulted. I am not making a judgement on their moral character. This is information you need to know. If you don’t know how can you work on accommodating it. Working with how you knit is what we all need to do.

Do Not Change how you knit.

Knit using the method you learned and are comfortable with. If you decide you are going to knit tighter or looser for a project, you know it’s going to last about 5 minutes until you relax, watch TV or speak to anyone.

Who are you?

  1. Are you a loose knitter (not in the moral sense) or a tight knitter (not in the monetary sense)? If, when using the needle recommended on the ball band, everything you knit turns out large, your fabric is drapey and open and your stitches are loose or uneven, you are a loose knitter. If your stitches squeak when you move them on the needle, your fabric is very firm then you are a tight knitter. There is NOTHING WRONG WITH HOW YOU KNIT. You just need to know where you are on the continuum between loose and tight.
  2. Notice the details. First of all, observe. Take a look at, or remember, some of your previous projects where the size turned out to be different from expected. What weight of yarn was each of these projects worked in? We are not necessarily consistent. I am a loose knitter but when I knit socks with sock yarn I’m right on target. I’m also pretty good with DK weight yarn. The break appears when I reach worsted weight yarn. I’m loose with all the heavier weights of yarn which I love to work with. I also struggle to get gauge the stiffer the yarn is. My ultimate frustration is that I simply cannot get gauge at all with boucle cotton (bumpy cotton aran weight yarn). No way, no how, even using 4 sizes smaller needles, not even close.

That’s what I know about how I knit. How about you? Are fine yarns trouble? Heavy yarn is a problem? Are there projects you just don’t tackle because of gauge?

Thanks for reading. Any questions?

Deb

ANY GAUGE and GAUGE-FREE patterns by Deb

Cabin Fever No-Sew patterns

Deb oninstagram

Knit to Fit: How Do You Want Your Sweater to Fit?

In your closet you might have casual clothes, fitted clothes and fancy dress clothes. Or you might be like me. In my closet I have casual clothes, old shabby clothes and more casual clothes. I’m assuming you might be a little more upscale than I am.

Casual clothes fit differently than fitted or dressy clothes. You also have a very personal way you like your clothes to fit you: close fitting, relaxed fit, over-sized fit (they still fit even though the fit is looser).

How you want your sweaters to fit?

A close fitting sweater is meant to hug your curves. At the bust this sweater will probably have negative ease (the sweater is slightly smaller than your measurement around your bust). It will have an inch or two of ease at the waist and will be shaped to the hips with minimal ease. This requires that you work both waist and hip shaping and if you are on the busty side, bust darts.Body schematic close fit

I have one of these fitted sweaters and wear it sometimes (read that to means only in a class demonstration to show this kind of fit). If you can wear close fitting sweaters go for it. They are beautiful sweaters.

I wear relaxed fit clothes which have a little more ease but still have a curve in them to represent the waist and have lots of wiggle room in the hips. They still follow the shape of the body, just a little distance from it. Generally the amount of ease is that same over all your curves, with possibly a little less ease at the bust.Body schematic relaxed fit

Then there is A-line shaping or over-sized sweaters. These are comfy, easy to wear garments. They can still look fantastic, especially if the bust fits closer to the body. To finesse them you can decrease a little bit under the bust before you begin working increases for the A-line shaping.  This gives this style of sweater a nice curve.Body schematic oversize fit A-line
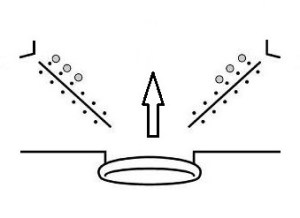
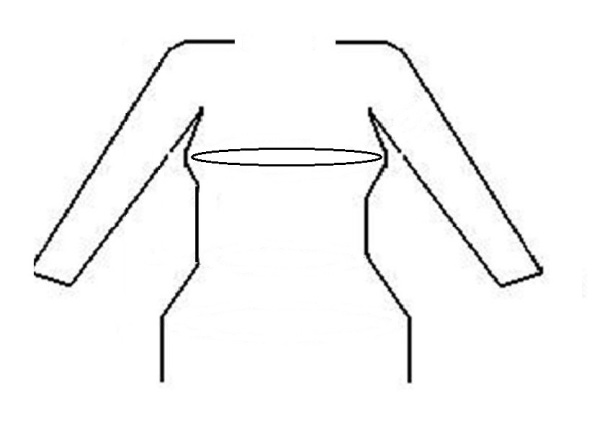
I especially love this style of sweater.

Thanks for reading,

Deb

ANY GAUGE and GAUGE-FREE patternsby Deb

Cabin Fever No-Sew patterns

Deb on Instagram

Knit to Fit: 7 Reasons to Double Up the Increases for Bust Shaping

One of the easiest ways to work some extra width on the front of your Top Down Raglan sweater is to work an extra increase beside the regular Raglan increase on both sides of the Front. In the last couple of inches at the bottom of the yoke you can work the EASY BUST SHAPING .Bust shaping Yoke increases Body schematic working EASY

You can add up to about 3″/8cm to the Front this way. Bust shaping Yoke increases Body schematic direction of knitting

I was asked if there were specific circumstances where you would use this method.

  1.  It’s a very straight forward way to add width to the front of your sweater without affecting the upper yoke and neckline.
  2. It’s easy to add these extra increases into any Top Down Raglan sweater pattern that doesn’t have extra width already written in.
  3. A couple of extra inches on the front really helps to alleviate button gap on your cardigan. If you wear your cardigans buttoned up, positive ease at the bust is a necessity. I cringe every time I see button gaping on a cardigan in a magazine.
  4. Nothing shows. No one can see the extra increases since they are almost in your armpit.
  5. Working the increases above the underarm works really well for a bust that is high. More traditional bust darts may be too low when they begin below the underarm.
  6. One of the best reasons is for the well endowed. The Doubling Up of Increases method can be used in conjunction with more traditional styles of bust darts. A couple of inches added at the bottom of the yoke (just above the underarm) plus bust darts in the bust area itself can add 4-6″ extra width at the bust if needed.
  7. If you have a stitch pattern on your sweater, bust darts may interfere. This method can be added where you are already working the raglan lines so they are less likely to interfere.

Could you do a little bust shaping on your next Top Down using the Easy Bust Shaping method?

Thanks for reading,

Deb

ANY GAUGE and GAUGE-FREE patterns by Deb

Cabin Fever No-Sew patterns

Deb on instagram

Knit to Fit: Top Down Easy Bust Shaping

Would you like the front of your sweater to be wider than the back? There are two obvious reasons why you might need that. Knit to Fit: Do I Need Bust Darts?

If you are working a casual Raglan sweater from the Top Down here is an easy way to get some extra width across the Front just where you need it: not over the entire front of the sweater and expecially not around the top of the shoulders and neckline, just at the bust.Body schematic bust shaping Top Down

As you work down your yoke, you are working increases at the raglan lines.Top Down pullover schematic

As you approach the bottom of the yoke, what would happen if you doubled up the increases on the Front only? Wouldn’t there be more width on the Front?

In the bottom couple of inches of the yoke, on the Front only, you could work an additional M1 increase beside the raglan increases you are already working, separated by a stitch or two. This could easily add an extra 2″- 3″ to the Front.Bust shaping Yoke increases Body schematicWould the extra increases show? Not really. You can put them in just before the underarm. Can you see them?Everyday Cardigan close up bust shaping yoke

They’re right there.Everyday Cardigan close up bust shaping yoke showing

At my gauge of 5 sts = 1″,  5 extra increases on each side of my front (yes I did work 5 extra  increases but I can’t find the 5th one) for a total of 10 extra stitches, which gives me 2″ of extra width across the front, above my bust. Great for my casual cardigan.Everyday Cardigan Yoke shaping

Now for the nitty gritty details. Here is an example of how it works for a cardigan:

Double Increases on Fronts for Bust Shaping

Increase Row: (RS) Work across the Front to 2 stitches before Marker#1, M1L (extra increase for bust), K1, work your regular raglan increase, K1, slip Marker#1, K1, work raglan increase, work across Sleeve to 1 stitch before Marker#2, work raglan increase, K1, slip Marker, K1, work raglan increase, knit across Back to 1 stitch before Marker#3, work raglan increase, K1, slip Marker#3, K1, work raglan increase, work across Sleeve to 1 stitch before Marker#4, work raglan increase, K1, slip Marker#4, on the Front work K1, work raglan increase, K1, M1R (extra increase for bust), knit across remaining stitches of Front to end of row. – increase of 10 sts, 8 raglan increases + 2 extra bust increases on Fronts only.

You can use this in addition to other bust shaping techniques for more width or shaping. You can add this shaping to any Top Down Raglan sweater pattern where the front and back are the same width.

You can decrease these extra bust stitches away as you work towards your waist or leave them there. It’s a casual cardigan so I just left them there. It helps to prevent button gap.

There it is. One easy way to make some extra width for your bust.

Thanks for reading,

Deb

M1L: Work before the Raglan line:  With Left needle, lift the running thread between the stitch just worked and the next stitch, from front to back, and knit into the back of the resulting loop.

M1R: Work after the Raglan line:  With Left needle, lift running thread between the stitch just worked and the next stitch, from back to front, and knit into the front of the resulting loop (this is tight to work).

ANY GAUGE and GAUGE-FREE patterns by Deb

Cabin Fever No-Sew patterns

Deb on instagram


Knit to Fit: Do I Need Bust Darts?

The knitting pattern industry is mainly set up for women with a bra cup of A – B. If you are also 5’6″ or slightly taller you are an excellent fit for most patterns. Lucky you. If you are like me and not anywhere close to this figure profile you might have wondered if the reason the sweaters you’ve knit don’t fit is because of your knitting or your yarn or your figure. Maybe it’s the knitting industry itself.

Do You Need Bust Darts?

Why are the fronts of women’s sweaters the same size as the back? There are two obvious reasons why that should not be so.

Strip down to your skivvies and let’s check this out.

With your measuring tape, measure around your UNDERBUST.

Measure around your UPPER CHEST (right under your armpits).

Body schematic underbust & upper chest

Now measure around your Bust at the largest part.Body schematic Bust


My measurements are :  Underbust:  36″       Upper Chest: 36 1/2″   Add these two measurements together and divide by two. That will give you your Torso measurement which does not include your bust.  My TORSO measurement is 36 1/4″.  I’ll round it off to 36″.  My Torso BACK is 18″ and my Torso FRONT (without bust included) is 18″.

To find the measurement of my Body Front with my bust included:

Bust measurement: 40″

Subtract the Torso Back from the Bust measurement (bust measurement – Torso Back):  40″ – 18″ . That gives me a Body Front measurement of 22″ when including my bust.  My Back is 18″ across, my Front is 22″ across at my bust.

I usually aim to knit a 42″ sweater with 2″ of ease.(EASE is the difference between the size of the sweater and the size of the body underneath it.)  A 42″ standard sweater will have a 21″ BACK and a 21″ FRONT.

Here is how my sweater fits.

Double circle Body & Sweater

On the Back I have 3″ of ease. On the Front I have -1″ of ease. Too much ease across the back. One inch of negative ease is OK on the Front but the sweater does not fit as I would like.

My figure needs less width on the Back and more width on the Front. How about you? How does the standard sweater with the same sized Front and Back work for you?

Deb

P.S. This can be fixed. The person who has to make the necessary modifications is the knitter. Stay tuned. I’ve not leaving you without the necessary info to make this happen.

Thanks for reading,

Deb

Any Gauge and GAUGE-FREE patterns by Deb

Cabin Fever No-Sew patterns

Deb on instagram

%d bloggers like this: