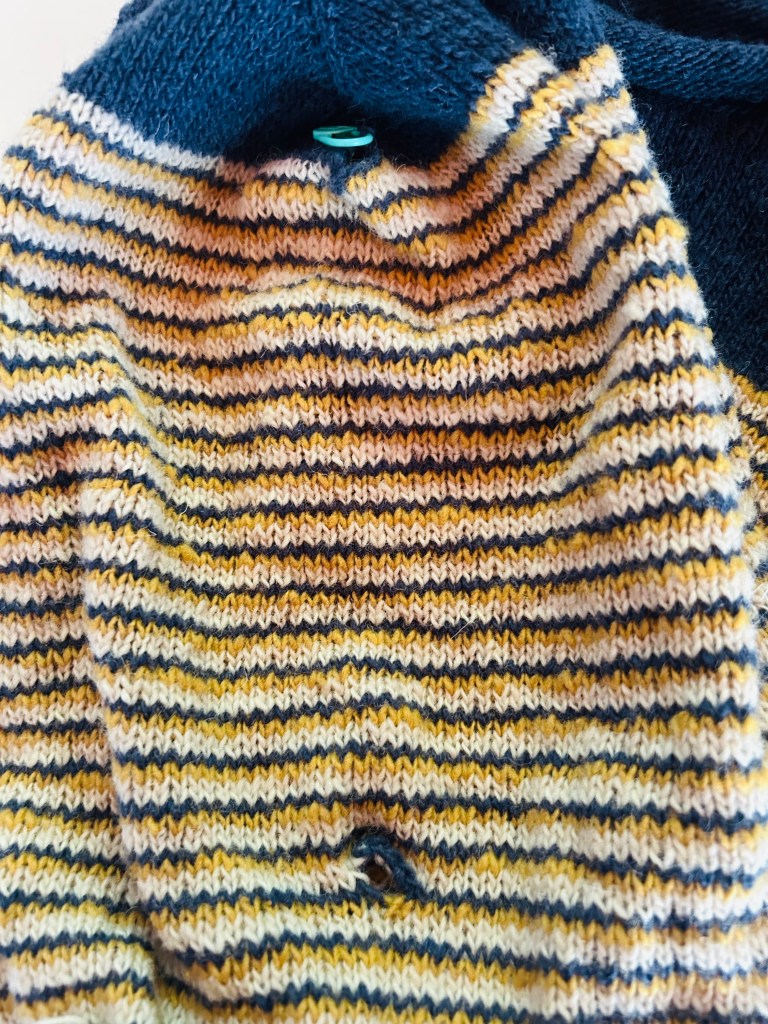
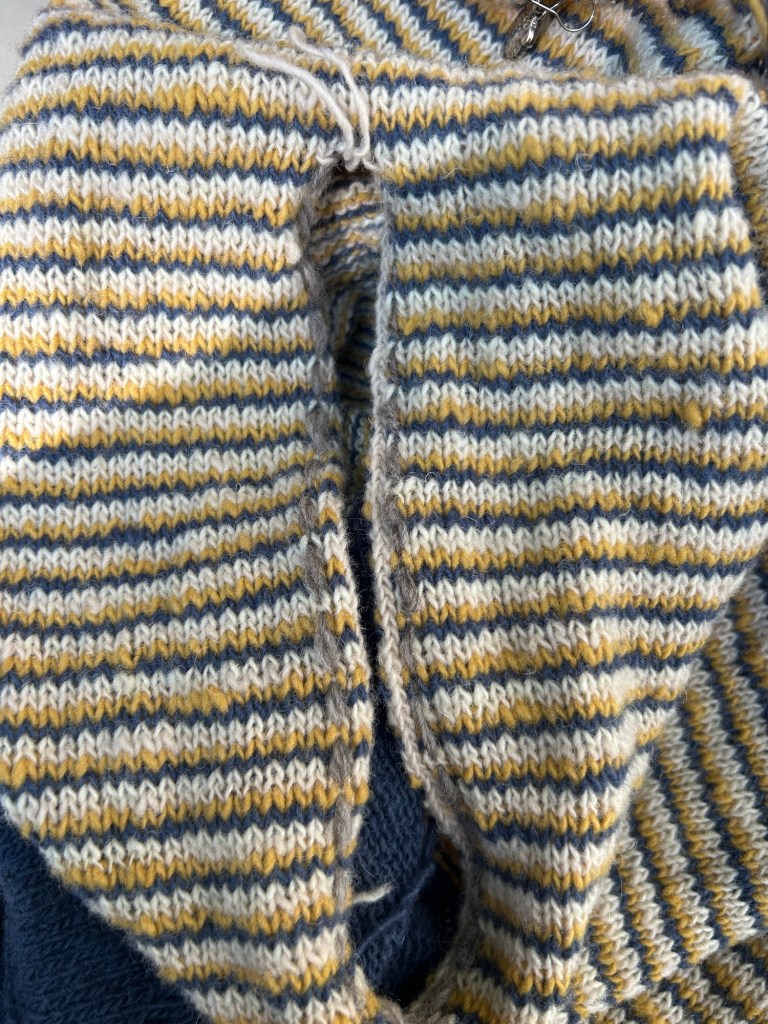
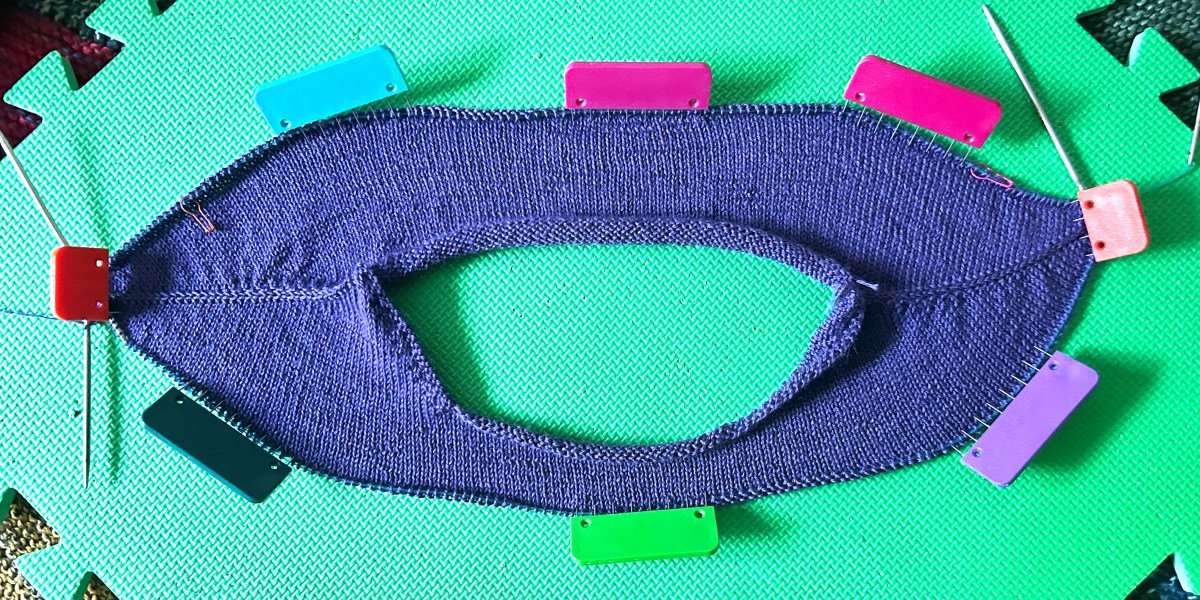
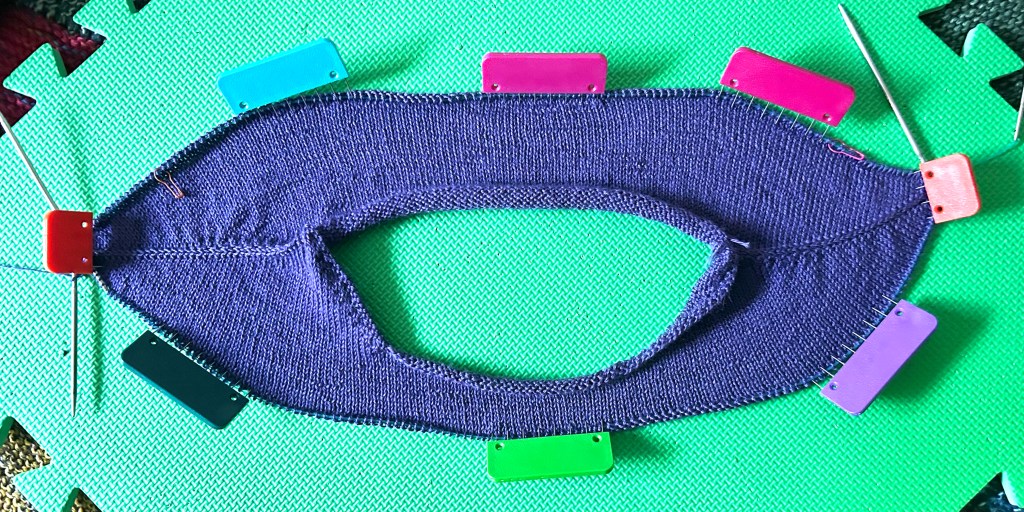
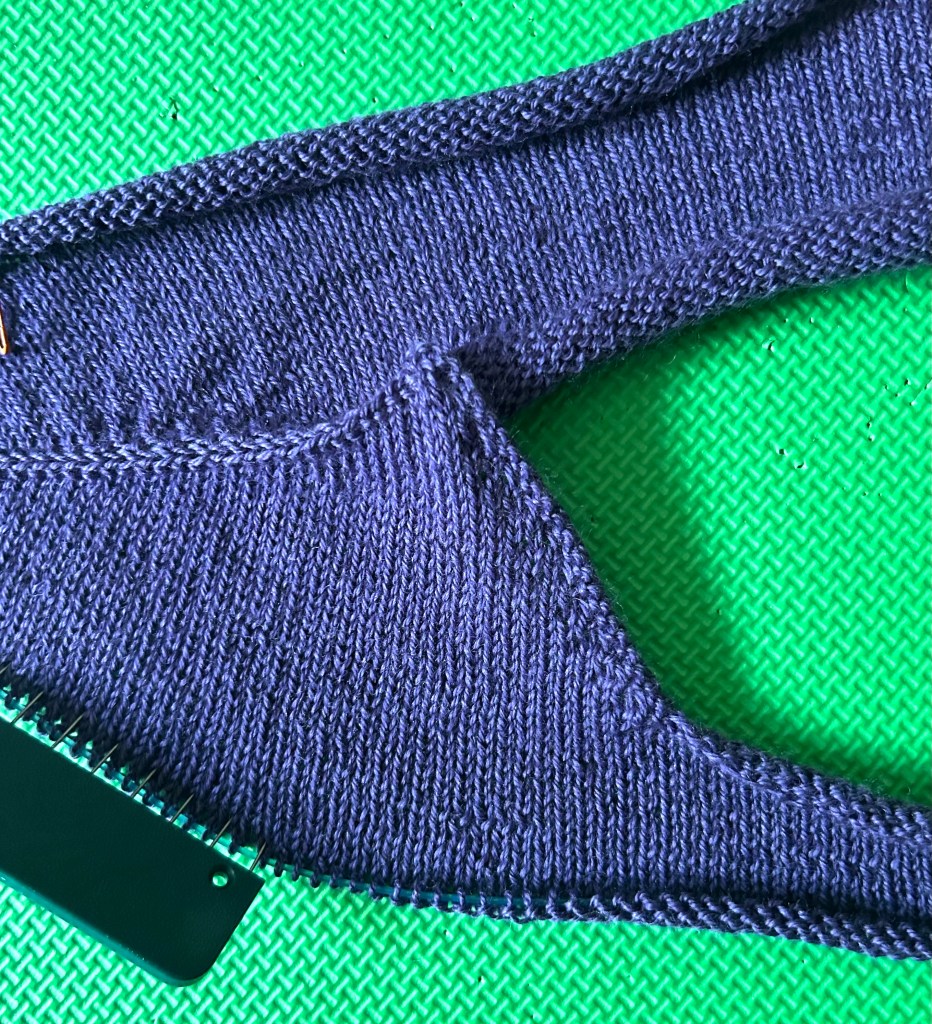
To set up the steek, at the top of the shoulder I cast on an extra 5 sts where the armhole will go. Then I continued knitting round and round for 8.5″, the length of the armhole, cast off those 5 sts and continued to knit round and round for the body.
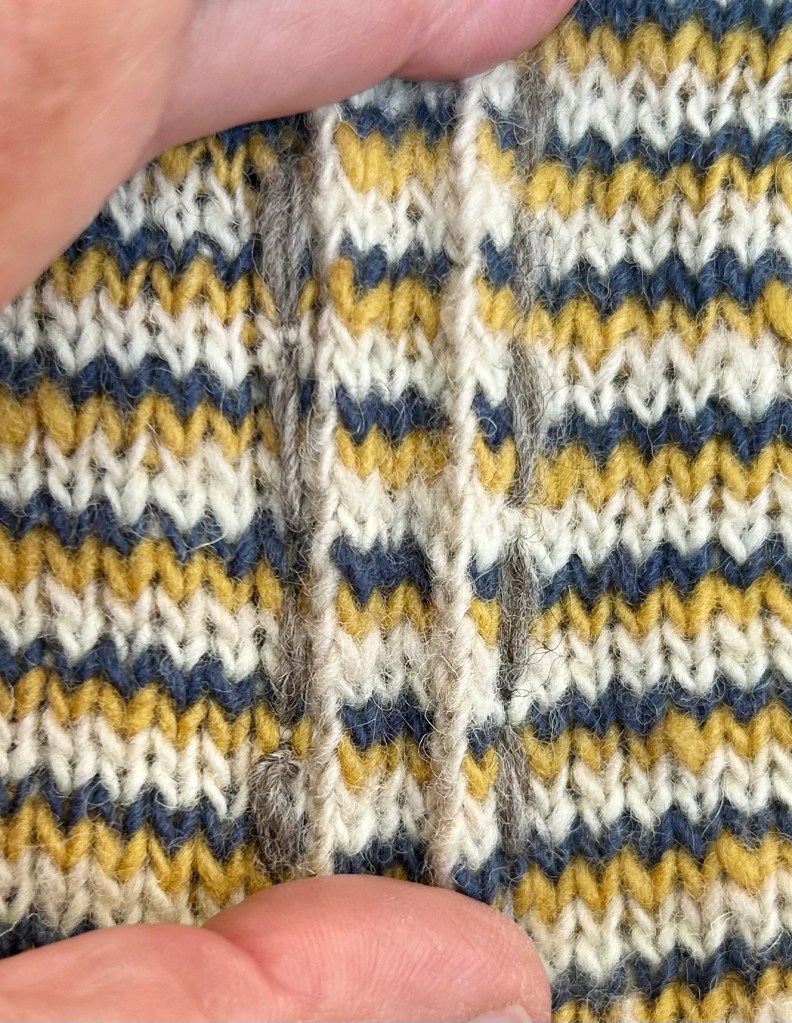
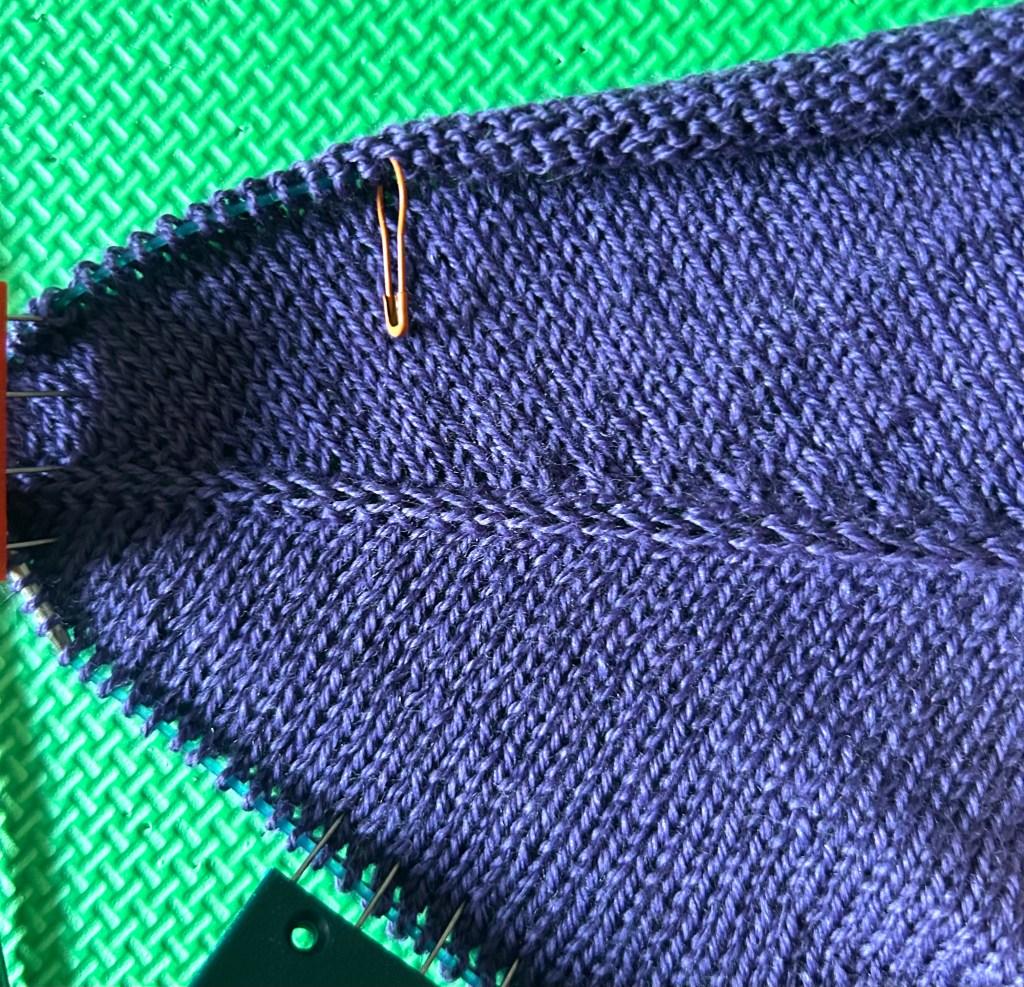
So here we are. I’m ready with the scissors. But first, I ran a length of grey yarn down on either side of the 5 steek sts.
Then with cream coloured yarn I crocheted a slip stitch through the two legs of a column of sts, inside the grey line.
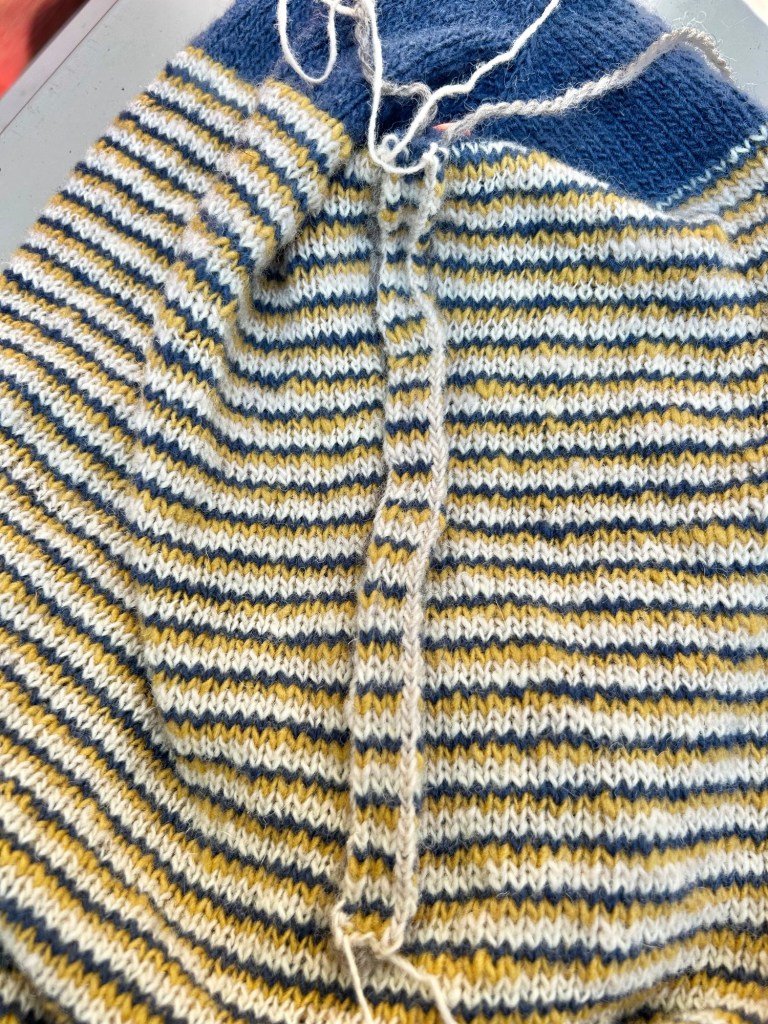
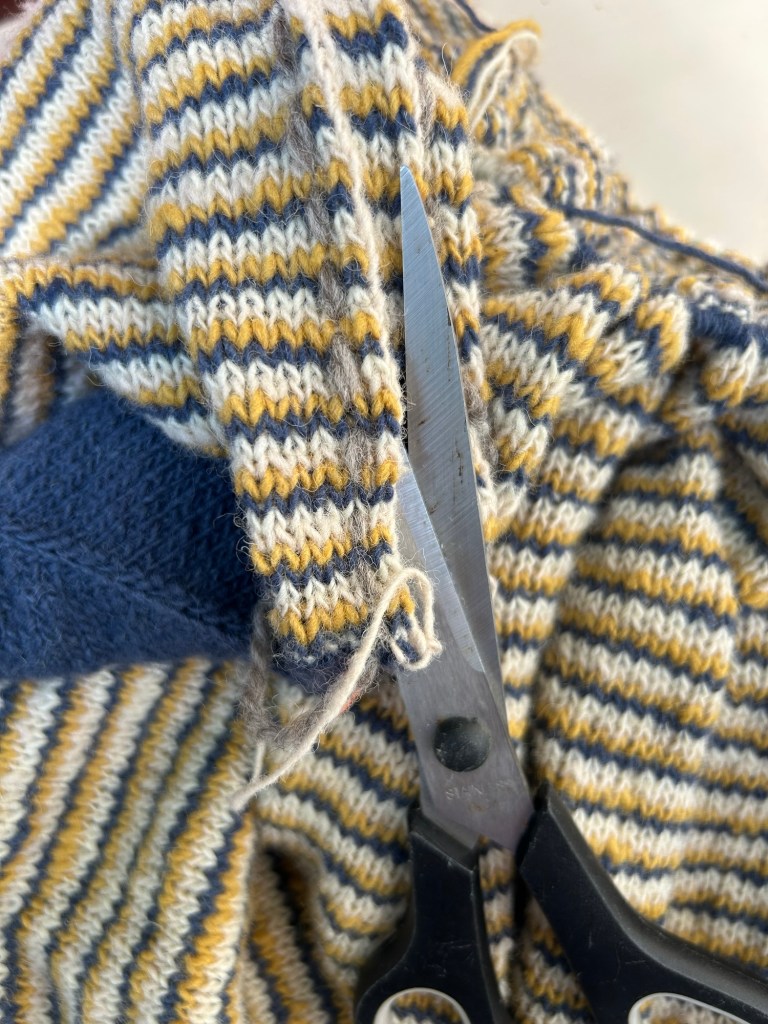
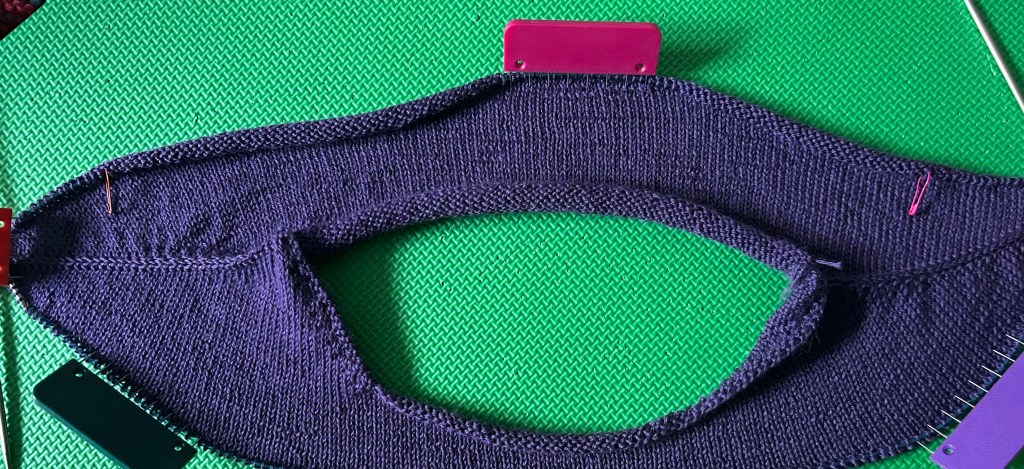
Now I cut.
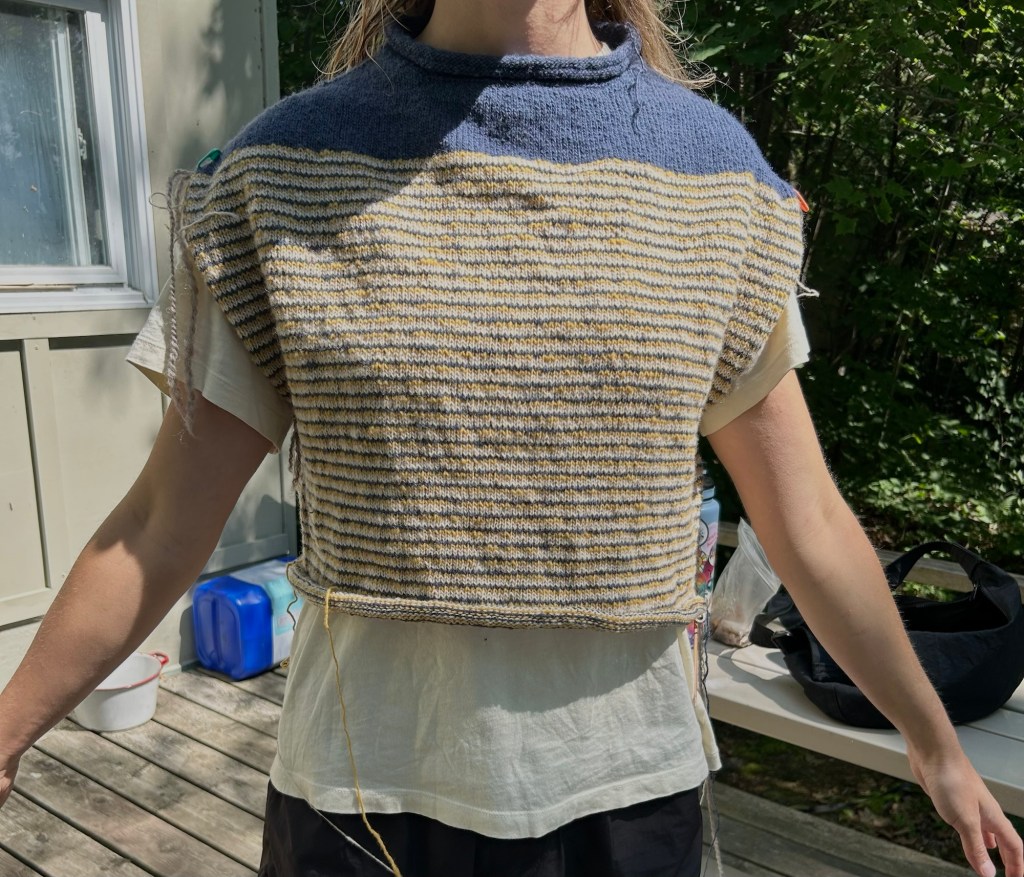
Now that both armholes are open my DIL can try it on for some final measurements.
Just a couple more inches needed on the body for a cropped sweater. Then the rest of the summer will be sleeve knitting.
I’m afraid that monogamous knitting is not for me. I have knit a couple more inches on my Contiguous Drop Shoulder …
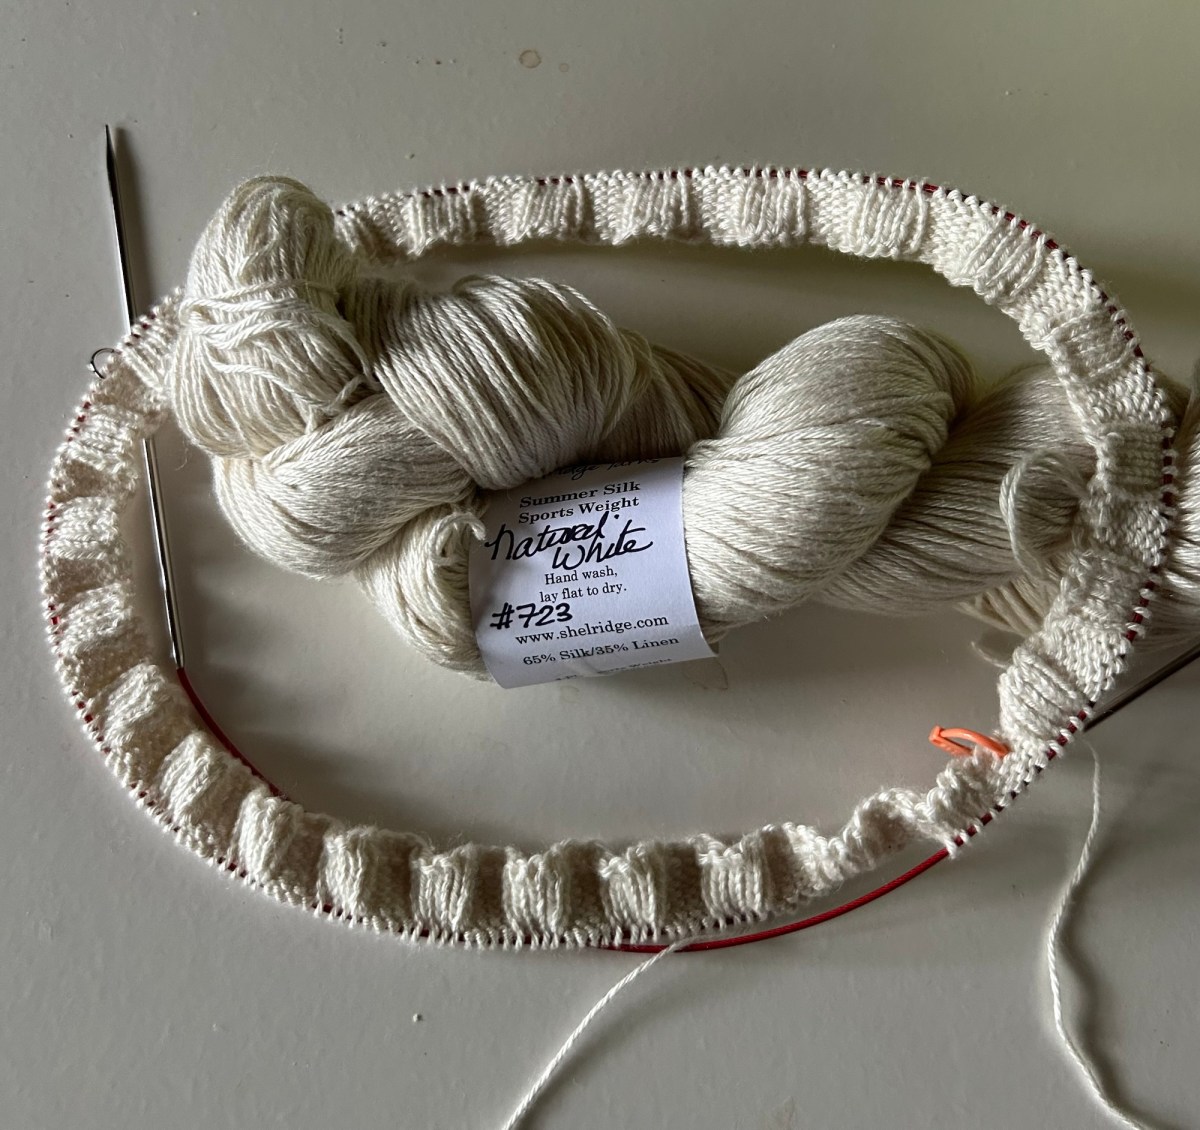
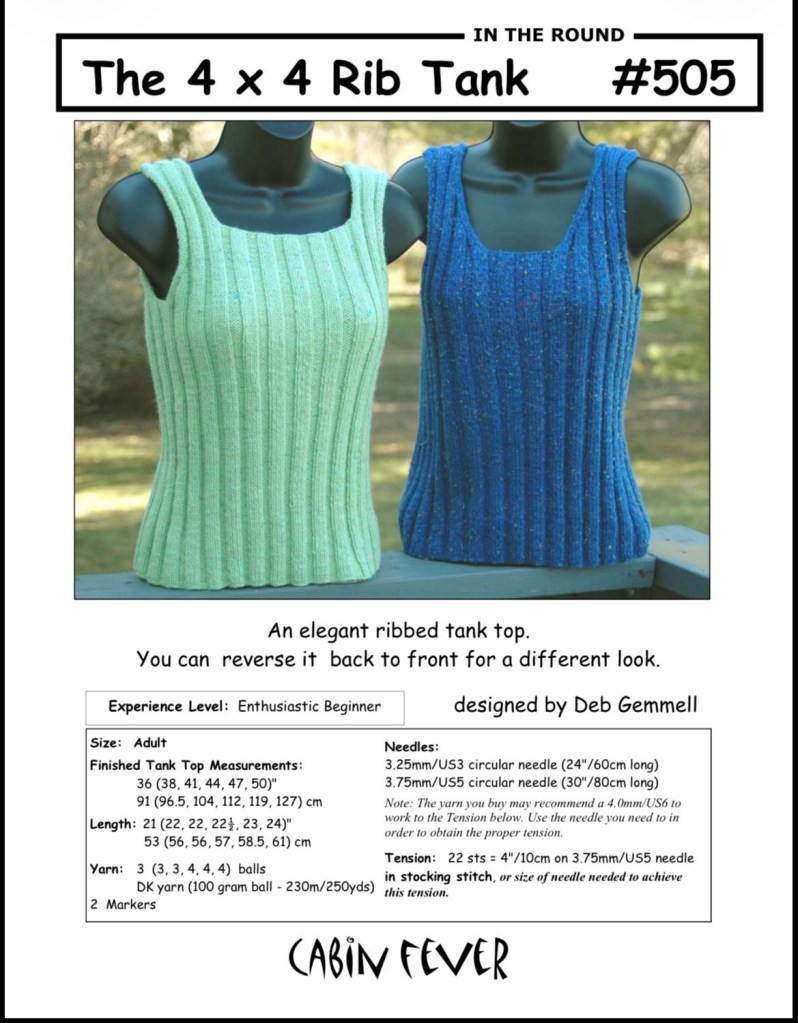
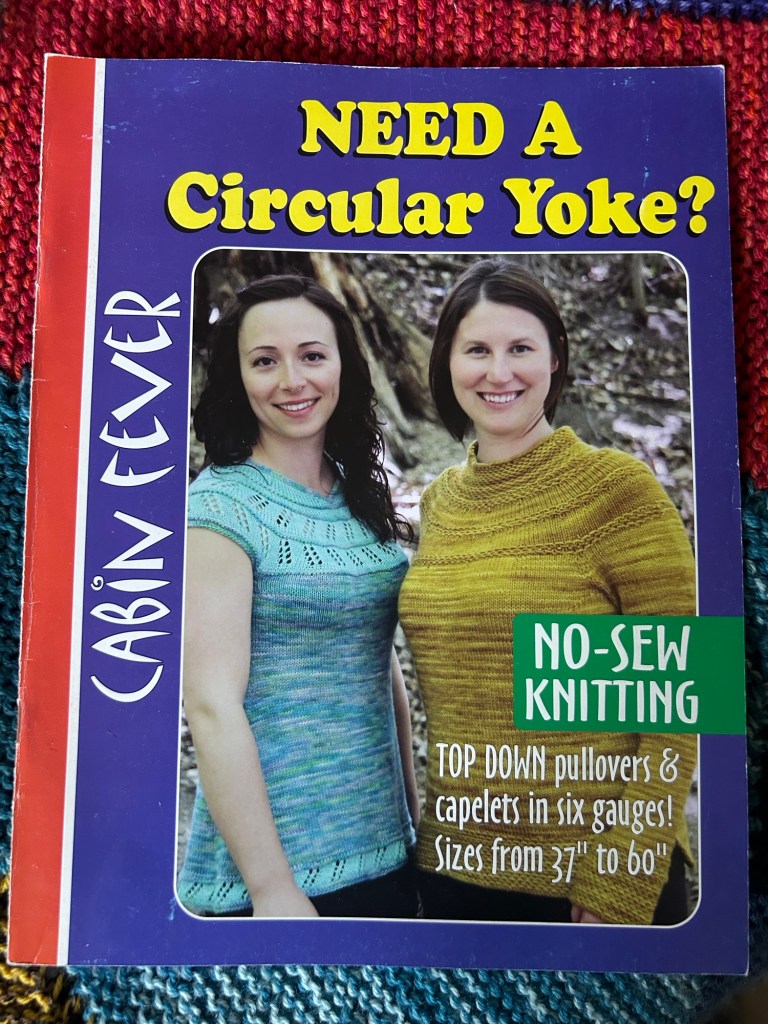
… but found myself wanting to try something else. So I cast on the 4 x 4 Rib Tank.
This is a Cabin Fever pattern designed by me, which I am happy to knit again.
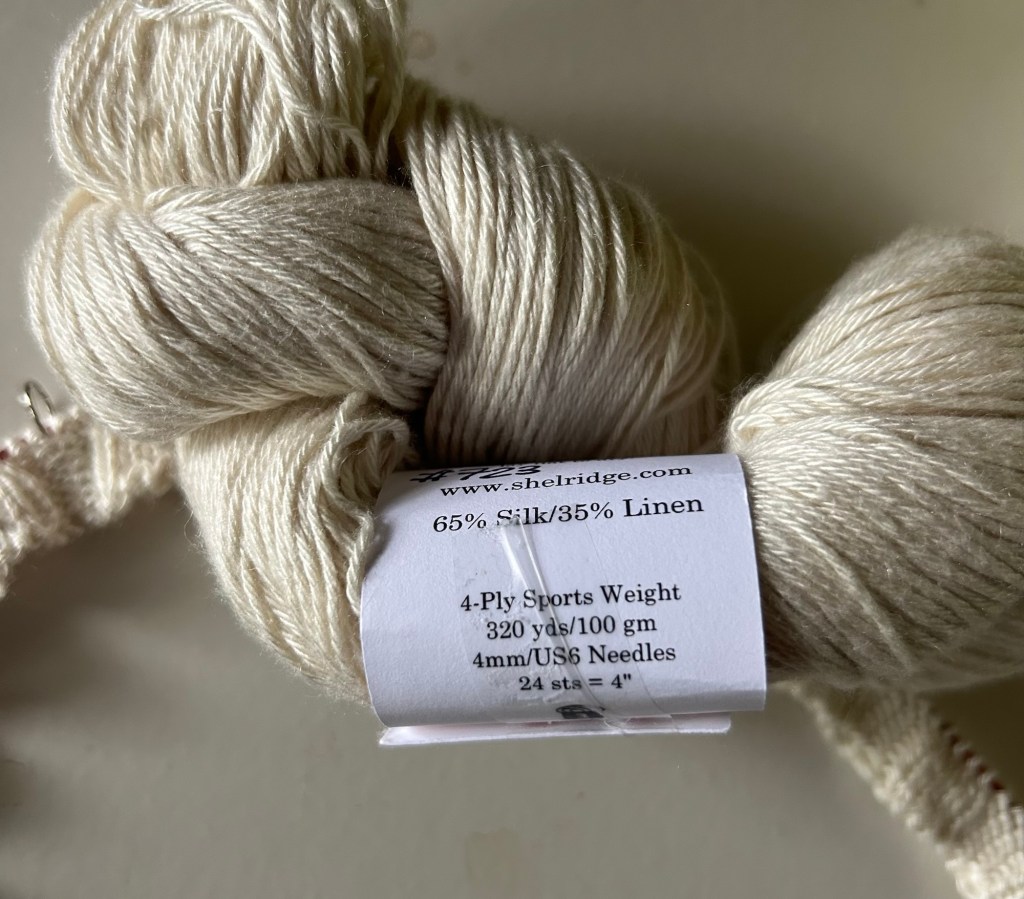
I am, of course, not using the correct yarn. I’m using a sports weight yarn, Summer Silk by Shelridge Yarns: 65% silk and 35% linen.
Modifications are happening:
Sports weight yarn, not DK as suggested in the pattern.
Very small size. I’m going to knit a 31″ chest size. That’s much smaller than the smallest size in the pattern.
Much tighter gauge. Using a 2.75mm needle I get a gauge of 6.5sts/1″ (26sts=4″).
Because I will be knitting at a much tighter gauge I can use the stitch numbers for the smallest size in the pattern. Instead of a 36″ tank top I will have a 31″ top for my daughter.
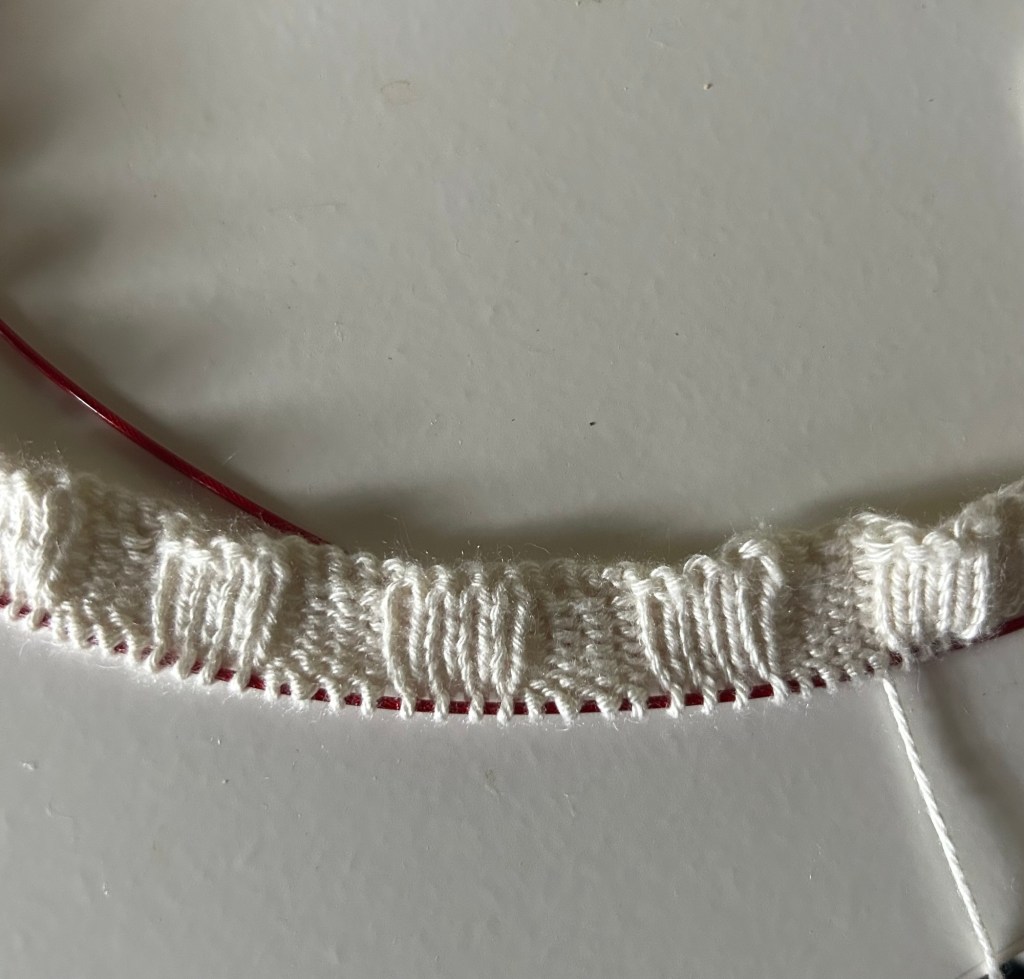
Here’s how the math works using the stitch count for the smallest size. There is a little extra chest circumference for the ribbing:
208 sts at gauge of 5.5sts=1″ (22sts=4″) for DK yarn: 37″ chest
208 sts at gauge 6.5sts=1″ (26sts=4″) for sports weight yarn: 32″ chest
I don’t expect that the silk will be able to hold the ribbing. It will flatten out when worn so I’ve done my calculations based on a flat fabric.
All these modifications make this an exciting knit for me. I know this sort of idea, with all these changes, is not for everyone but it’s definitely got me going.
I hope your summer knitting is exciting you. Cheers, Deb
Gauge-free and Any Gauge patterns by Deb on ravelry: Debgemmellmods
Heat and humidity is slowing me down and maybe you too?
But I have to admit it’s mostly a sore shoulder. I overdid it! I know, shocking!!! Too much knitting for too long at a time. Take a break, there’s a new thought. Note to self – TAKE A BREAK.
I took 3 days off. It was painful in several ways. No knitting, sore shoulder, but really, no knitting. Sigh.
I’m back at it now but trying to work for less at a time. It’s still hard to take a break.
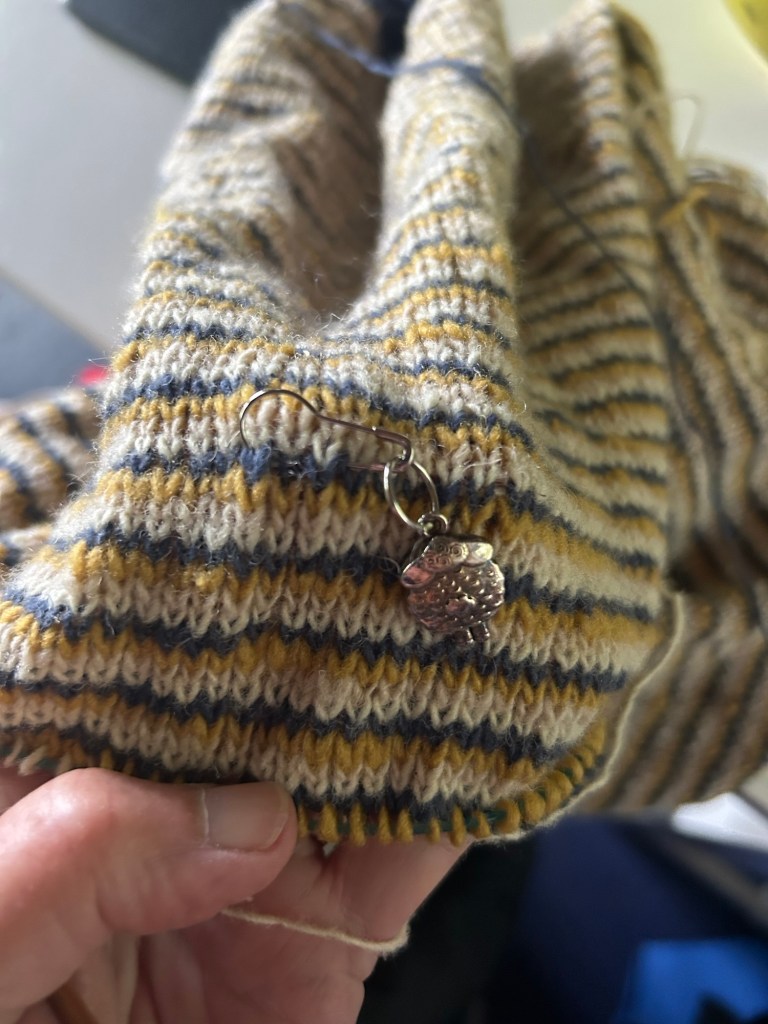
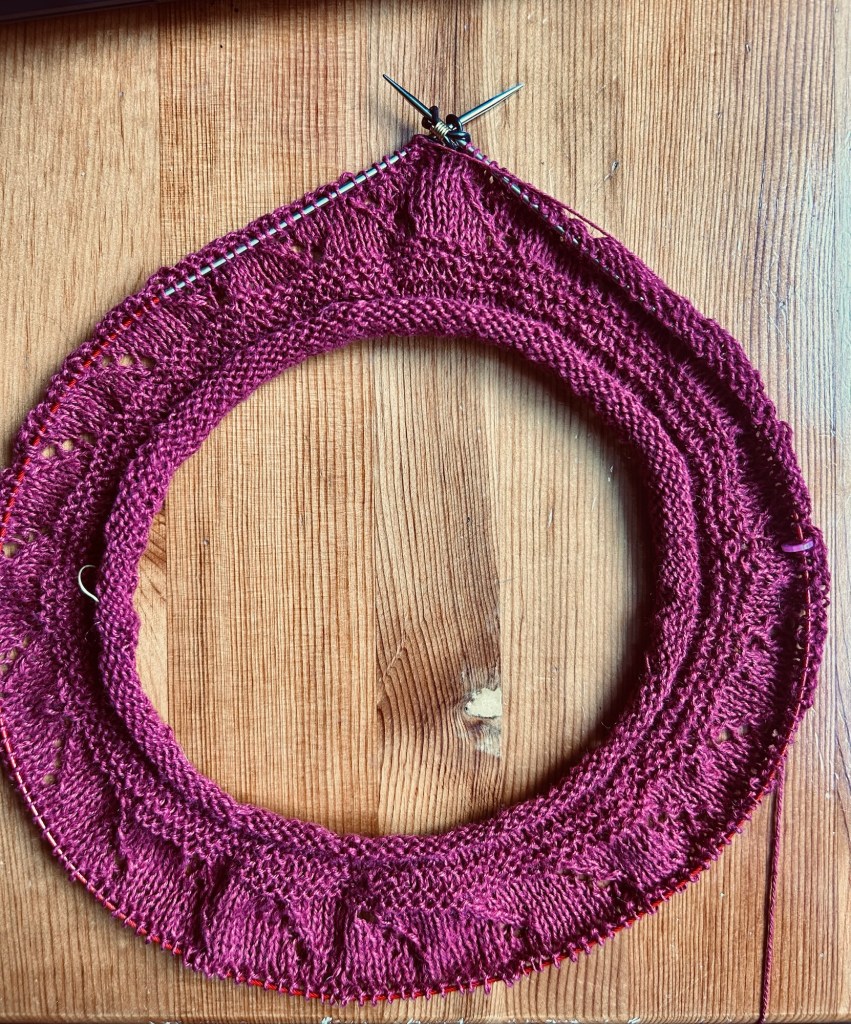
The Contiguous Drop Shoulder is the one I’m drawn to knit on. I’m really enjoying the knitting.
Waxwing Cedre fingering weight wool
I have hit the spot that is so exciting, the bottom of the armhole. Yay.
The 5 steek stitches at the bottom of the armhole have been cast off. I know it doesn’t make much difference to the number of stitches or anything but it’s a milestone in the length. At least for me it is.
Nothing else is appealing to me knitwise so I’m just going with knitting this one sweater at present. Something different for me but it’s hot and humid so there we are.
I am also spinning in the Tour de Fleece. I’ve been spinning for about 7 months and I’m totally hooked. I’ve added Tour de Fleece videos to my youtube channel: debgemmell435. If you’re also spinning I’d love to hear about it.
It’s been a while but I’m going to get in front of a classroom and teach a couple of knitting classes at the Elliot Lake Arts Club in July. I’m really looking forward to it.
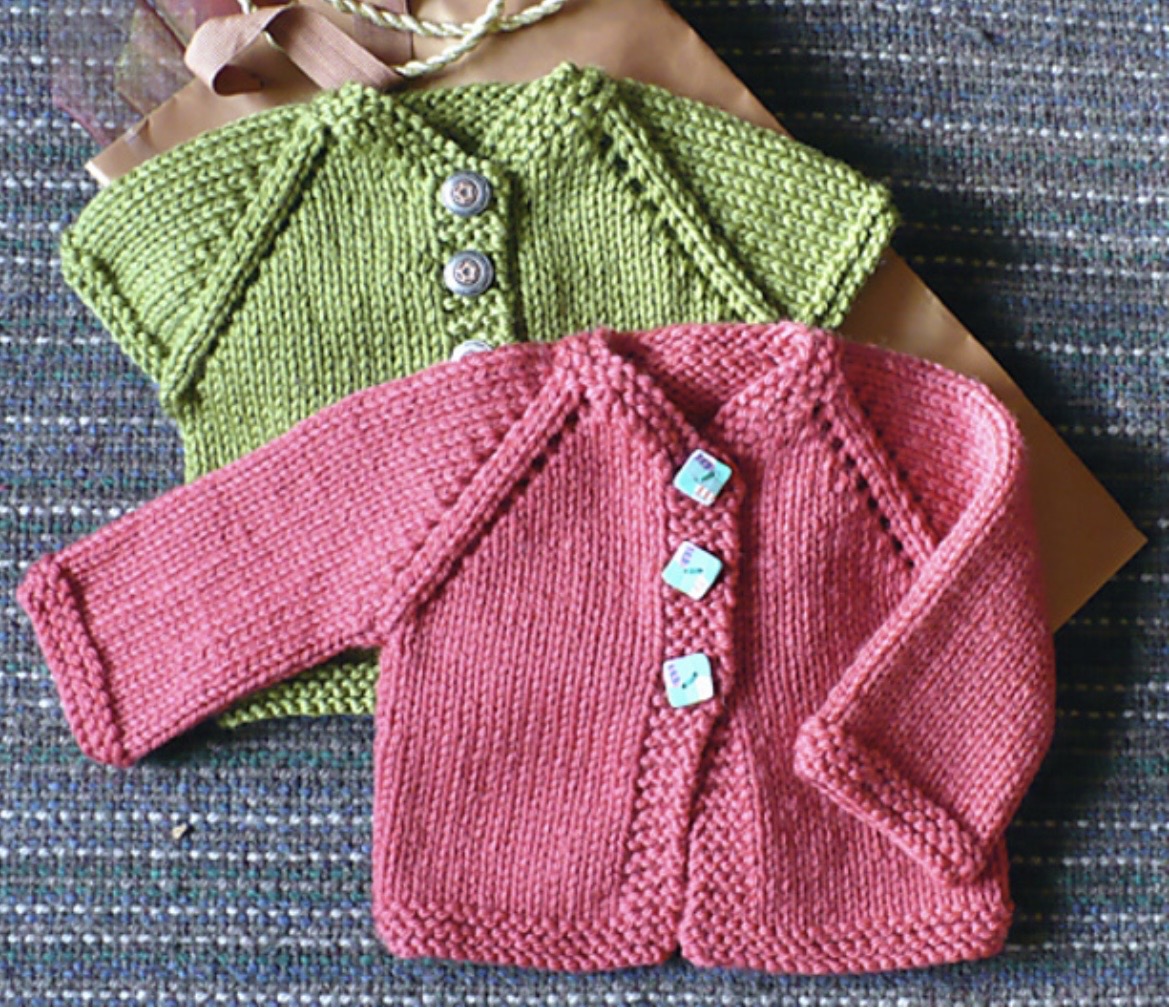
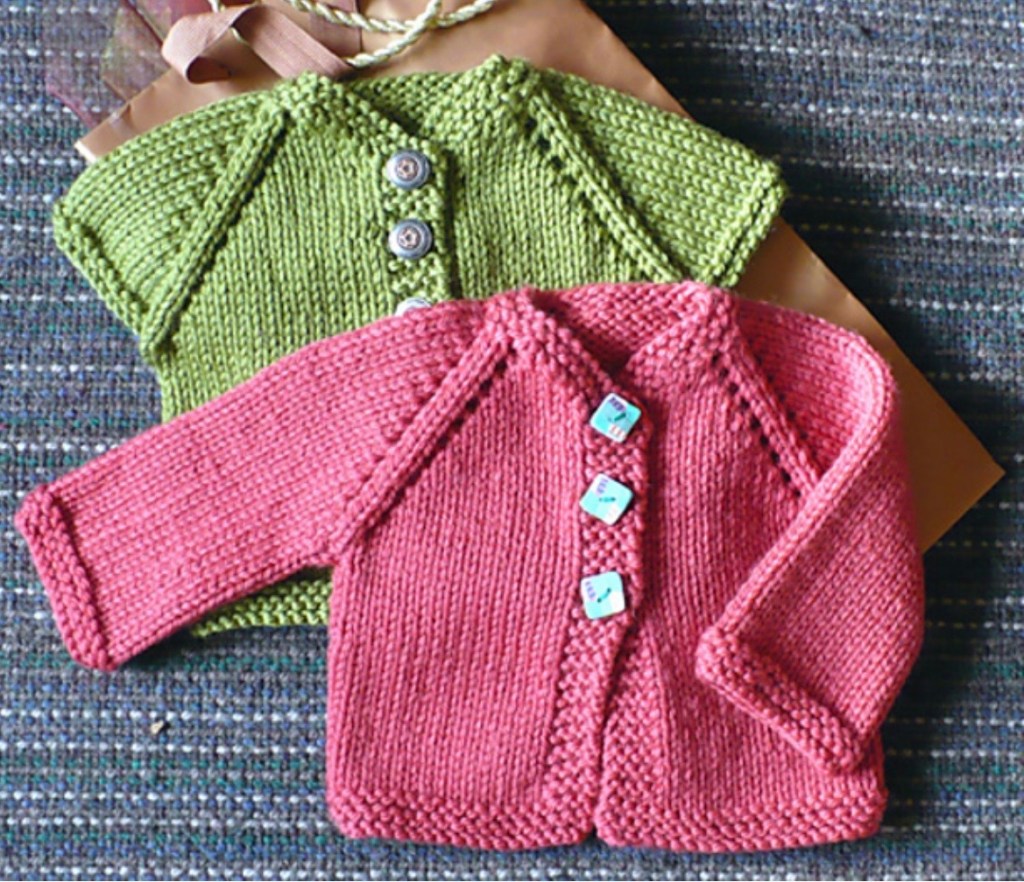
First up will be a Top Down V-Neck class . We’re going to knit a Baby Cardigan Vest with short rows to form the V. I have written out an option for long sleeves too. There will be lots of chat about adding this neckline to any top down raglan pattern and how to make your top down fit your unique body shape. That’s all information I have been working on for quite a long time and am really happy to pay forward.
Screenshot
Elliot Lake Arts Club – Baby V-Neck Vest Knitting Workshop over Two Sundays July 5 & 12, 1 – 4pm. You might notice that the little sweaters showing are not V-necks. This is the photo that will shortly be showing.
I just finished the DK weight sample for the class. It’s drying outside. I need some buttons and then it will be finished.
It’s so relaxing to be knitting tiny sweaters!
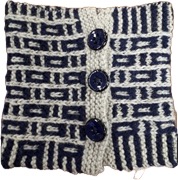
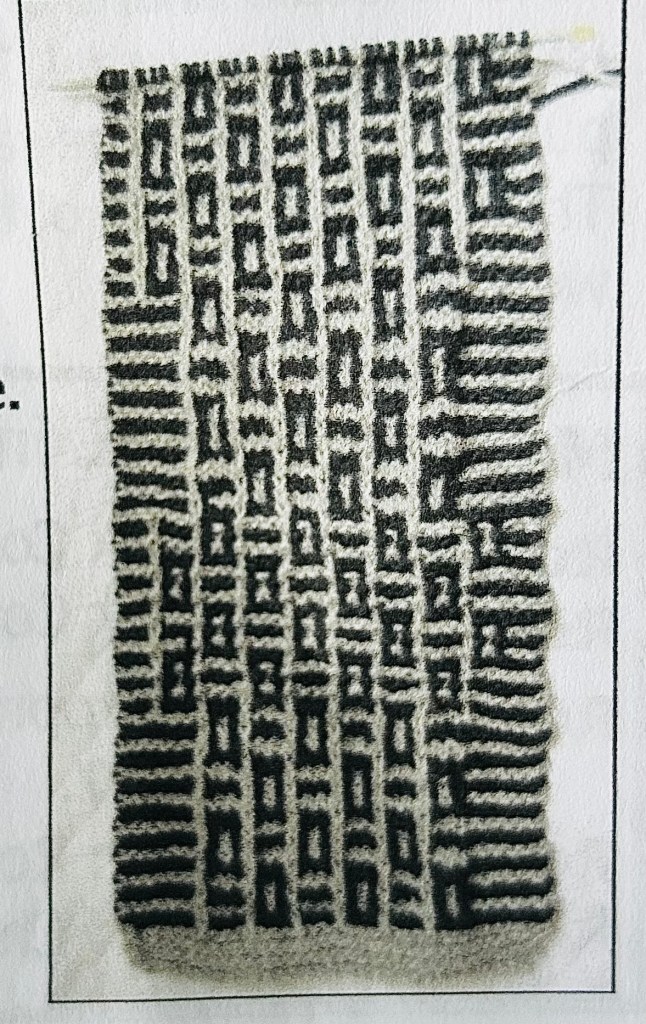
The second class will be: Knitting Mosaic Cowl Workshop. I love this technique. Colourwork without the stranding! What’s not to like. The class will also be over two Sundays, July 19 & 26, 1-4pm.
We will knit a strip of mosaic knitting in chunky weight yarn, working first in stockinette stitch, then in garter stitch (my favourite) and then a combination of the two. This is a photo from my class notes. Can you see the mosaic stockinette stitch at the bottom, garter stitch in the middle and the combo at the top?
I will provide both written instructions and charts. I’m going to explain how the charts work because I think they are a much superior way to work mosaic knitting and once you get used to them they are really helpful in working the design. We’ll have lots of time to get the hang of them.
If you are a northern person and within driving distance, I hope you will join me on these Sunday afternoons. I am really looking forward to teaching these classes.
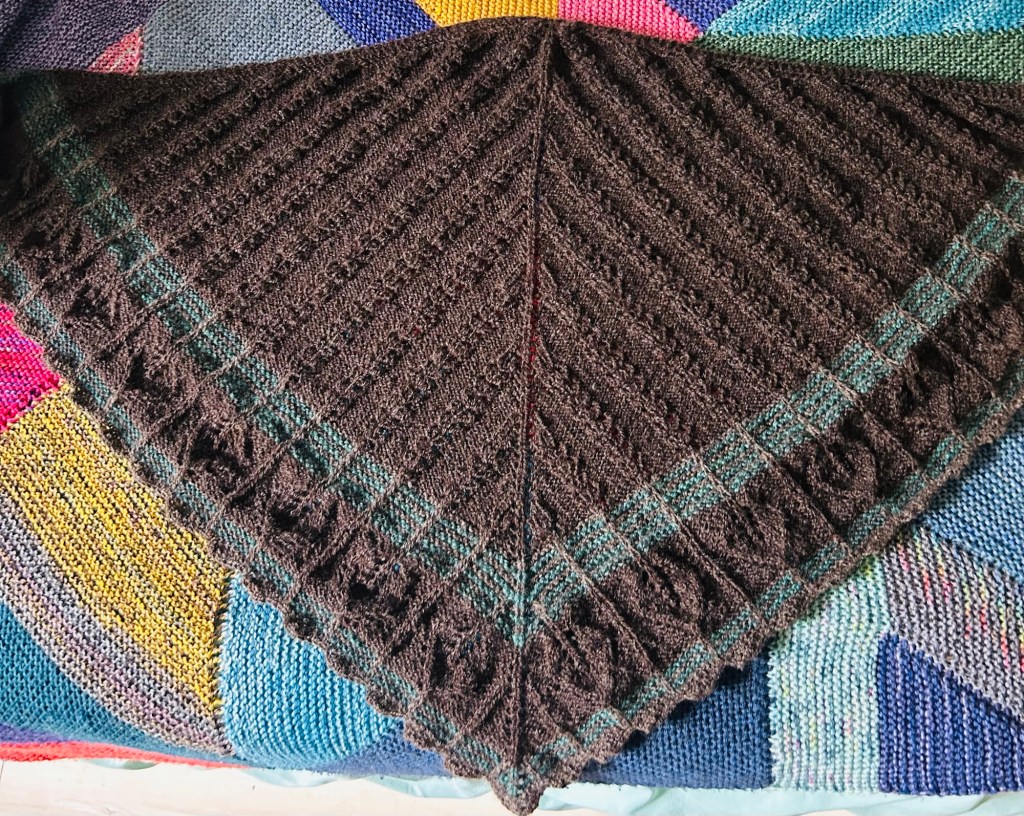
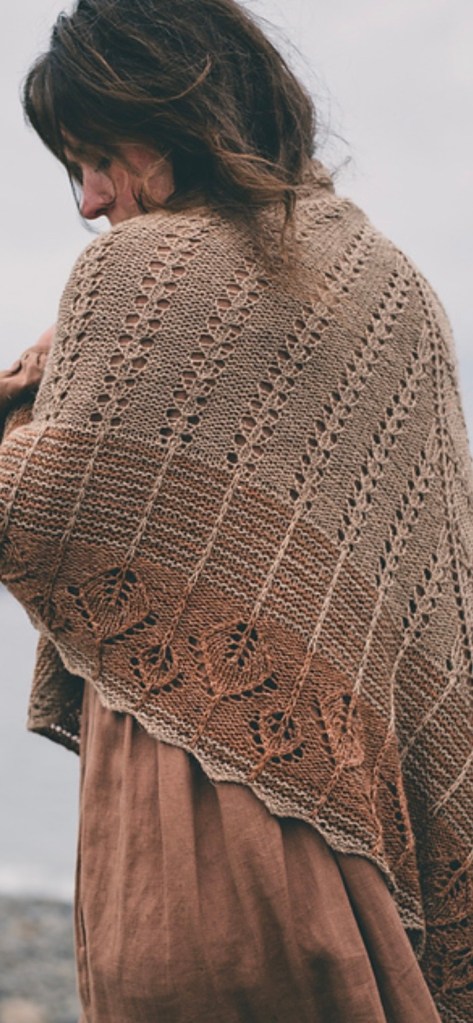
Mainly BFL from a spinning class I took. Then some mystery fibre (green) from Wellington Fibres (https://wellingtonfibres.on.ca/) and some Rideau Arcott (paler brown) to make up enough to make the shawl. I knit it with thicker wool since a light worsted is the best I can spin at the moment. It needs blocking which will really make it shine!
Then I will figure out what my gauge really is since I changed to a larger needle size after the first bit was done. I have an idea what my new gauge is but I do need to take a measurement.
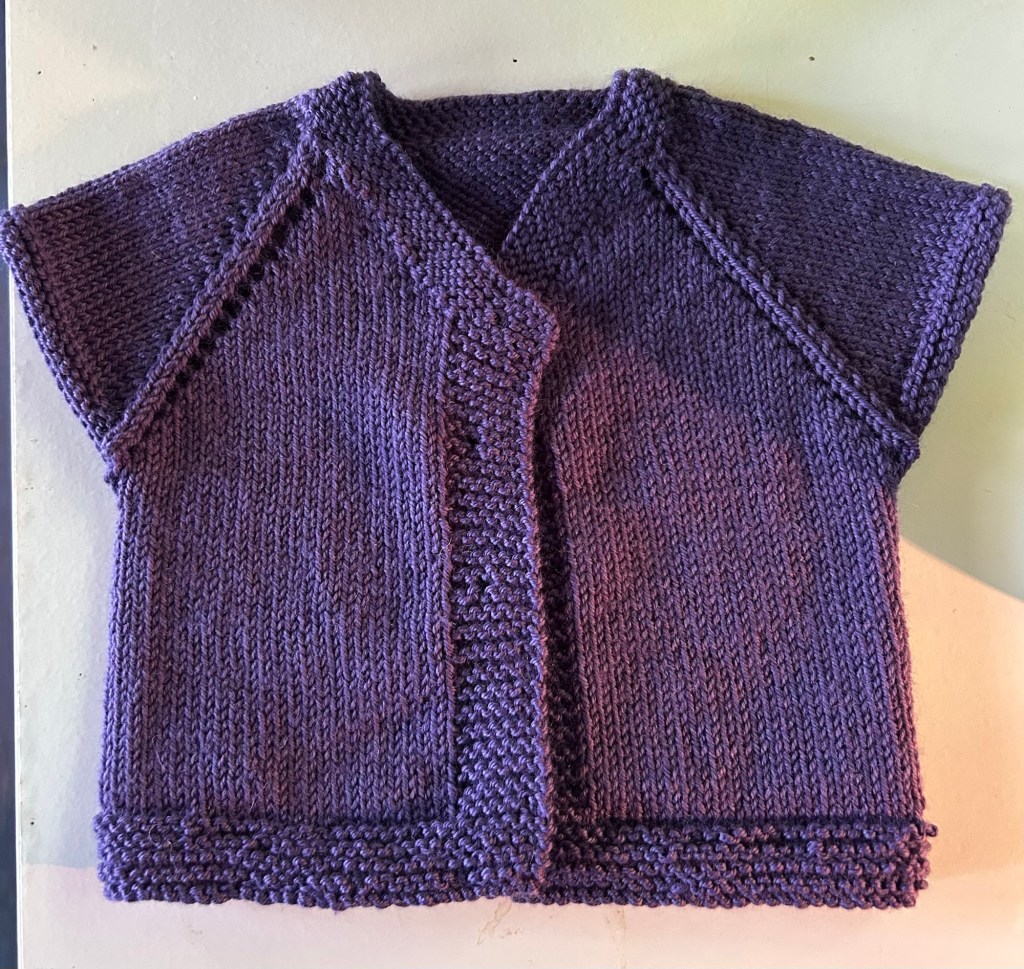
I’m teaching a top down class in Elliot Lake this summer so started my sample, a 6month size vest.
I head up north next week so the sorting of projects has started. Is 10 projects too many???
This will take all week to get it down to a reasonable number of projects that I will never, ever finish over the summer. Can you relate?
I dithered around for a couple of weeks unable to settle on any new projects but I have finally landed. Whew. Do you do this too? I really dislike this feeling of being on edge about my knitting.
Here are the couple that are going ahead:
A summer circular yoke with Allhemp 3 fingering weight hemp by Hemp for Knitting. http://lanaknits.com
I’m not getting anything close to gauge which I totally expected. Nothing to do with the yarn. It’s the loose way I knit that’s the culprit. I’m getting 22 sts/4” instead of 28sts/4” on a 2.5mm needle. I’m comfortable knitting at this gauge so here we go.
I wanted a solid shawl to wear instead of a sweater. This is it: a slightly thick and thin handspun, DK-worsted weight wool on a 3.75 needle. I’m excited just to be using it.
A discouraging couple of weeks when everything didn’t quite turn out as I had hoped. But now I am finallly reconciled to ripping, here we go.
Now you see it.
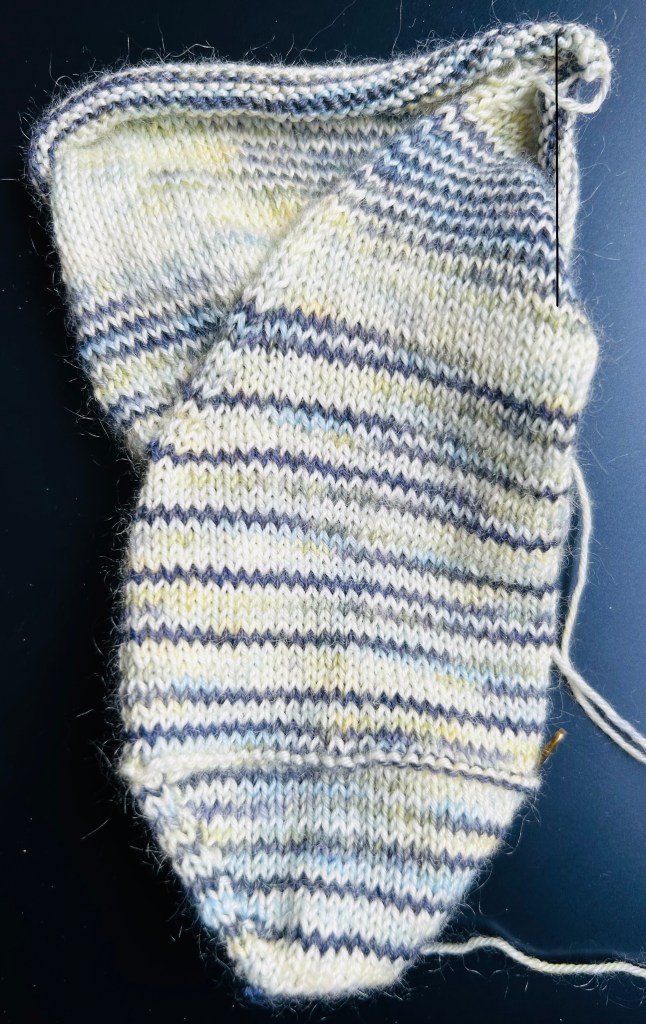
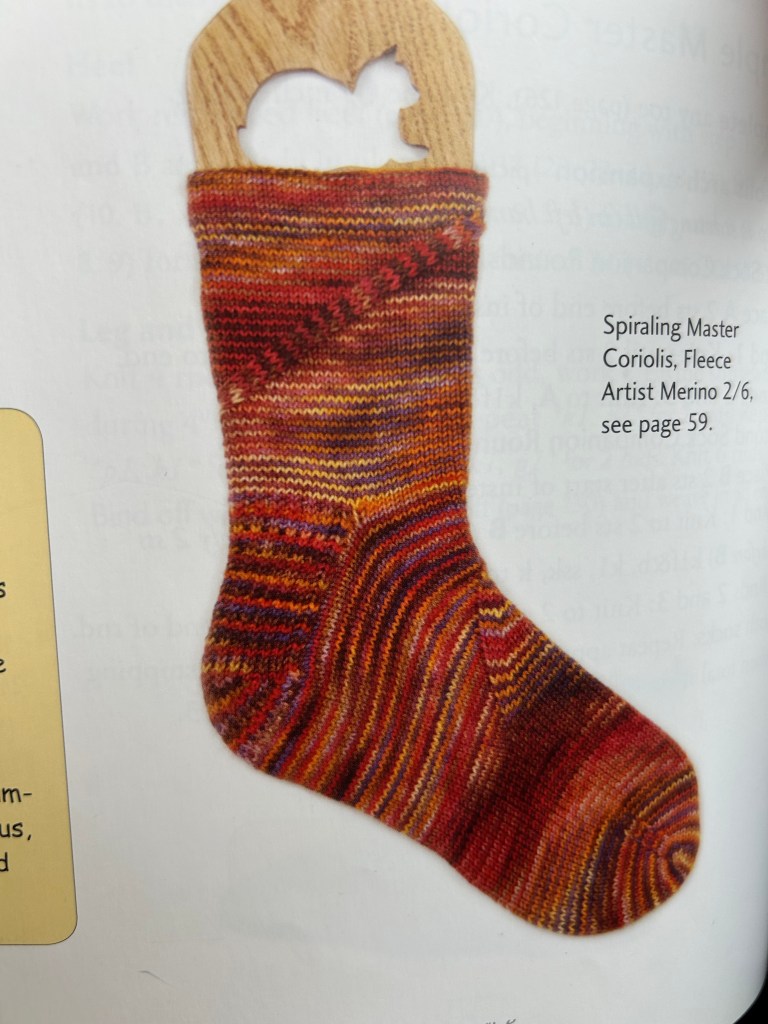
The Coriolis Sock from the New Pathways for Sock Knitters book by Cat Bordhi with what I thought was a slight modification – a second spiral, which didn’t work!
Now it’s gone and I’ll start the heel and leg again.
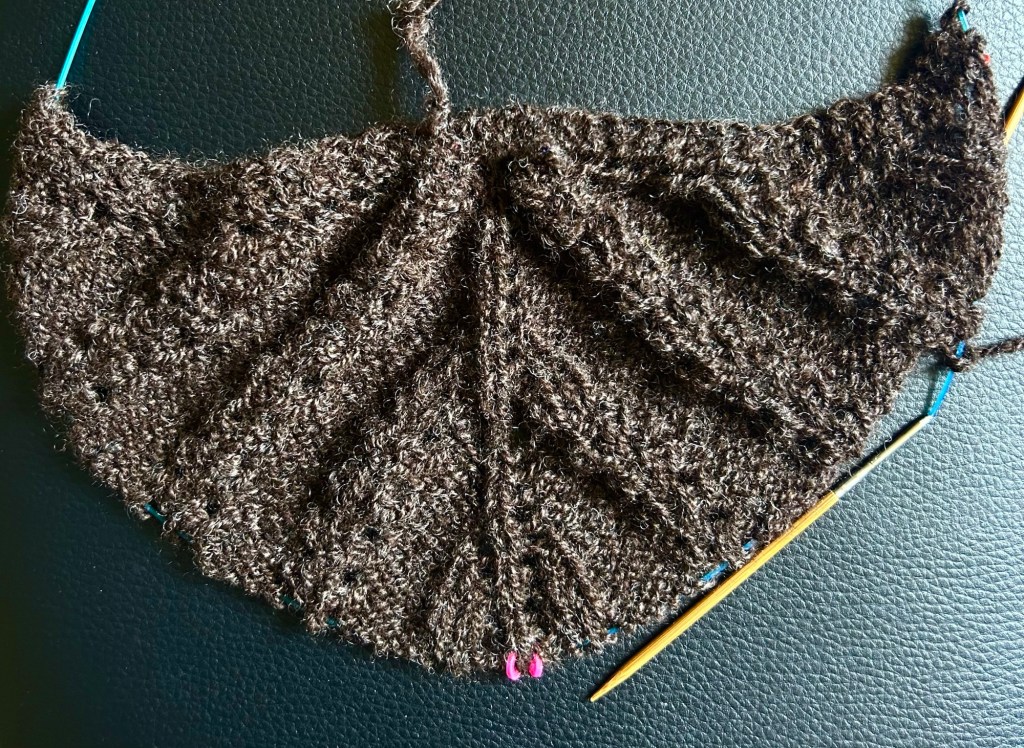
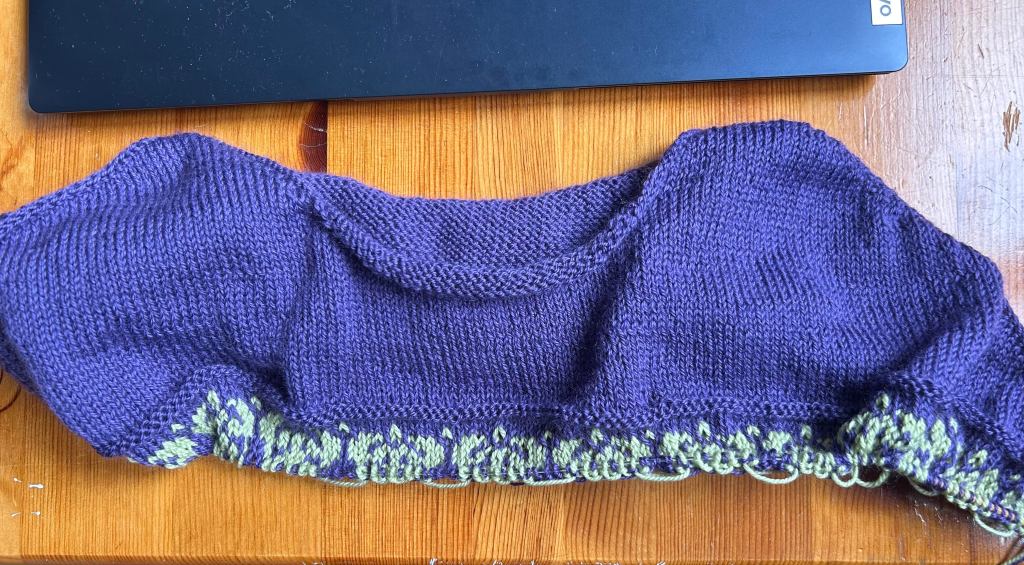
Another rip. My Contiguous Drop Shoulder with colourwork which I think would have more drape than I want
Colourwork gone. I’m going to repurpose this as a vest, maybe, possibly.
I finally got back on the video train so here is the full explanation and what I’m up to.
begins with the neckband but I’m working a colourwork pattern on this version and will use one of the colours for the neckband. I haven’t decided which colour yet so I just cast on the number of stitches, purled one round, and did the short rows against the cast on round.
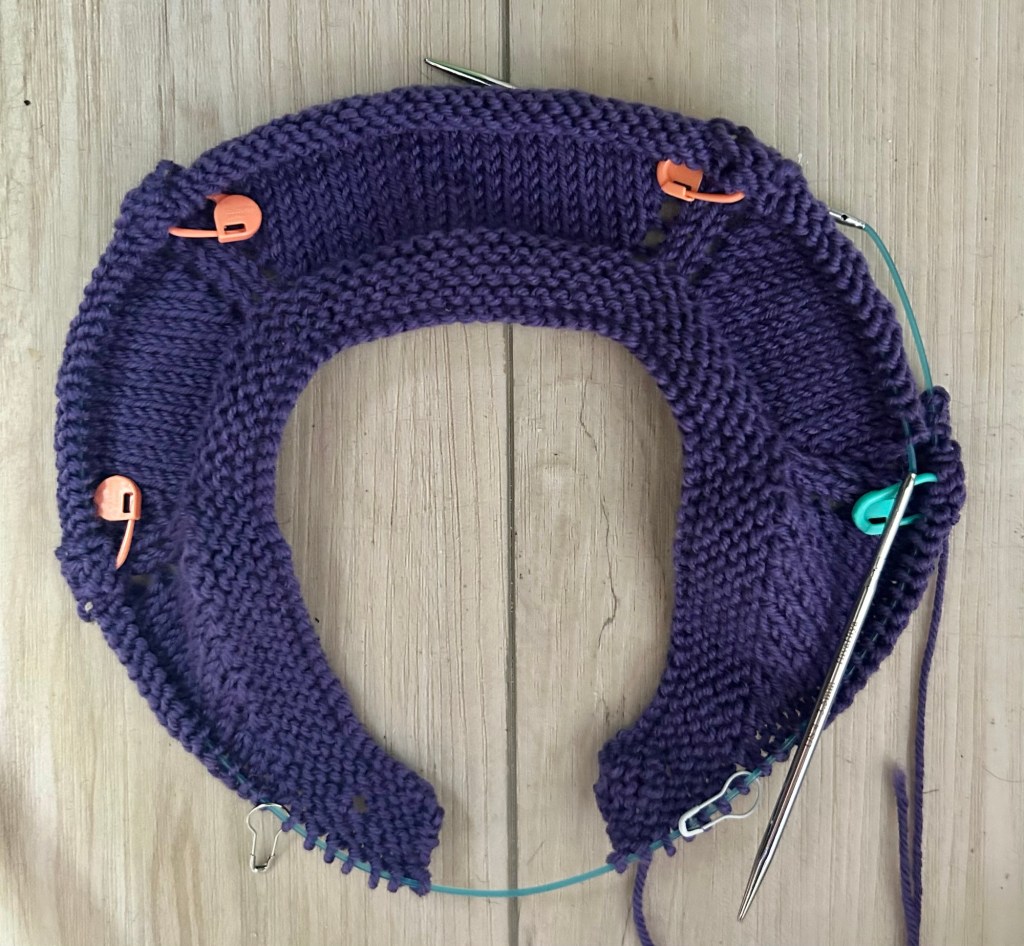
Have you tried a contiguous sweater? This is an amazing way to make a drop shoulder sweater. In the contiguous method 2 increases are worked at each shoulder, every round. It is really easy to work.
The short rows are worked right away to lower the front. They are worked back and forth, knit right side turn, work across the wrong side turn. This is a system of short rows that I unvented (as Elizabeth Zimmermann would say) many years ago and have used it over and over again. The short rows are simple and worked after working a neckband. They usually butt up against a ribbed neckband. In this case, they are butting up against my cast on and one round of purling.
These short rows make a nice angle to drop the front of neck.
I am working in the purple (Shelridge yarn, 80/20 fingering – iris) until I have the width I want. I am going to have 8″ of ease, not as big as the sweater in the pattern photo which had 10″ of ease, but this is in much finer wool. That’s around 169 sts across the back, at my gauge, and considering my 12 st colourwork pattern repeat. I have put markers on either side of the centre 100 sts on the back so I don’t have to keep counting across them all every time.
Right now we are on the cusp of winter/spring. One season is almost done but the next one is not quite here yet. My knitting has been the same. One project progressing, the other ripped off the needles and tossed in the corner, totally my own fault.
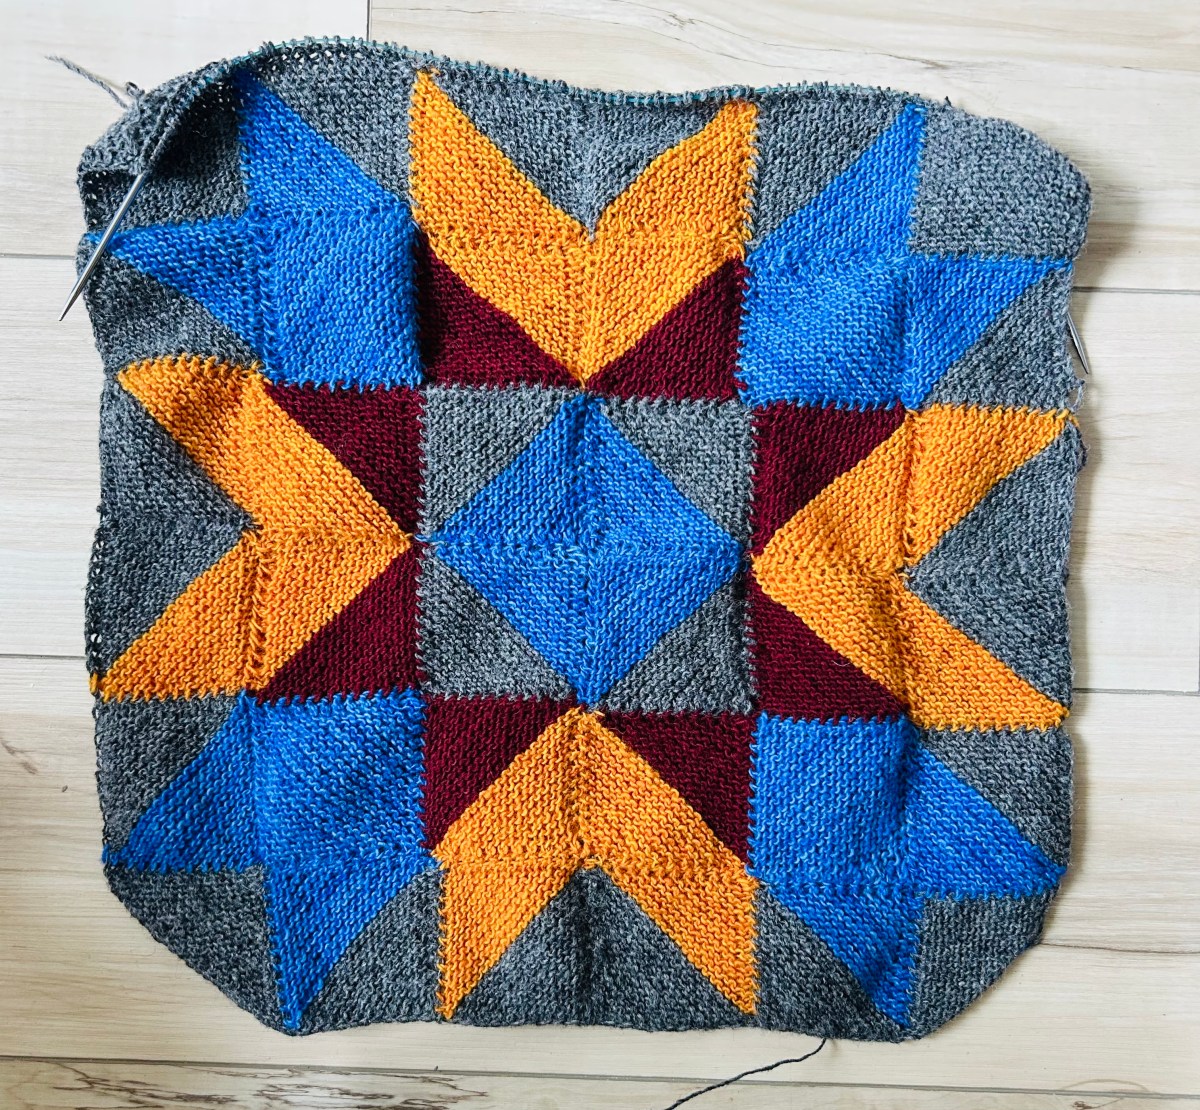
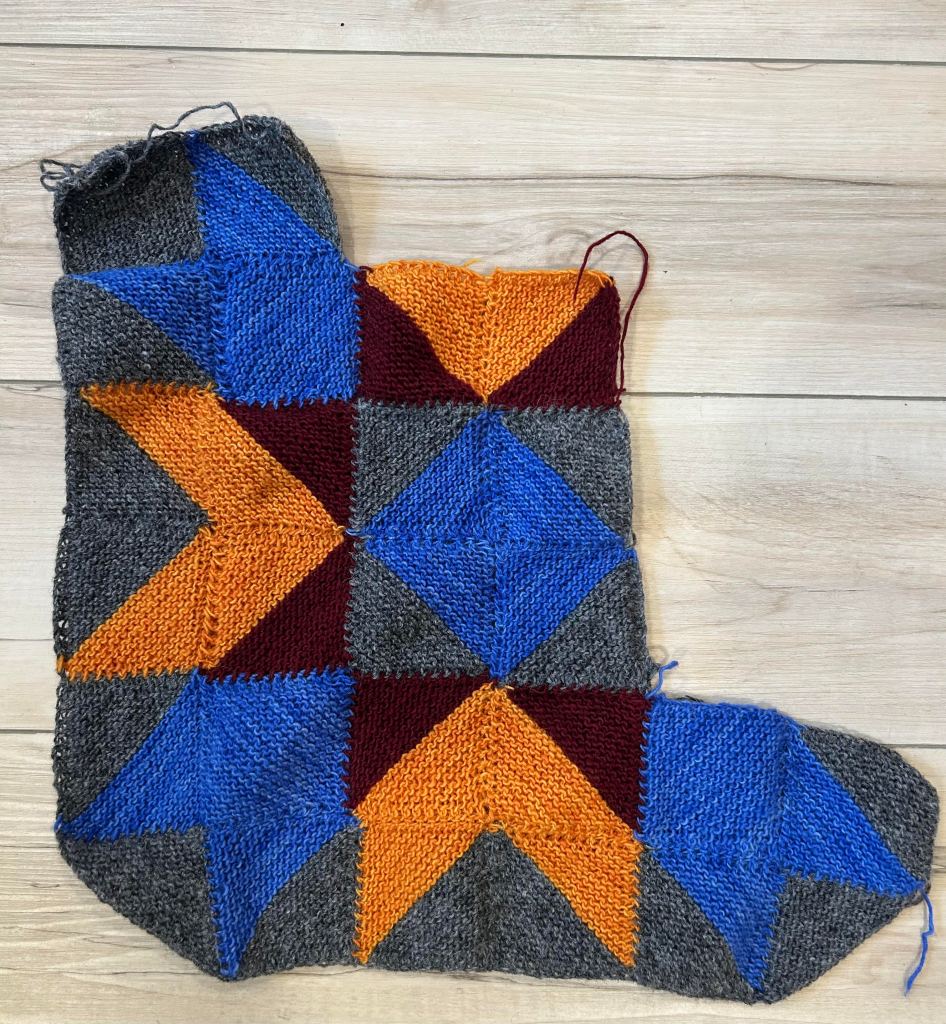
Look at this. I have finished all the modular squares for the Clint. Most of the squares are divided by colour into two triangles. The effect is stunning.
Lichen and Lace Rustic Heather Sport, singles wool
I love it. Now there is some plain garter stitch to finish the shawl. It was fun to knit and the way Natasja Hornby (Moonstruck Knits) did the overall design is very clever and interesting. She gives you a map of the squares with where to start and what colours to use. Excellent.
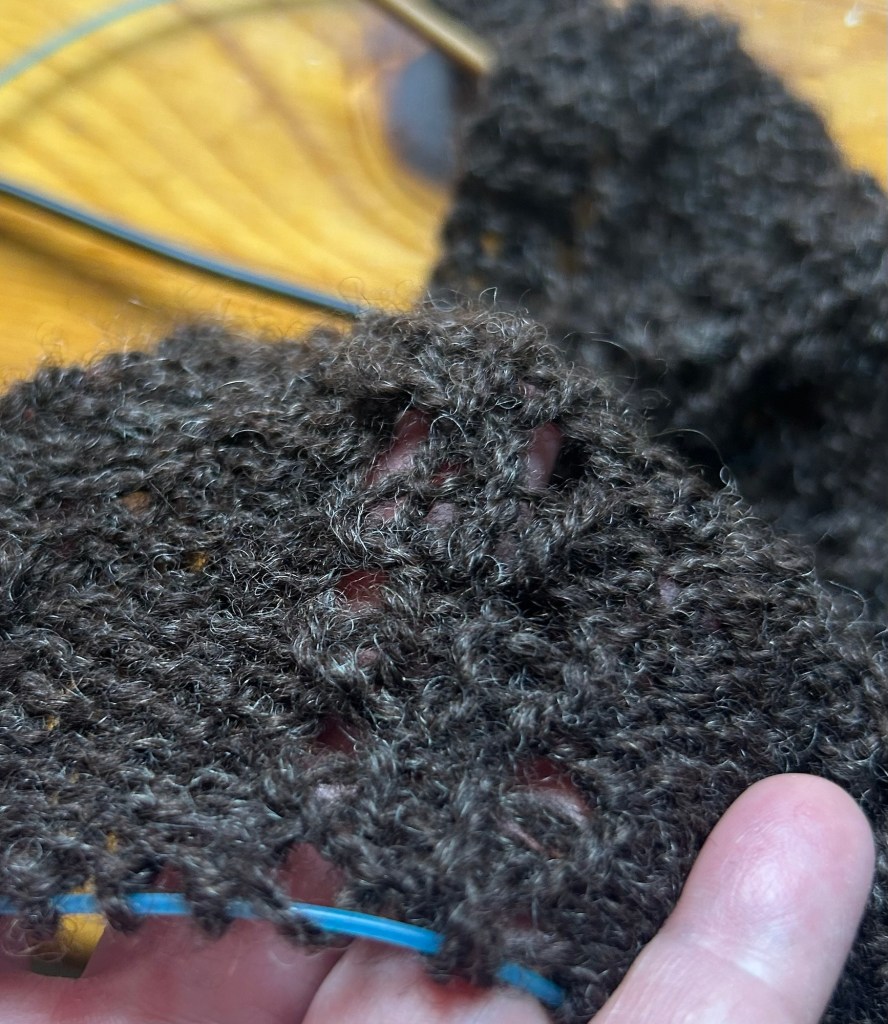
I ditched my Coriolis sock (Cat Bordhi). It was not working and it was totally my fault! I wanted the spiral to go all the way around the leg. It wasn’t until I got to the heel part that I realized my mistake. I picked up a toe-up sock I had already started and began the sprial for this sock. I didn’t know this was a bad idea. I had the wrong type of toe for this sock. I had read the pattern through but didn’t really take it what it was saying because it wasn’t in front of me.
That line on the right is where the side of the heel flap will be. The spiral here will definitely run into it and stop.
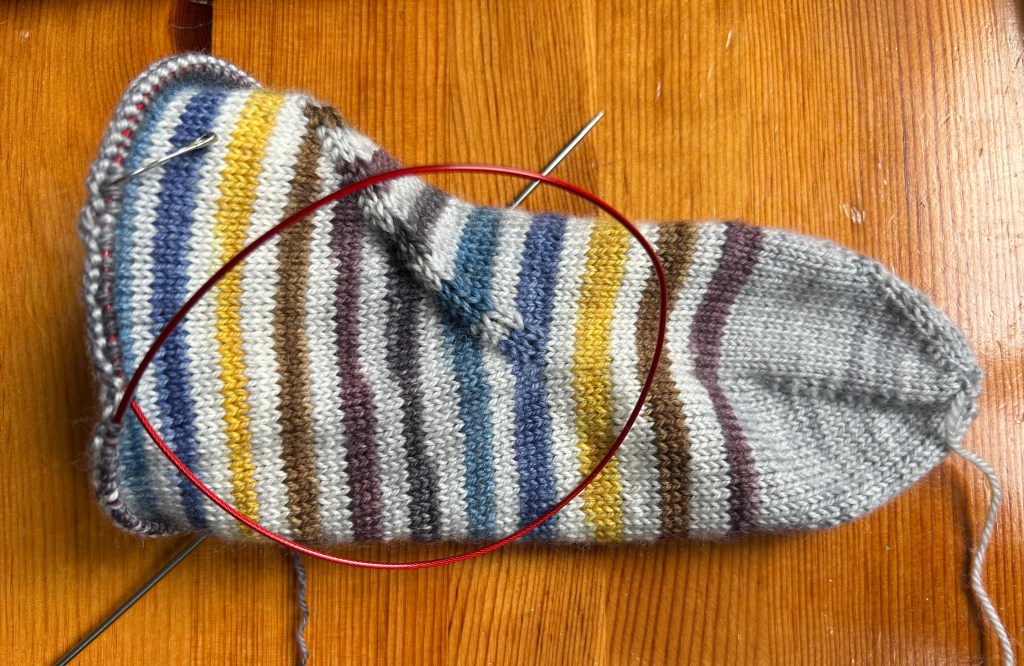
So here is the proper toe for this pattern, a type of star toe.
Windswept Fibres and Design, St. John’s Newfoundland
On the top of the foot you increase stitches as you spiral across, then when you go to start the heel you rearrange your stitches and move the beginning of round several stitches to the right (that moves the end of the spiral several stitches back towards the centre of the top of the foot, away from the heel). That’s how it’s done. This toe allows you to move the beginning of round anywhere you like and that’s what I missed. I’ve got it now.
Some forward progress and a start-over. A pretty typical week of knitting.
*If you are receiving this blog on Mailchimp, please sign up on Debgemmell.com to continue to receive it. My Mailchimp account is closing down because I don’t do a separate blog there. Thanks for staying with me all this time. Hope to see you over on WordPress. Cheers.*
I did a video. Phew, it’s taken a bit to get started again but here it is. Hi, I’m back.
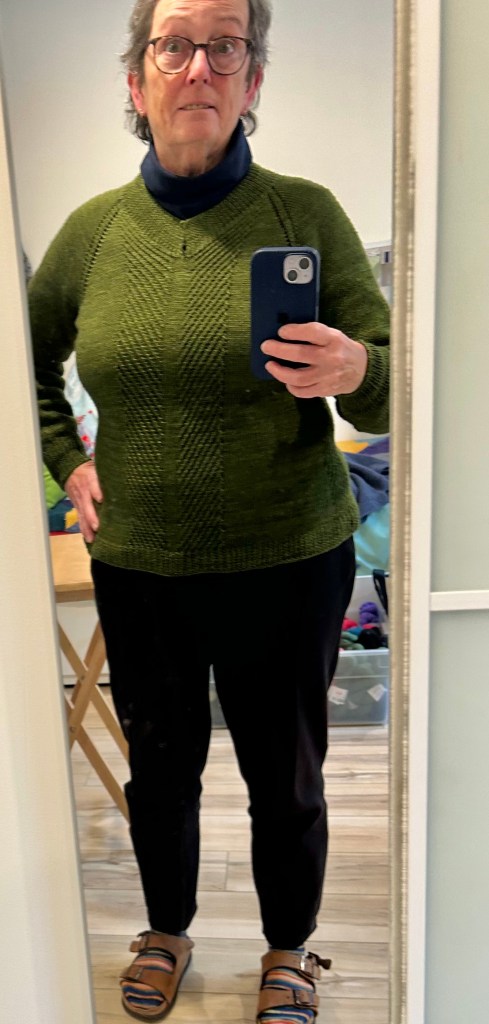
I got the sleeves done on my Just For You V Pullover. I am patting myself on the back for getting that done. Yay me!
I must admit sleeve knitting can put me off stockinette stitch knitting for a bit. It’s not the knit stitches, because I totally love garter stitch, it’s the sameness of it. I usually put some design element in the sleeve to keep myself busy but this time I didn’t for no obvious reason I can think of now. That was a mistake. So no stockinette stitch for a while (except for socks, of course).
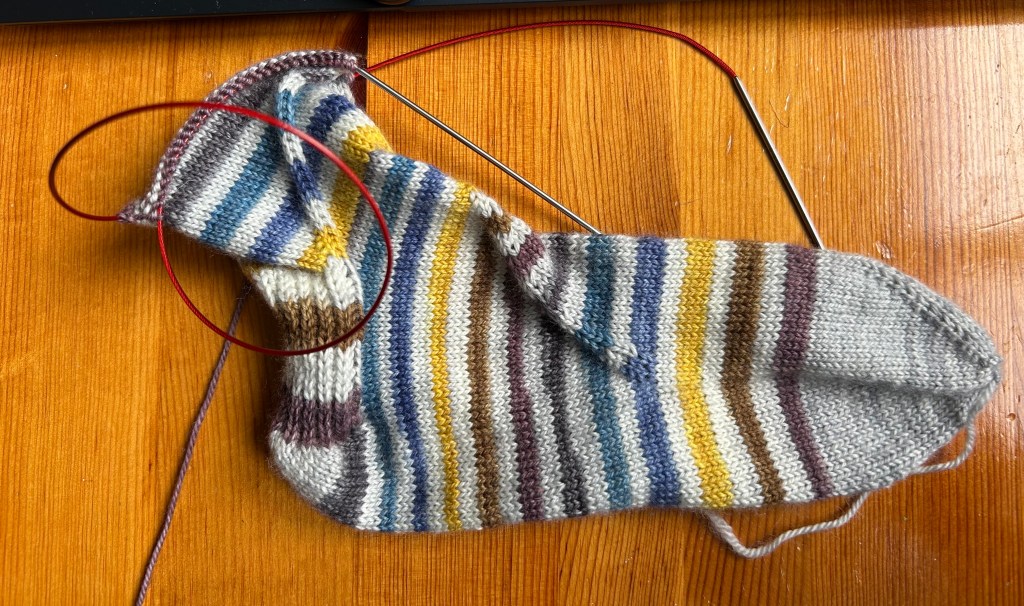
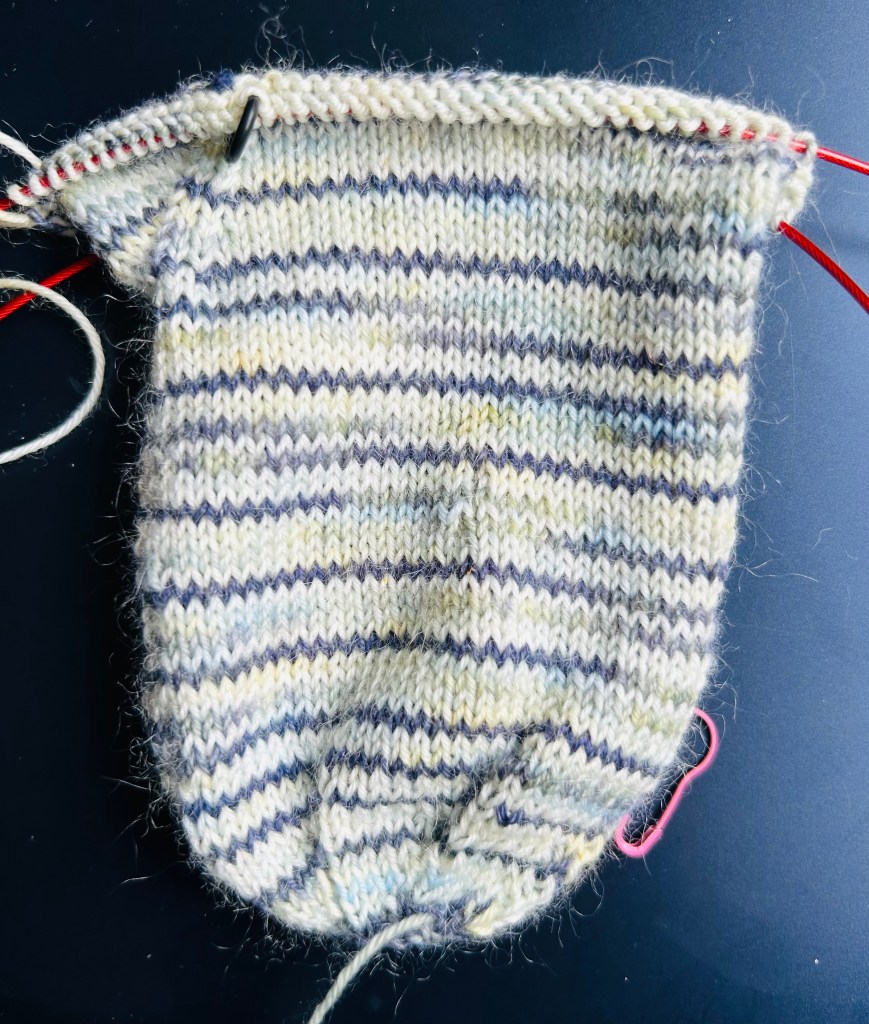
Speaking of socks, I’m going knit socks to stockpile them for birthdays and next Christmas (who is this person?). I’m continuing with Cat Bordhi’s New Pathways for Sock Knitters book. The next toe-up is the Corialis Architecture sock. The swirl is so cool and at this point I don’t know if the swirl is going to run into the heel flap or get above it. How can it swirl around the entire sock and if it doesn’t? I can’t see it yet. These photos assure me that it will.
That’s keeping me engaged in this sock. Weird as that is, it’s the possibility that it might fail that keeps me knitting. Is this totally off base?
The modular knitting continues and continues and continues. Project number 3 with the Lichen and Lace Rustic Heather wool is the Clint shawl by Moonstruck Knits. Here’s where I am so far. The first corners are not great, worse than that, they are terrible. I do feel like they are getting better as I continue on. I almost stopped a couple times and started over but I gave myself a talking to about being a perfectionist and got over myself, at least I think I did. (I still see those miss aligned corners every time I pick it up, argh.)
I do have enough yarn to keep knitting squares for another shawl or blanket with hopefully better corners. The corners are the reason I am not a quilter. I can not do them nicely with fabric either!
Let it go and have some fun. That’s what it’s all about, right? That’s what I’m going to do.