I have more techy talk for you. That’s where I am right now.
I had a couple more tech issues that have been swimming around my brain, looking for a solution. I think I have a couple, solutions that is.
It is progressing.


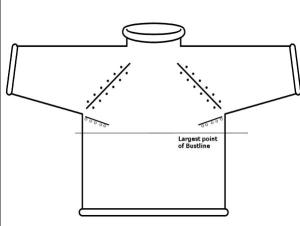
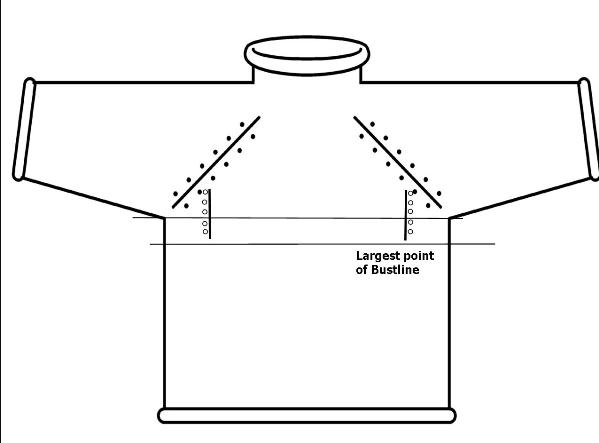
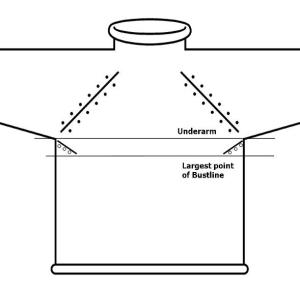
Issue #1 is how to get extra width across the Bust. I need it and maybe you do too.
This cardigan is set up to have 4″ of ease on the body. That’s a really standard amount of ease (ease is the amount that the body of the sweater would be larger than your actual body). This amount of ease generally works for most of us. The ease on this pattern (and most of my other patterns) is added as underarm stitches cast on when your work the Divide Row. Two inches worth of stitches are cast on at each underarm.
This amount of cast on stitches at the underarm means that when you go to work the sleeve, you will pick up one stitch for each of those cast on stitches for 2″ of ease on your sleeve. A really good amount of ease for your sleeve.
But is the 4″ of ease for the body of your cardigan enough across your bust?
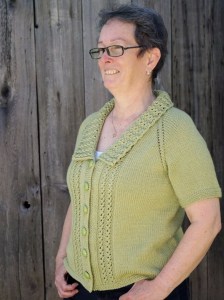
It’s not enough for me. I would like a little extra width across the bust area so that the cardigan is not stretched there and buttoning up my cardigan won’t cause gaps at the buttonband.
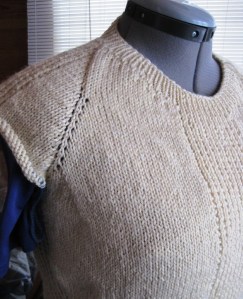
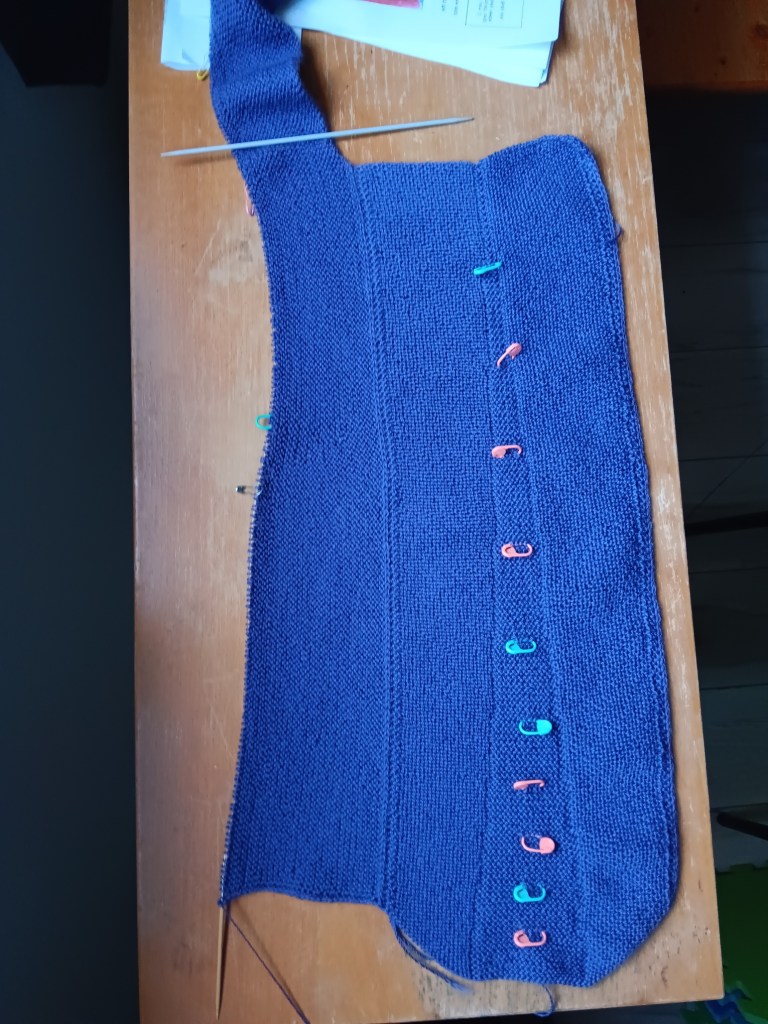
As I was knitting the yoke I was pondering just this question. This is what I have decided to add to the Modification Pages as an option for added bust width.

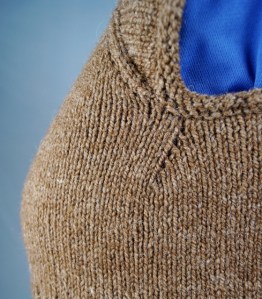
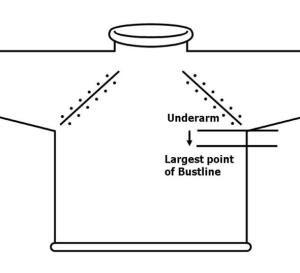
I worked 4 increases across each front (3/4″ worth of stitches on each front). That, at my gauge, gives me 1.5″ of extra width across the bust for a total of 5.5″ of ease around my cardigan at the bust. Just what I need. I will decrease these extra stitches away at the imaginary side seam as I get closer to my waist.
I think that takes care of one of my design issues. Next is what to do with those raglan lines when it’s time to do the Divide Row. Can I leave just leave them be? Can I continue the raglan lines down the body in some way?
What do you think? A good idea? Let me know.
Cheers, Deb
Any Gauge and Gauge-Free patterns by Deb
deb.gemmell on instagram


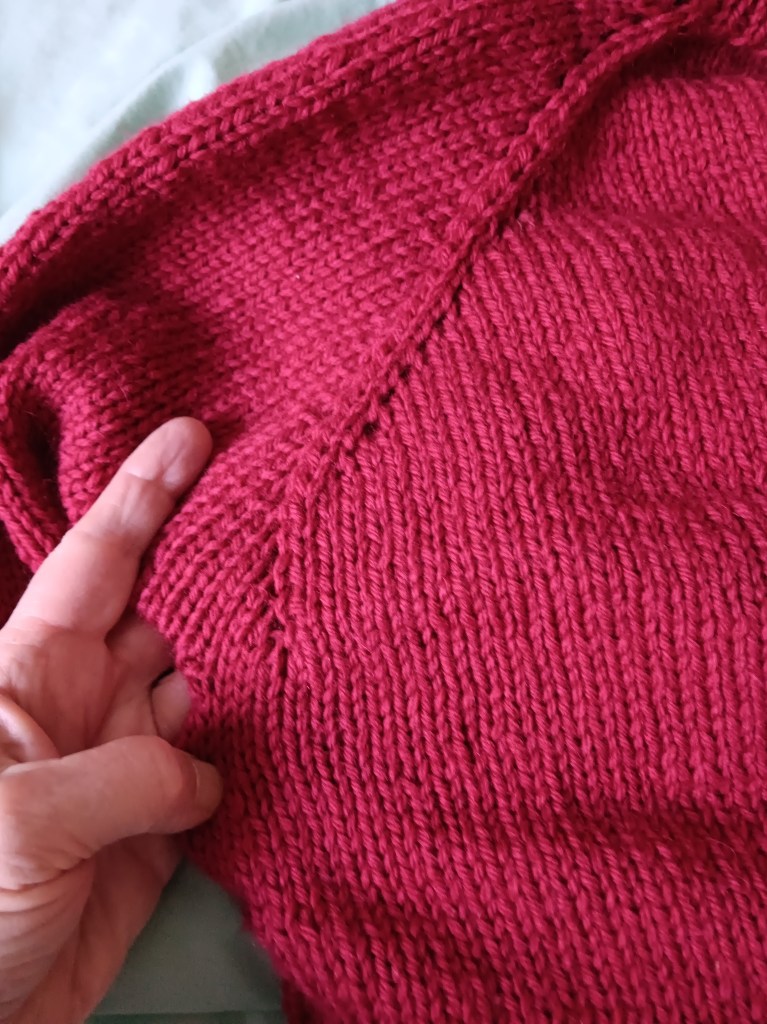


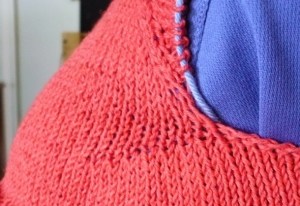
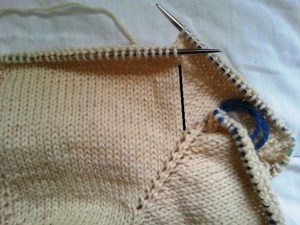
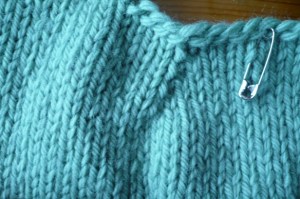
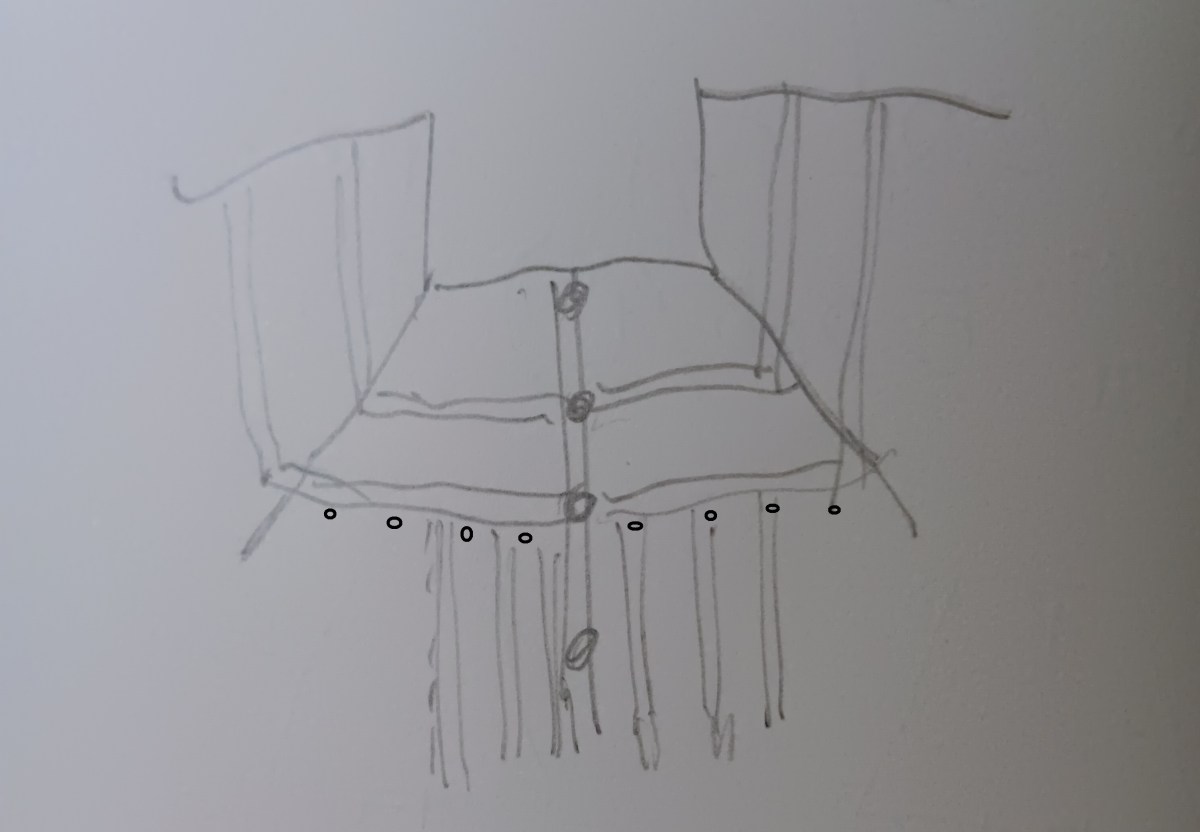
 Would the extra increases show? Not really. You can put them in just before the underarm. Can you see them?


 Now as a confirmed cardigan buttoner I add extra Front stitches for
  But now what? What do you do with those extra stitches below the bust?