Salt and Pepper Crewneck

This Any Gauge Family Crew Neck was a fairly quick knit. Nice big needles and an interesting wool for a plain pullover. Now that I have a basic sweater done I can get down to finishing my pattern. No more procrastinating. I’m taking on the challenge of making this pattern for all sizes. This is new for me and something of a formatting nightmare. How do I put in all the information for all the sizes and not overwhelm the knitter who is only knitting one size? Hmm, lots to learn here.

I used Briggs and Little Heritage, Threaded G+W. I knit it at a slightly looser tension (15 sts = 4″/10cm as opposed to the recommended 17 sts = 4″/10cm) for a nice drape. I’m very happy with it.

One more Family Crew Neck pattern prototype is done. I’m going to deliver it this week and will have some photos next week. Now to cast on the next one.

Right now I’m taking a moment to feel the satisfaction of a sweater finished. Don’t you love that feeling?

Cheers and hope your knitting is going well too. Deb

Any Gauge and Gauge-Free patterns by Deb

Dividing yarn for body and sleeve stripes

Working a sweater with big stripes is a great look. If you have tons of yarn available it’s not a problem to get equal sized stripes on the body and the sleeves. I made sure I bought enough. Knitting this prototype for the Any Gauge Family Crew Neck Raglan sweater for my SNL was really fun.

Then I decided to knit a mini-me sweater for my grandson with all the odd balls I had left over. Now I have a limited amount of yarn to work the body and sleeve stripes.

How do you divide your yarn so you’re sure to have enough for the sleeve stripes while you’re working the body? I didn’t want to knit the body sweating about the sleeve stripes. I wanted a nice relaxing knit.

If you have a scale to weigh your yarn and you have decided on the finished size of the sweater, you can follow along. Here is how I did it for my sweater sized for a 1 year old:

Formula: weight of yarn available = body circumference + sleeve circumference + second sleeve circumference.

Now the calculator comes out: Divide the grams of yarn by the total circumference of body and sleeves. This will give you the number of grams of yarn needed to knit once around the body and two sleeves.

Here are the numbers I used with my left-over balls of yarn:

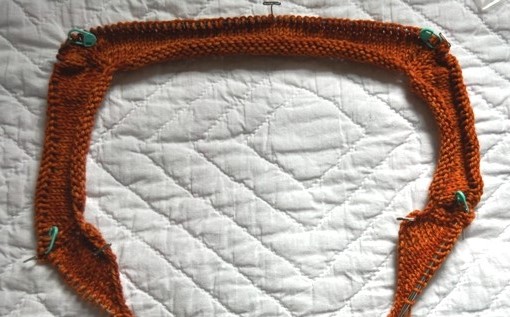
35g of rust colour = 22″ body + 9″ sleeve + 9″ sleeve (1 year size)

35g = 40″ circumference

Divide as follows: 35 divided by 40 = number of grams to knit one round of the body and two sleeves

0.875g of yarn needed for every round of stripes knit

Separate Yarn to use for body and sleeve stripes : OK, now that I have this weird number from the formula I can divide my yarn into enough for the body stripe and 2 equal sized balls for each sleeve stripe:

22″ body x 0.875g = 19.25g of yarn for a body stripe

9″ sleeve x 0.875g = 7.87g of yarn for each sleeve stripe

Weigh out your yarn. Give yourself a safety margin. I wound a ball weighing 18g for the Body stripe. Now I’m sure to have more than enough left for the sleeve stripes.

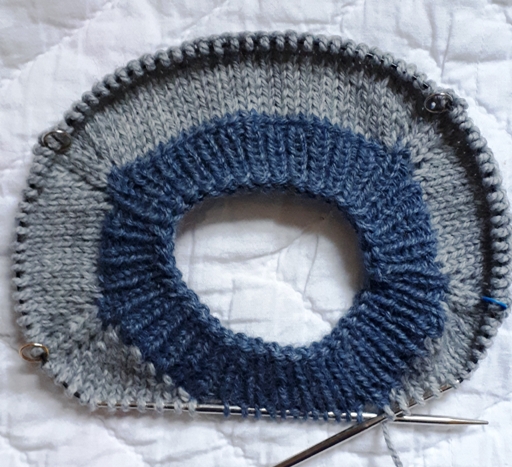
Once I knew I would have enough for the sleeves I could make a decision on the actual size of the rust stripe, knowing I could mimic it in the sleeves. I didn’t need all 18g for the body stripe I wanted so I ended up with a little left over. Then I knit the sleeve stripes, counting rows so they were the same as the body stripe. This worked out perfectly. At least I think it did.

I am so pleased with the results.

I hope this is helpful, Cheers, Deb

Family Crew Neck

Any Gauge and Gauge-Free knitting patterns by Deb

Crewneck Pullover short rows

The new pattern I’m working on for a Family Crew Neck Pullover begins by knitting the neckband in the round. This is not the usual way to start a raglan pullover.

Usually you would cast on for the shoulder, back of neck and second shoulder and work back and forth to form the crewneck. You would work your usual raglan increases along with an increase at the beginning and end of the row to form the crewneck angle on the Front. Then cast on some centre front stitches and work your yoke in the round. Pick up the neckband afterwards.

Have you made a pullover that begins like this?

But of course, I am not doing this pullover like that. As my husband would say, “Have you met me?”.

I am starting with the neckband already knit in the round and to form the crewneck front, I’m going to work short rows. Why? Because I love short rows and they work.

Look at that. To me it’s a thing of beauty. I know, it’s a weird designer thing. But I do love looking at this stage in my pullover. The Back is raised. The Front is lowered. And now we’re working in the round for the rest of the yoke.

Now I have a question for you. Here it is with a colour change.

Is the angled edge of the Front with the short rows too messy?

Here’s a close up of both sides. Messy?

I don’t mind it at all but …

Would you like one round of grey knit before starting the short rows? Yes or No?

Thanks. I appreciate your opinion. Cheers, Deb

Family Crew Neck

Any Gauge and Gauge-Free patterns by Deb

%d bloggers like this: