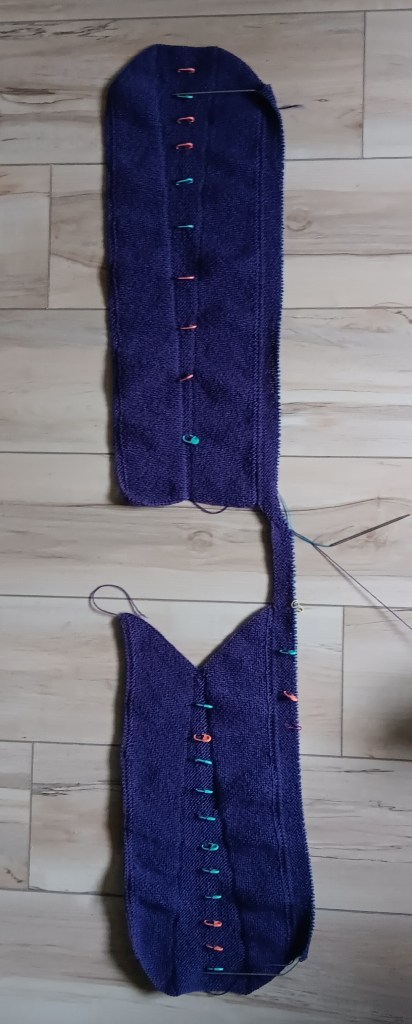
Progress is being made on my vest version of the Build A Bigger V cardigan, and yes I am knitting like a crazy person. The Front is knit as a pullover. Nice and easy since it’s just the Back again without the beginning triangle at the neck. Done.
Now I have to attach them together so I can knit out to the edge of my shoulder.
Both the Front and Back have a 2 stitch I-cord worked along each edge. I’m going to use those I-Cord stitches for the pick up. Hang on, it’s a tricky ride.
Ta, da. Phew, done. Not hard to do. It’s just lots and lots of stitches.
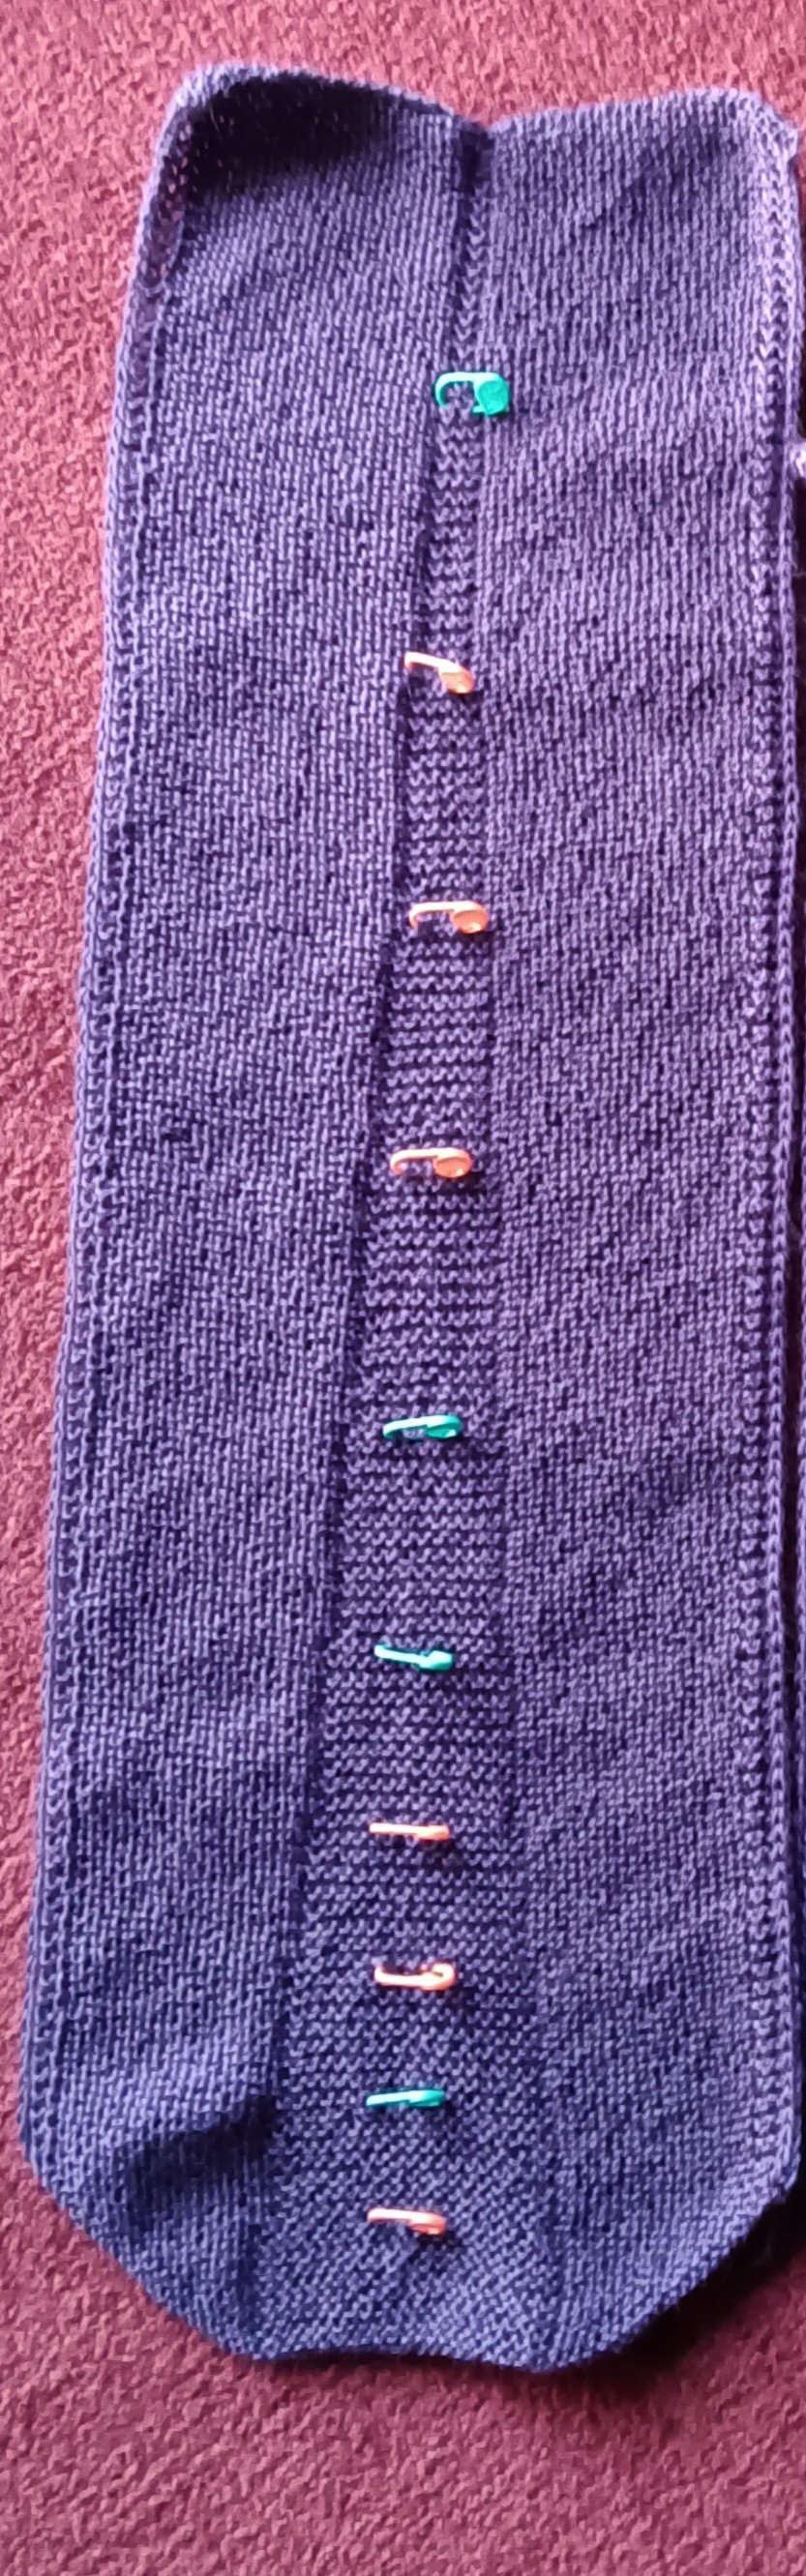
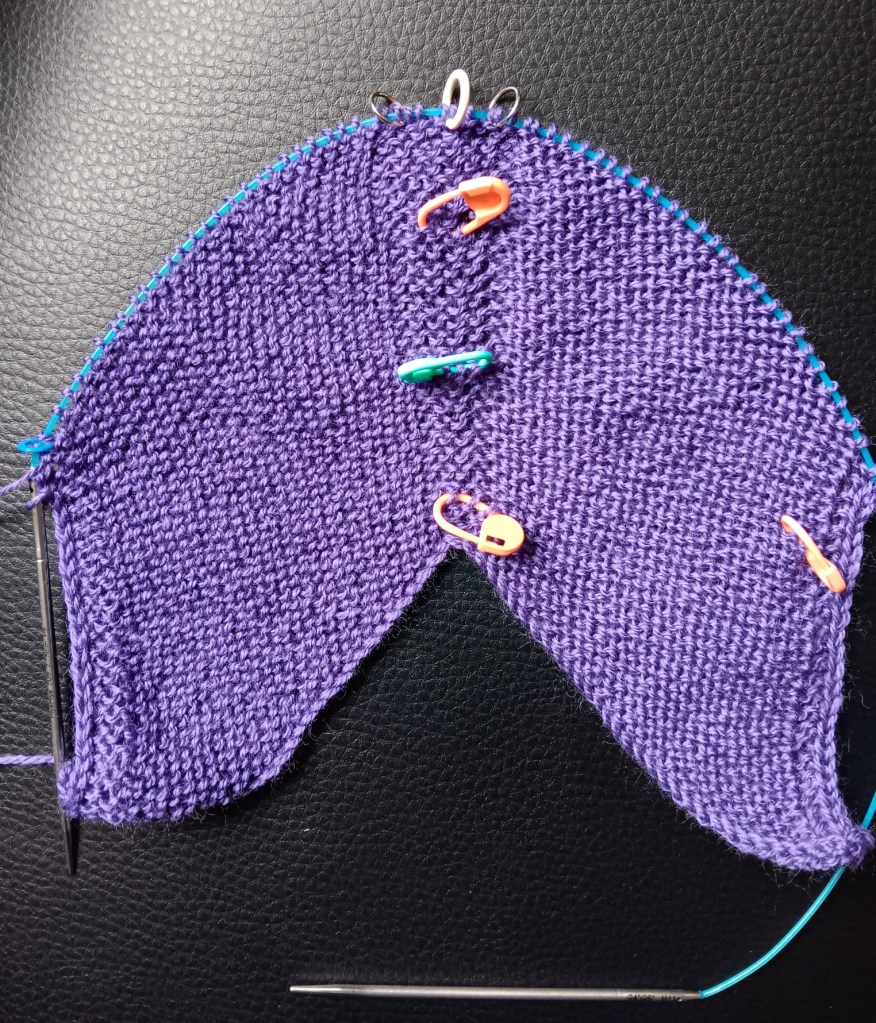
I’m working on the back panel of the Build a Vest with all those markers in place. What are they doing down the centre? I thought you’d never ask.
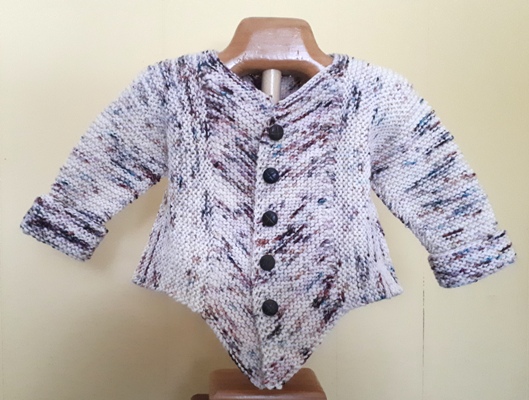
The first Build a V that I worked on was the baby version.
As you can see it also starts with a front and back panel, then is worked sideways for the sleeves.
The back panel looks like this.
See that nice little pointy V at the bottom? I didn’t want that pointing at my derriere on my vest. Would you?
So … all those markers. They indicate x number of ridges as I worked down the back.
This is my Build A Bigger V cardigan, and you can see that the point has been taken away, creating a rounded bottom to the back panel. At every marker I moved the increases further away from the centre marker.
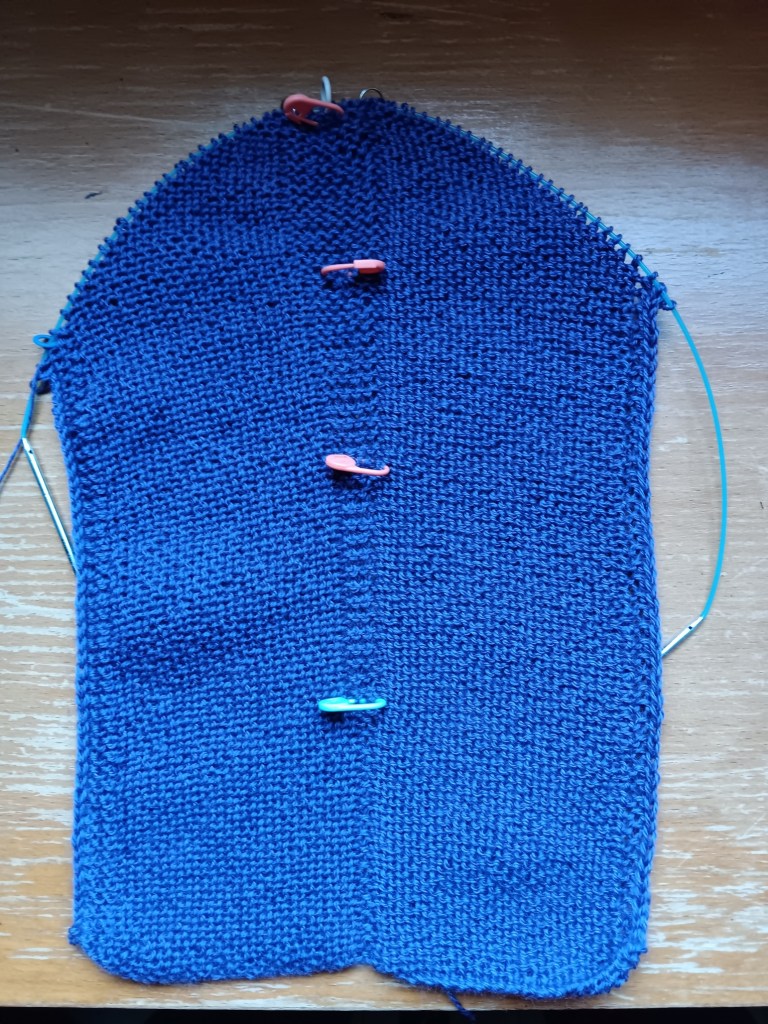
This is my finished back panel of my vest.
The centre section gets wider and wider. As I approached the bottom I started widening the centre section a little more often.
I think this would work for a triangular shawl too, if you didn’t want that sharp triangle point. What do you think?
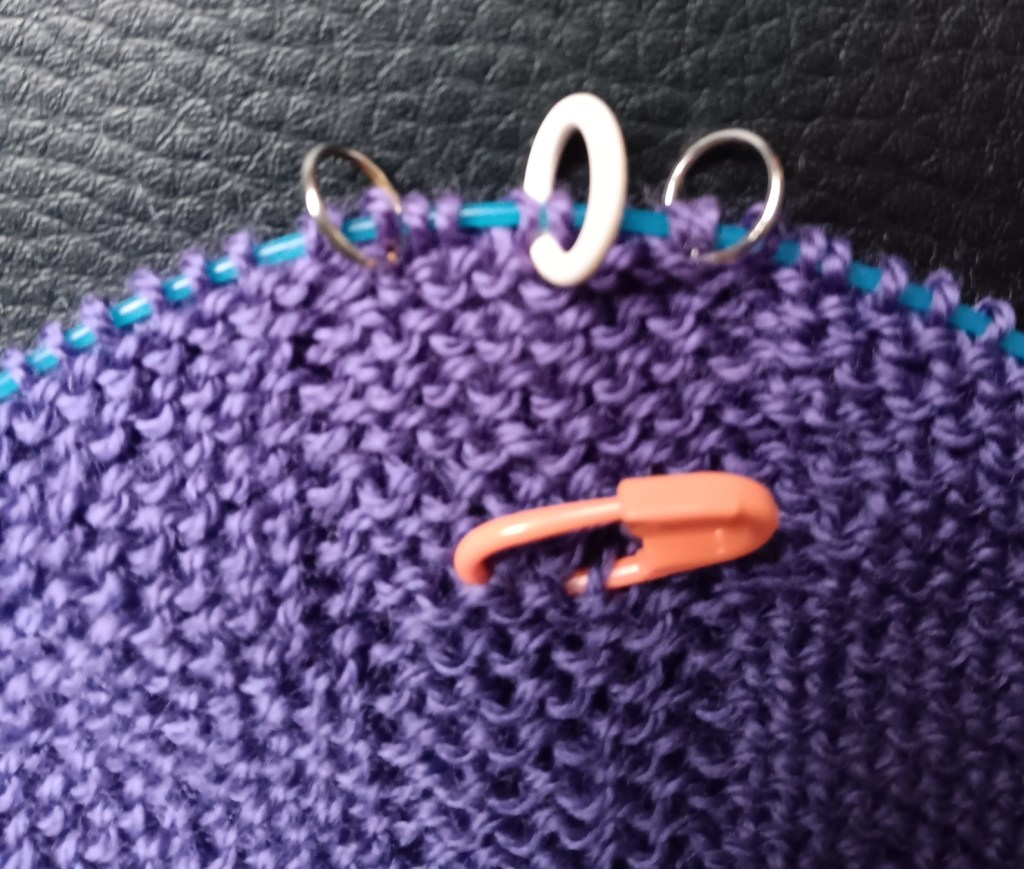
I am using several markers for this project. Only one is required by the Build a Bigger V pattern. That’s the white marker in the centre. The rest help me keep track of the shaping and remind me when and where to do things.
There are 7 more markers here which are all for me. Yes, there are quite a few. Yes, they are different colours and types of markers on purpose.
Marker for Right Side of fabric: That orange marker on the right is pinned through the fabric to tell me this is the beginning of the right side row. It is especially helpful at the start of the project when there aren’t as many other things to tell me I’m on the right side. It’s a removable marker so I can move it up as I knit.
Markers for length: The orange, green, orange sequence up the middle are for counting ridges so I don’t have to keep counting from the cast on. I am placing the first orange marker after the first 2 ridges, then every 8 ridges as I continue down this front panel because something happens every 8 ridges in this particular pattern.
Markers delineate: The two metal markers on either side of the centre marker (white) show me where the middle section is. You can place markers on either side of a stitch pattern or some section you need to keep track of.
Markers – do something here: The metal markers on either side of the centre marker also help me find where I need to work increases. The instructions say to work an increase x number of stitches before the centre marker (white). I don’t have to keep looking ahead for those x number of stitches if I put a marker in. I work one increase before the metal marker, knit across the middle section to the other metal marker and work an increase after it.
Markers – pay attention: I have a lot of trouble remembering to do things at the ends of the rows. So the blue marker on the left edge is telling me to pay attention and work a decrease, duh. I know it’s supposed to be there but I have merrily knit right past it so many times, I needed a marker to remind me. It’s a rescue marker.
I have collected several different types of markers for this very purpose. They help me reduce the stress of paying attention, cut down on the amount of ripping back I have to do, and therefore, make my knitting so much more enjoyable.
This vest, and the cardigan I’m modifying it from (Build a Bigger V), will be Gauge-Free. No swatch needed. No talk about gauge at all, none, throughout the entire pattern. How freeing is that?
How can it possibly work?
Start with a couple of stitches and build a triangle with increases worked on either side of the centre marker. Work until the solid edge of the triangle is the width of the Back of Neck. Mine is 8″ wide.
Width of Back of Neck is 8″.
That sets the number of stitches for the Back Panel. You need to count the number of stitches you set up with at this point but we don’t care how many stitches per inch you are getting here. Any number of stitches will work.
Now, I will keep the same stitch count as I knit the back panel.
The shaded part here is the Back Panel. The triangle begins at the Back of Neck and the Back Panel is knit down to the desired length.
The decision will be how long I want this vest to be. Lots of knitting for the next week.