A discouraging couple of weeks when everything didn’t quite turn out as I had hoped. But now I am finallly reconciled to ripping, here we go.
Now you see it.
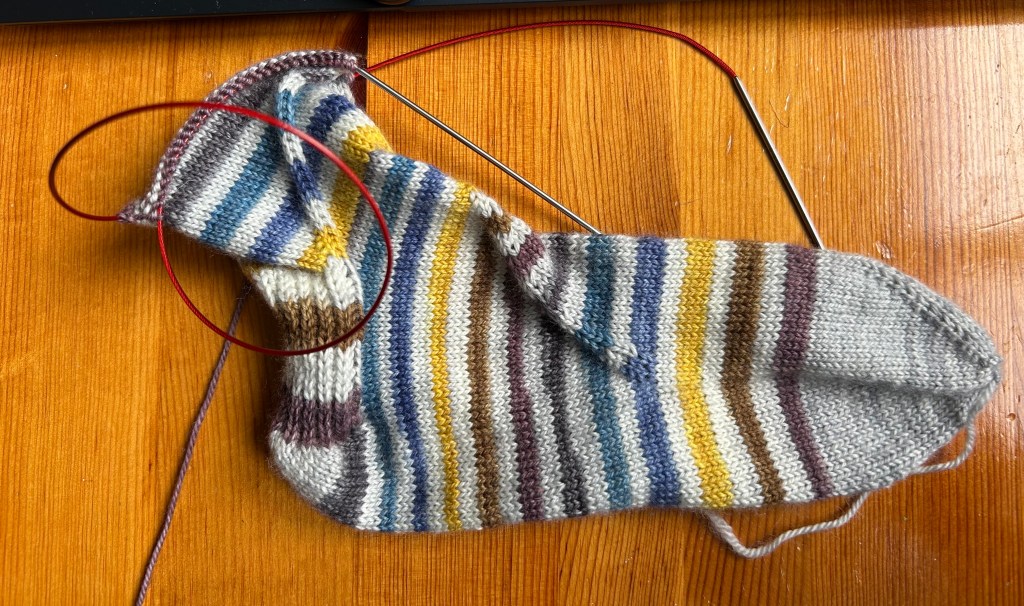
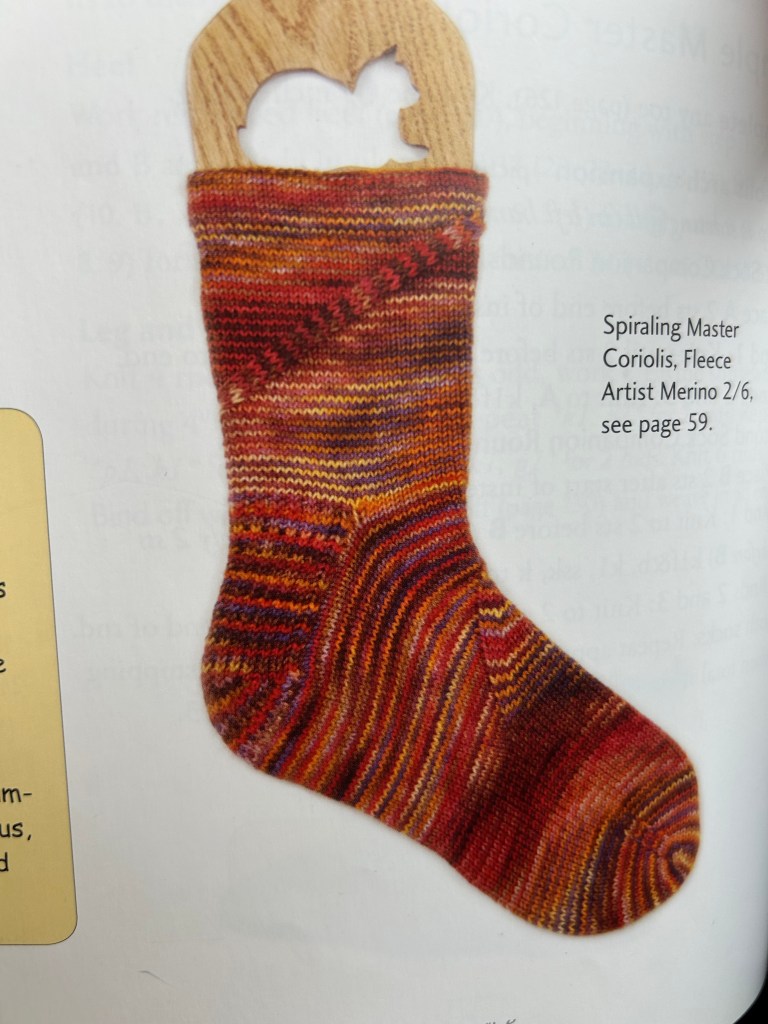
The Coriolis Sock from the New Pathways for Sock Knitters book by Cat Bordhi with what I thought was a slight modification – a second spiral, which didn’t work!
Now it’s gone and I’ll start the heel and leg again.
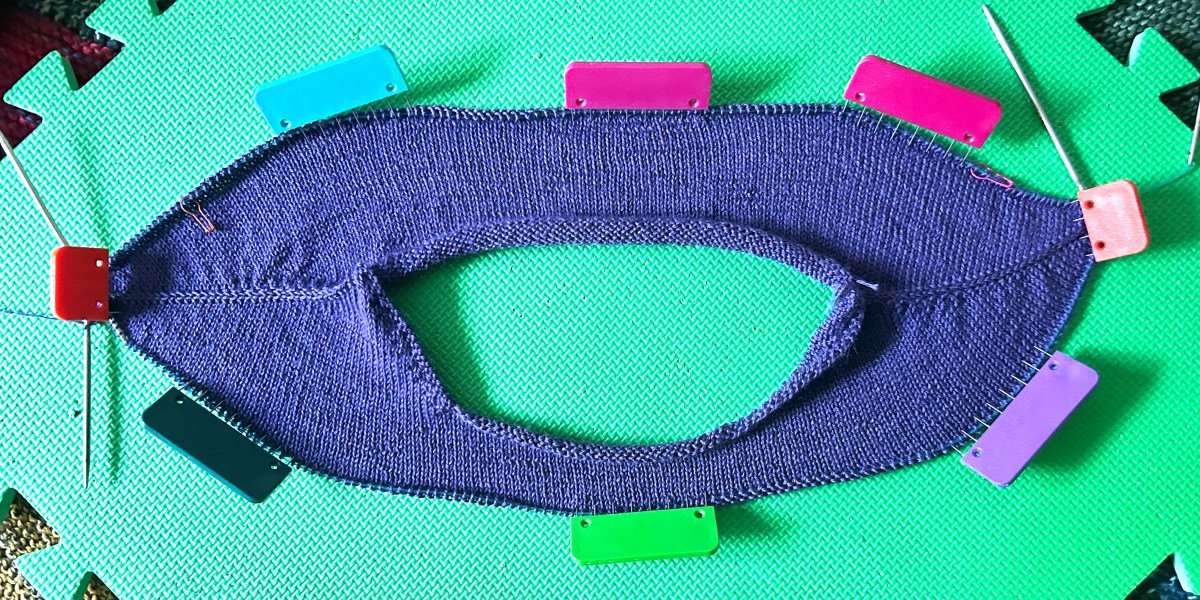
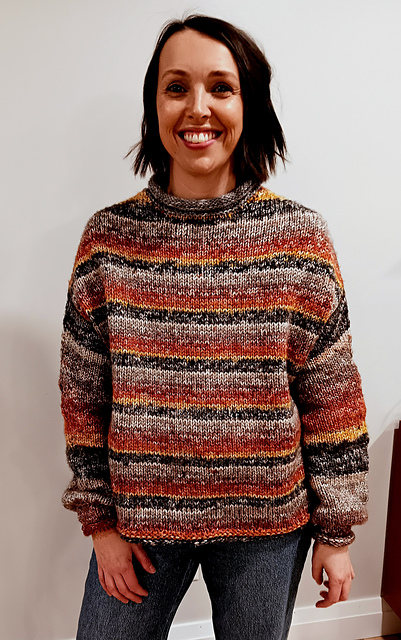
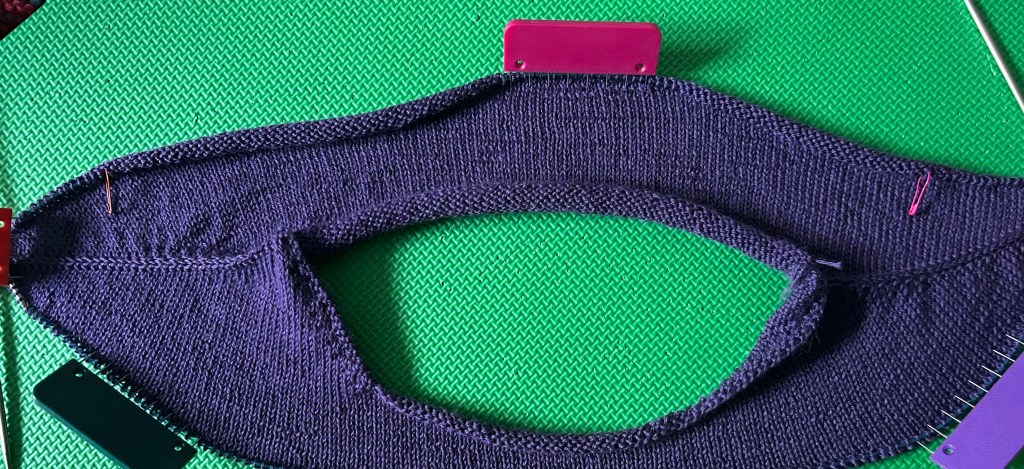
Another rip. My Contiguous Drop Shoulder with colourwork which I think would have more drape than I want
Colourwork gone. I’m going to repurpose this as a vest, maybe, possibly.
I finally got back on the video train so here is the full explanation and what I’m up to.
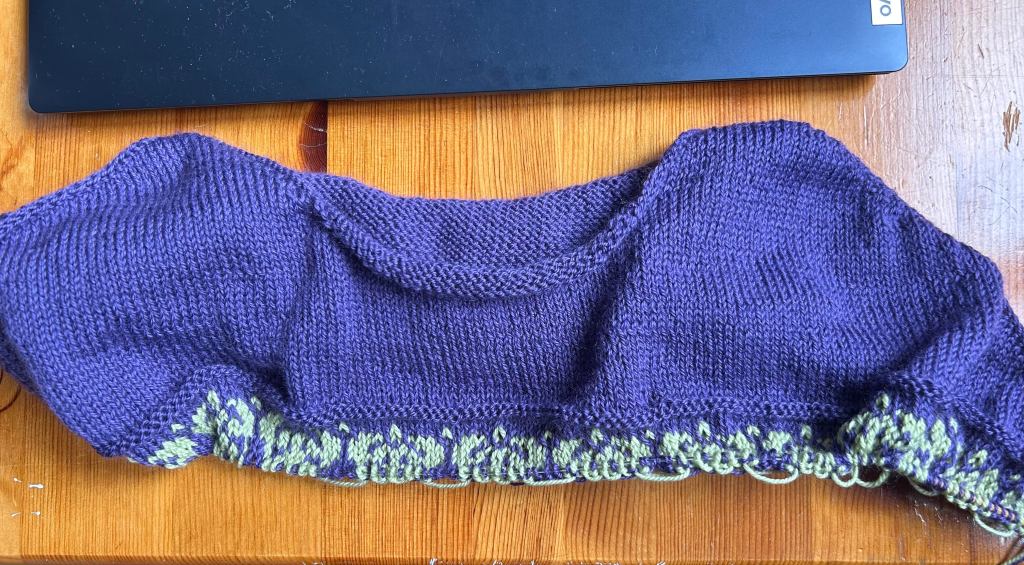
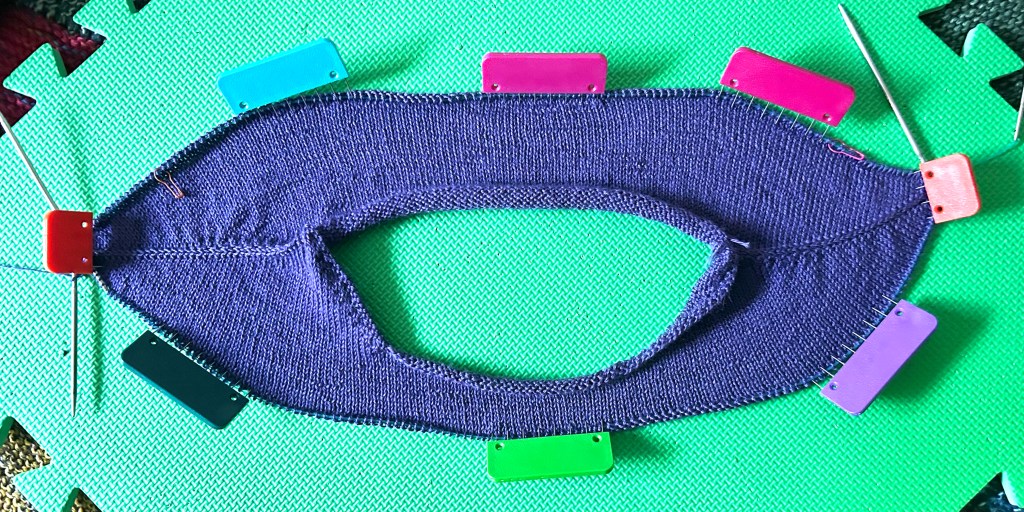
begins with the neckband but I’m working a colourwork pattern on this version and will use one of the colours for the neckband. I haven’t decided which colour yet so I just cast on the number of stitches, purled one round, and did the short rows against the cast on round.
Have you tried a contiguous sweater? This is an amazing way to make a drop shoulder sweater. In the contiguous method 2 increases are worked at each shoulder, every round. It is really easy to work.
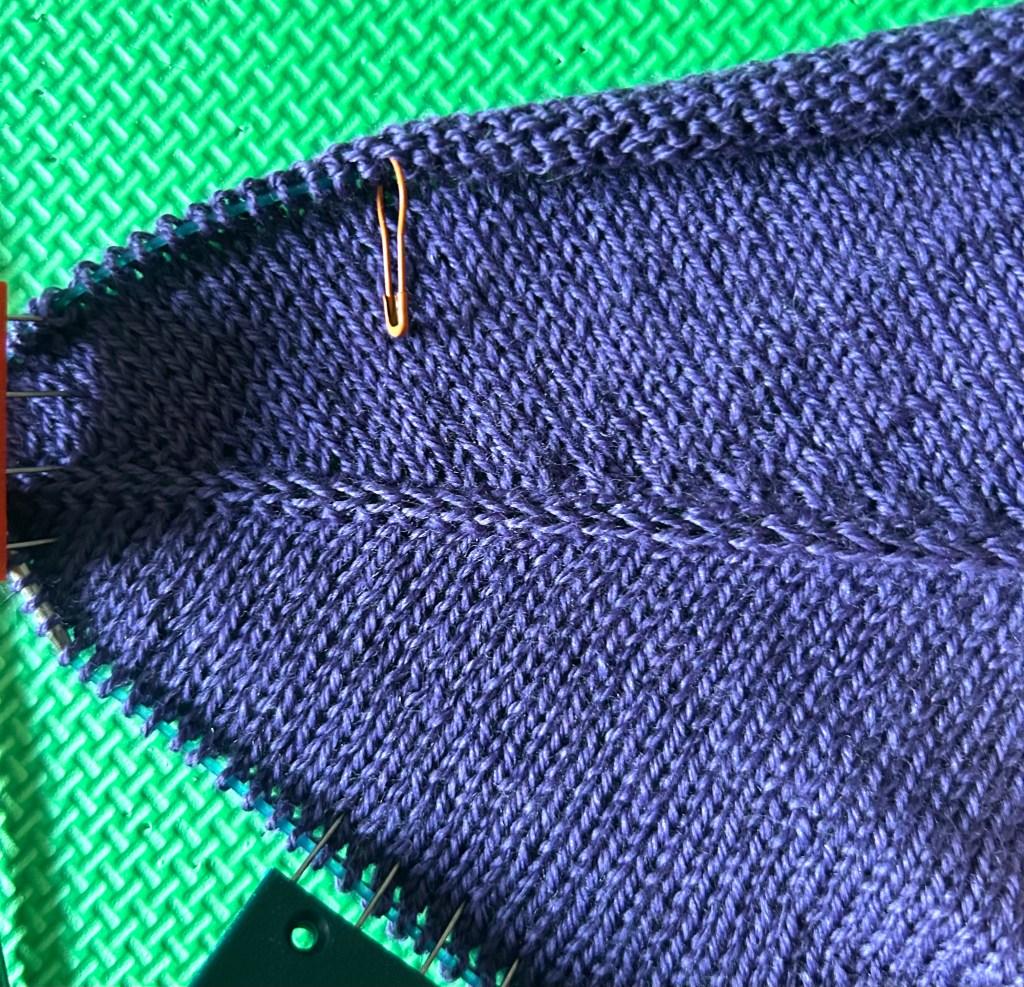
The short rows are worked right away to lower the front. They are worked back and forth, knit right side turn, work across the wrong side turn. This is a system of short rows that I unvented (as Elizabeth Zimmermann would say) many years ago and have used it over and over again. The short rows are simple and worked after working a neckband. They usually butt up against a ribbed neckband. In this case, they are butting up against my cast on and one round of purling.
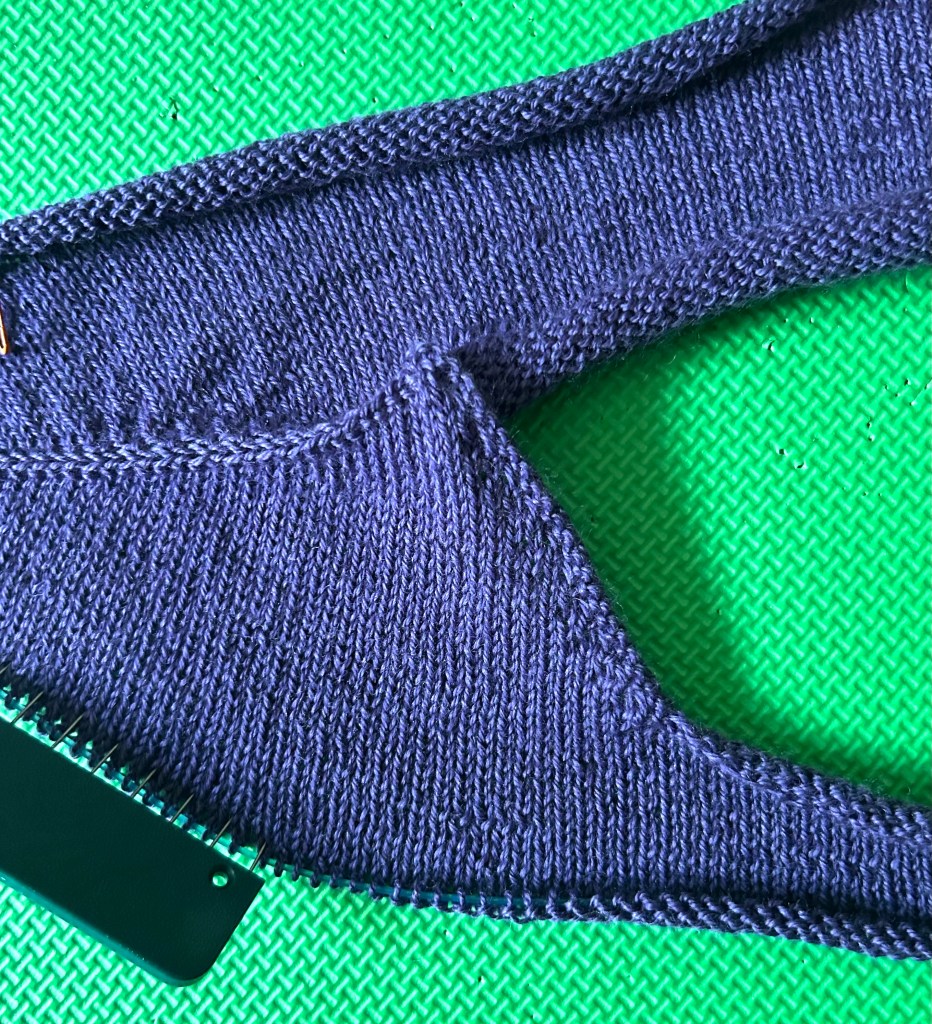
These short rows make a nice angle to drop the front of neck.
I am working in the purple (Shelridge yarn, 80/20 fingering – iris) until I have the width I want. I am going to have 8″ of ease, not as big as the sweater in the pattern photo which had 10″ of ease, but this is in much finer wool. That’s around 169 sts across the back, at my gauge, and considering my 12 st colourwork pattern repeat. I have put markers on either side of the centre 100 sts on the back so I don’t have to keep counting across them all every time.
*If you are receiving this blog on Mailchimp, please sign up on Debgemmell.com to continue to receive it. My Mailchimp account is closing down because I don’t do a separate blog there. Thanks for staying with me all this time. Hope to see you over on WordPress. Cheers.*
I did a video. Phew, it’s taken a bit to get started again but here it is. Hi, I’m back.
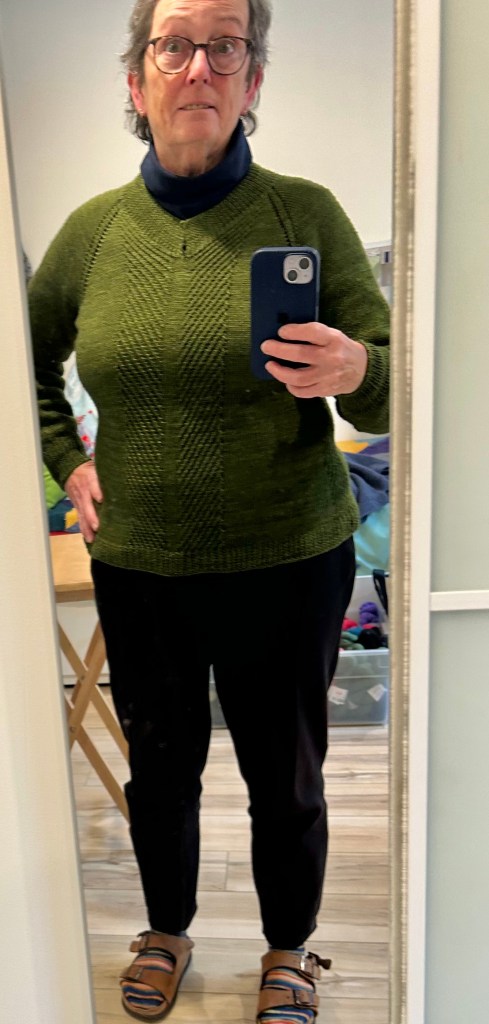
I got the sleeves done on my Just For You V Pullover. I am patting myself on the back for getting that done. Yay me!
I must admit sleeve knitting can put me off stockinette stitch knitting for a bit. It’s not the knit stitches, because I totally love garter stitch, it’s the sameness of it. I usually put some design element in the sleeve to keep myself busy but this time I didn’t for no obvious reason I can think of now. That was a mistake. So no stockinette stitch for a while (except for socks, of course).
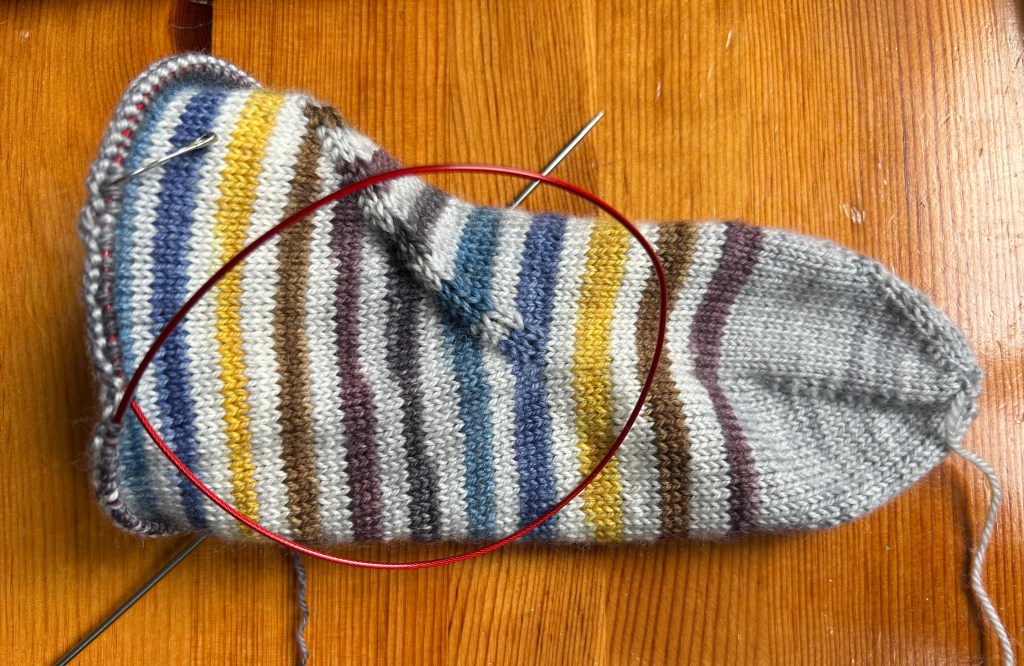
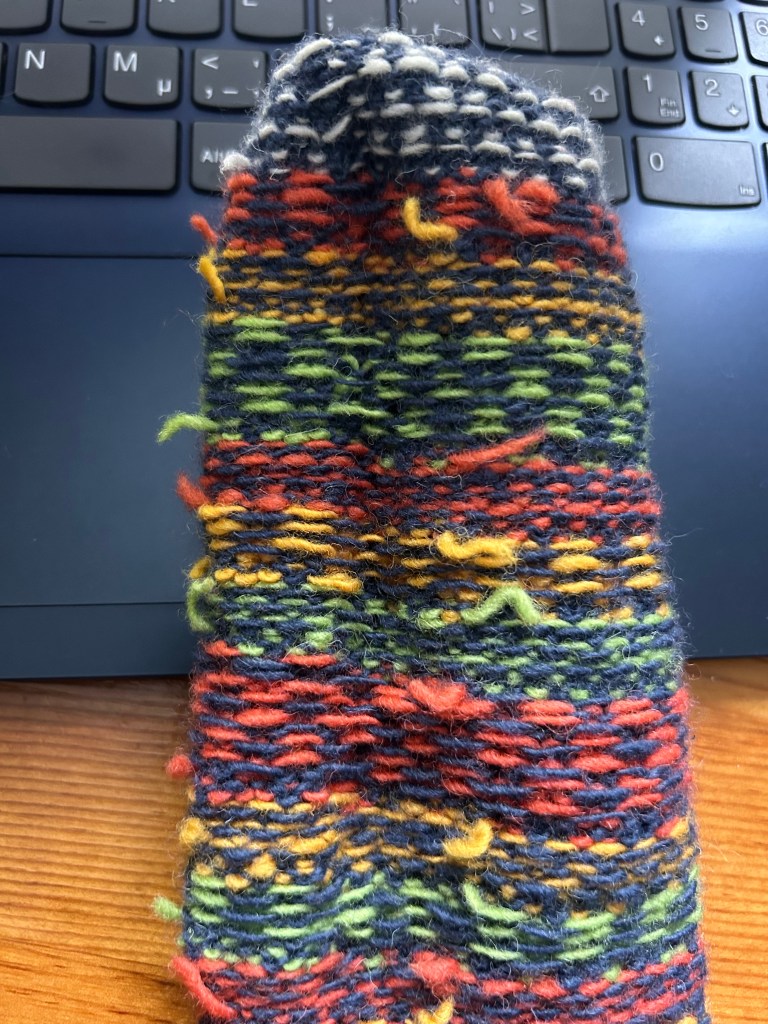
Speaking of socks, I’m going knit socks to stockpile them for birthdays and next Christmas (who is this person?). I’m continuing with Cat Bordhi’s New Pathways for Sock Knitters book. The next toe-up is the Corialis Architecture sock. The swirl is so cool and at this point I don’t know if the swirl is going to run into the heel flap or get above it. How can it swirl around the entire sock and if it doesn’t? I can’t see it yet. These photos assure me that it will.
That’s keeping me engaged in this sock. Weird as that is, it’s the possibility that it might fail that keeps me knitting. Is this totally off base?
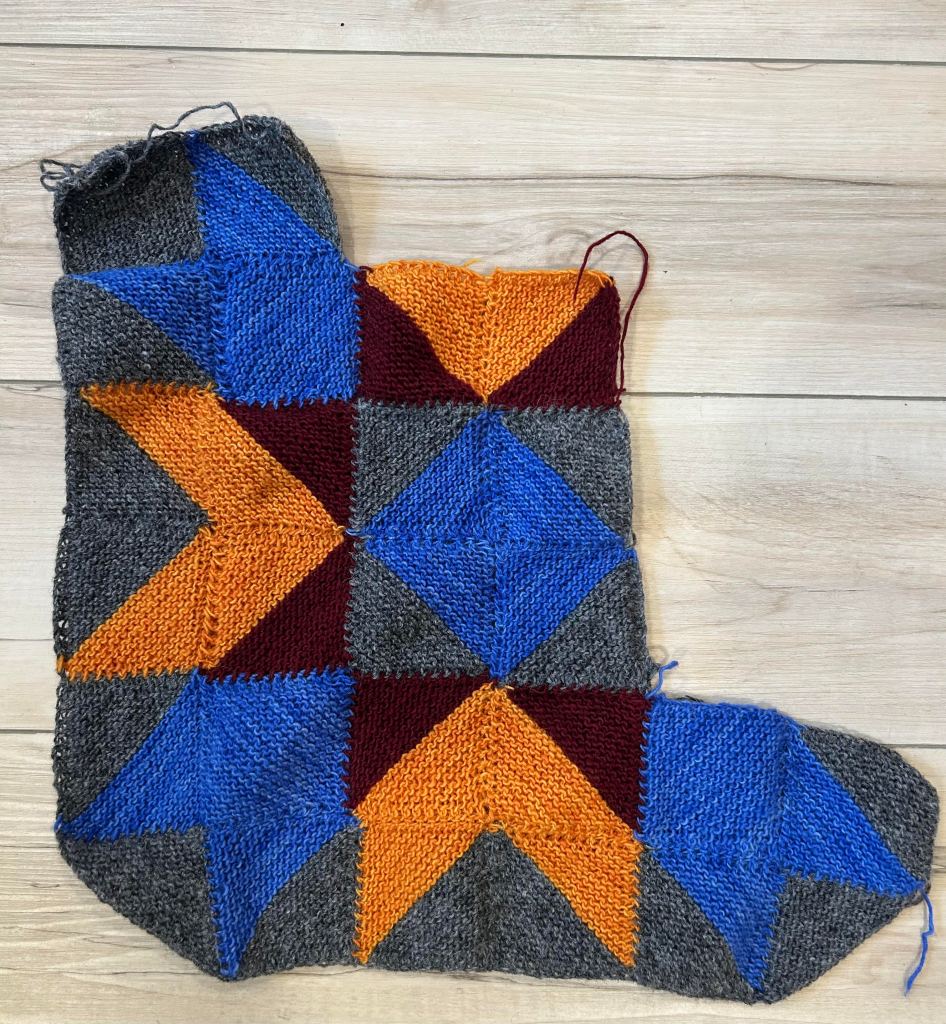
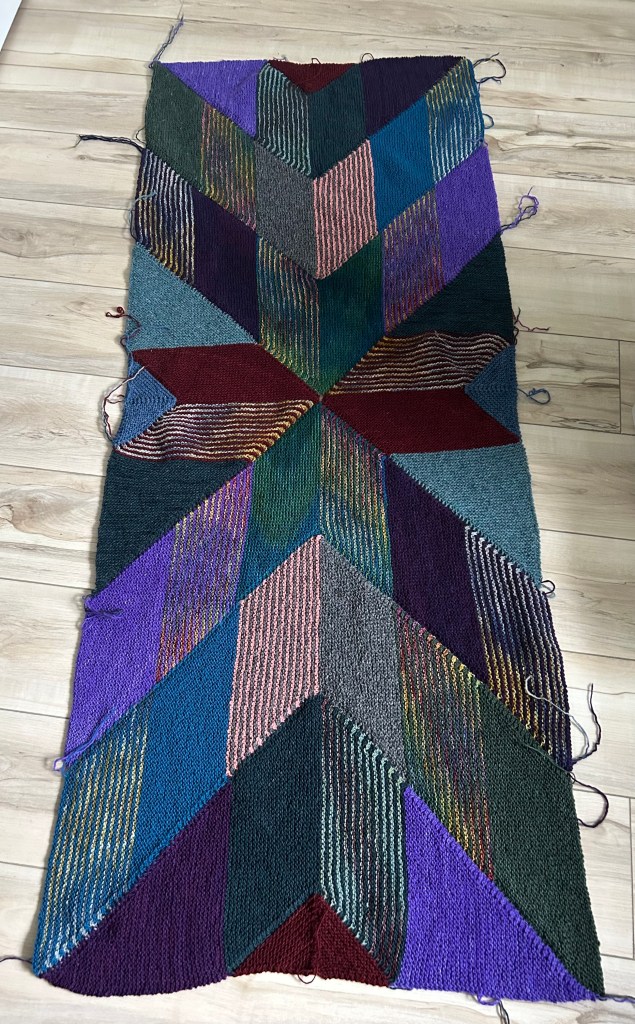
The modular knitting continues and continues and continues. Project number 3 with the Lichen and Lace Rustic Heather wool is the Clint shawl by Moonstruck Knits. Here’s where I am so far. The first corners are not great, worse than that, they are terrible. I do feel like they are getting better as I continue on. I almost stopped a couple times and started over but I gave myself a talking to about being a perfectionist and got over myself, at least I think I did. (I still see those miss aligned corners every time I pick it up, argh.)
I do have enough yarn to keep knitting squares for another shawl or blanket with hopefully better corners. The corners are the reason I am not a quilter. I can not do them nicely with fabric either!
Let it go and have some fun. That’s what it’s all about, right? That’s what I’m going to do.
Do you Christmas knit? I can’t decide this year if I’m going to it. Although I have been playing with mittens recently and they could be presents, right?
These are done in fingering weight wool by Waxwingyarns. I started at the tip of the fingers and worked down to the wrist roughly following my Any Gauge Mittens, Top Down pattern.
How about all those yarn ends to sew in?!
I didn’t have any. Huh??
I had one navy round worked between each of the stitch patterns. On that round I would weave in the colour I had just finished working with over the first 7 or 8 sts of the navy round, knit the navy round to the last 7 or 8 sts, and as I knit those last stitches I would weave in the new colour for the next pattern. No ends to weave in, magic!
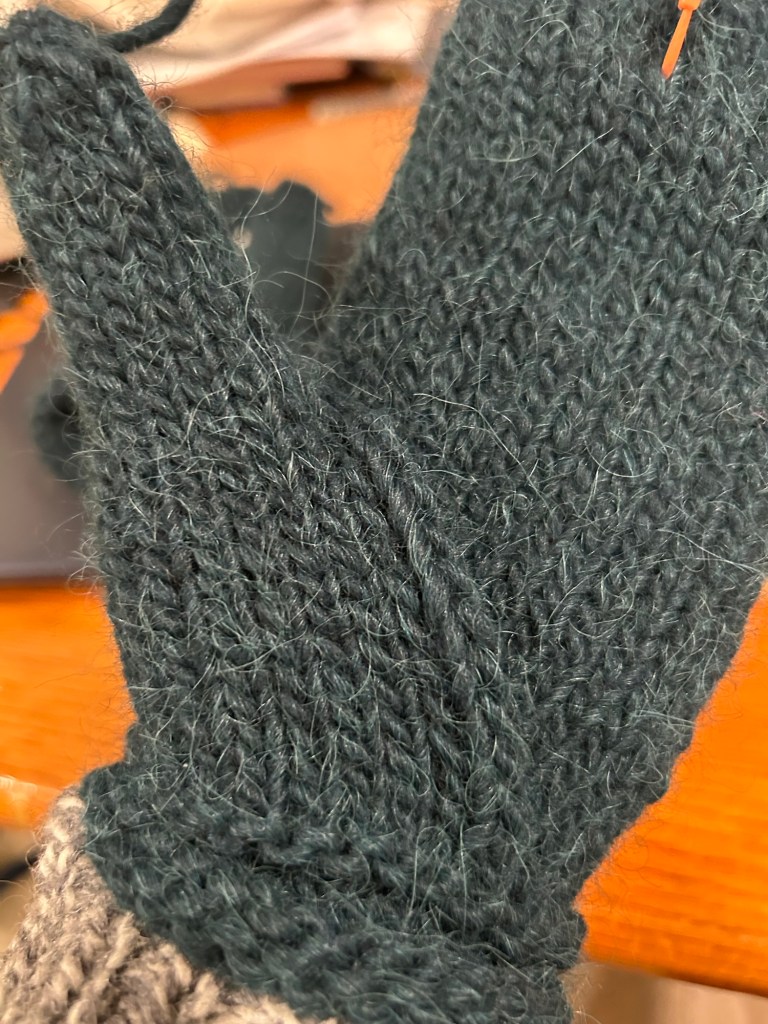
More mittens. These are also knit from the top down to the wrist. In this case I worked 4 increases every round (1 increase at one side edge of palm and then on the other side and same for the back of the hand) until I had the number of stitches I wanted.
I’m working on doing decreases in the top section of the palm side so they conform to how we hold our hands while walking. The palm will be slightly narrower than the back of my hand.
I also knit my thumbs as a large I-cord.
Once I add the thumb in I decrease every round along the lifeline on the hand down to the wrist.
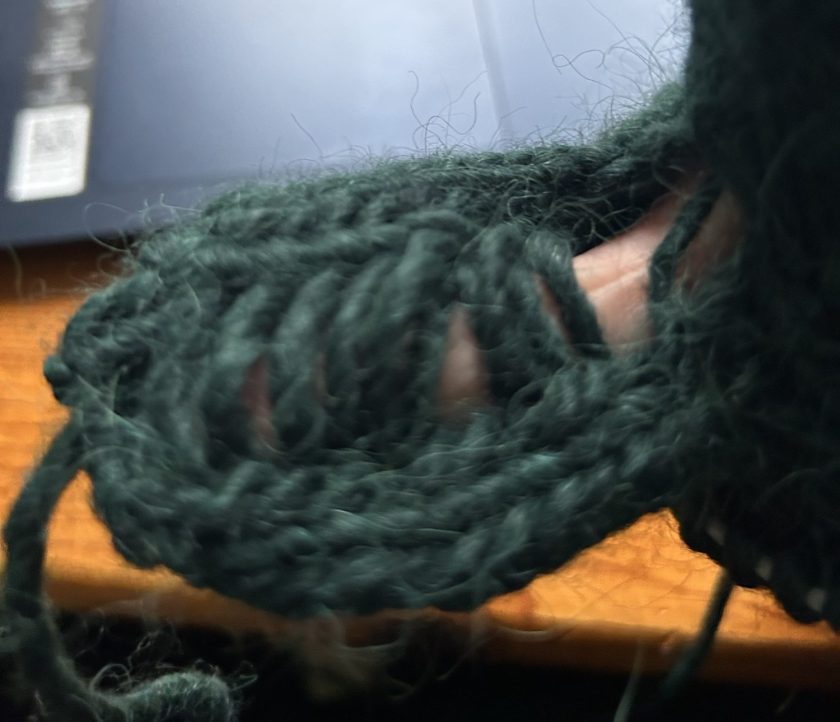
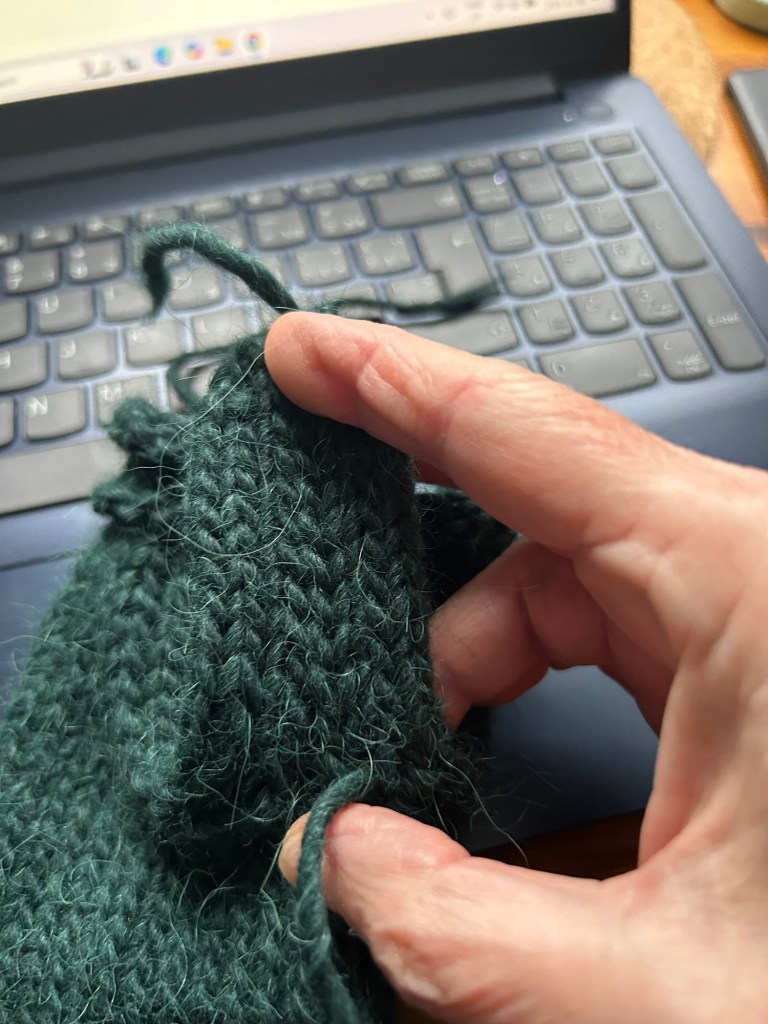
The goofy thumb is right there. I take a crochet hook and hook up all those ladders. This works great for any mittens knit with Aran, heavy worsted or chunky weight yarn.
After being hooked up.
I also finished knitting the Polaris Wrap as a blanket, in sports weight wool by Briggs and Little and Lichen and Lace. I am so very pleased with this blanket. I really enjoyed the modular aspect of it. I have a lot of ends to sew in but a couple evenings will do the trick.
I have posted a new Vlog post with more information and to show you several 3 Tier Shawls I have knit.
If you’re doing Christmas knitting what are you knitting? Small things at this point in time I would suspect.
I’m so excited to be here in Northern Ontario. I look forward to it every year. I especially like being outside most of the time. Once we are here at our cabin, it takes several days to get everything sorted: empty out all the stuff we store over the winter in the cabin, clean up after the mice, do some laundry (mouse related), set up our water, grocery shop, etc. Now the weather is heating up, it’s a pleasure to be here.
Here’s a video tour of me in my happy place.
As you can see my V-Neck Pullovers are progressing well. I’m loving the stripes.
Waxwing, a rustic fingering weight wool
The difference in the two fingering weight sweaters makes my knitting very interesting. The rustic wool by Waxwing is somewhat more forgiving. I’m using it to try to get more practice not looking as I knit. It’s sort of working. Can you do that?
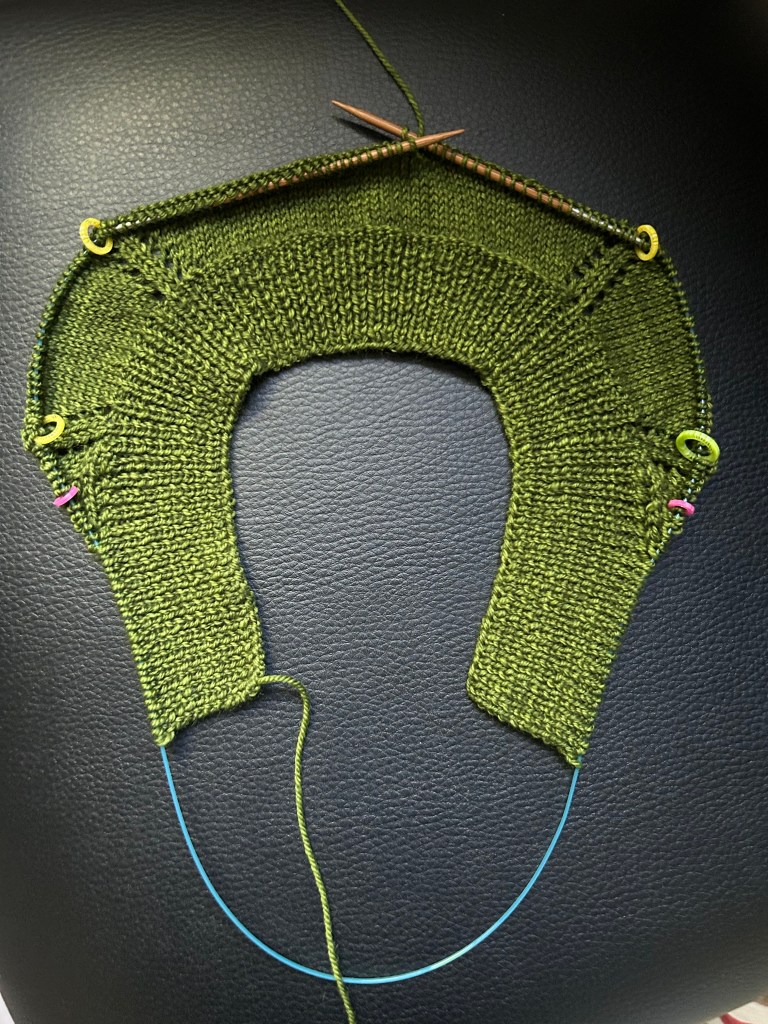
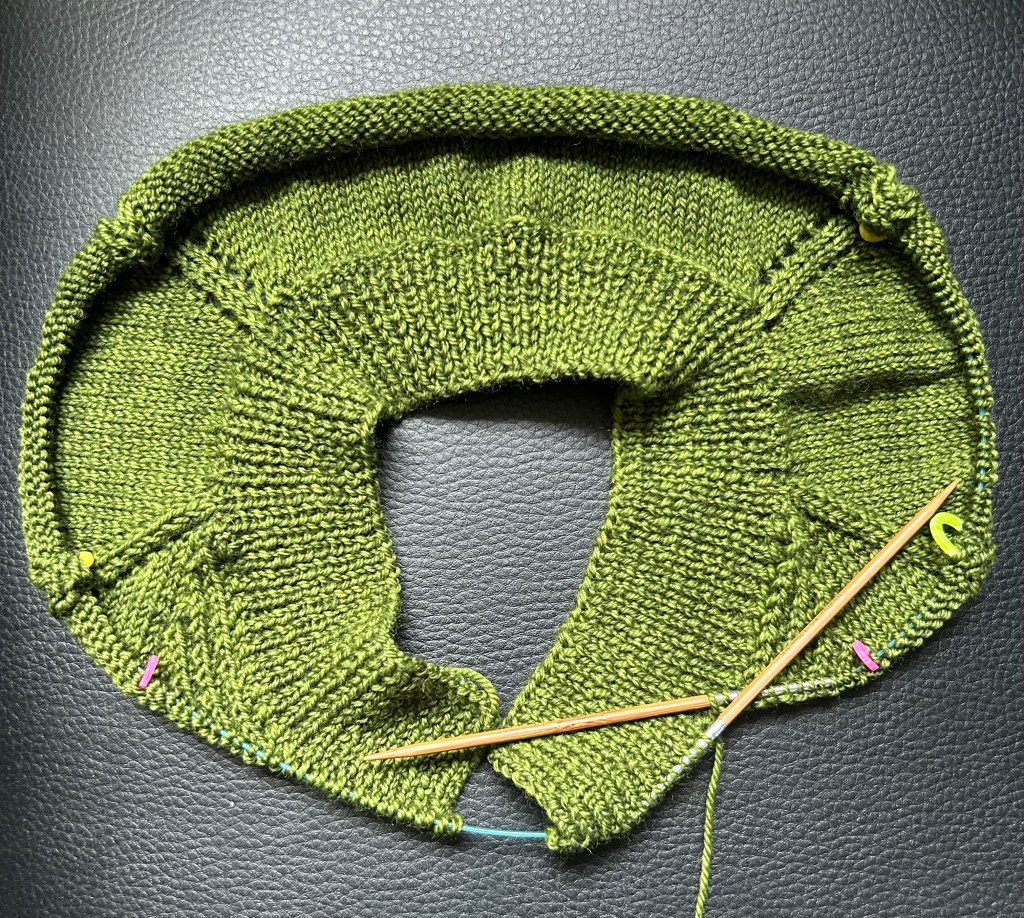
This green one is in Shelridge 80/20 fingering and because it’s a superwash the yarn is lighter and much smoother.
The pattern for this one is sitting for a couple more days as I work myself up to doing the charts for the twisted stitch pattern.
I love twisted stitches so I’m enjoying this no end. How do you feel about them? Love twisted stitches or not so much?
I’ve started a couple of new projects since I found that knitting one or two things is w-a-y to monogamous for me. I did a video. It’s at the end of the post.
Did I show you my third Twelve-Point Circular Yoke yet? I had some Hempton yarn left over. I have enough to knit my daughter a striped version. This is so much easier than the helical version. The simple stripes are 6 rounds deep. How easy is that?
I used the RL1 and LL1 lifted increases for the points. I think they look really nice. One more stripe to go before I can take the sleeves off.
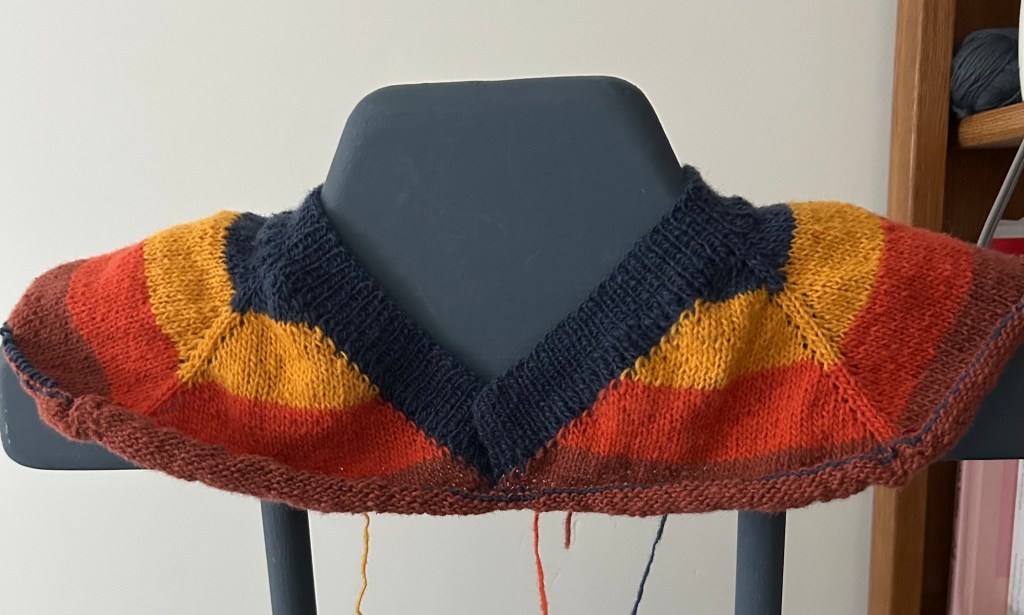
The new project I wanted to tell you about is the Any Gauge V-Neck Pullover. I’ve started knitting two of them, of course. This is a top down worked in any gauge of yarn. You start with the ribbed neckband, then you work short rows up again the neckband. As you work, the V shape is made.
One is using left over wool from the mitts I knit. This is fingering weight rustic wool by Waxwing.
Big stripes of bright colours. I’m loving this. Don’t stripes make everything go faster?!
Next stripes are navy, light blue, medium green and then lime green. Bold!
I’ve made some progress on the short rows. I’ve added a panel of twisted stitches to this one. They follow the slant of the V and get wider and wider as you work down the V. This is an experiment!
I’ve never charted the short row section for this type of neck before. You may see this as a modification to the pattern or maybe not. I’d have to hand write the chart because it is weird. We’ll see if this works out or not.
All of these are in the pile of projects to take with me. I also have another Lunenburg to finish for my son-in-law. He chose green, red and grey Sport by Briggs and Little for his colours. I added in some black too. I didn’t follow the colour changes on the chart exactly, ok, hardly at all, so it looks really different from the one I made myself.
I printed the chart in black and white and then just change colours when I wanted. It’s freeing and, well, sort of worked out.
I’d like to try it again with some variegated wool that would do all the colour work for me. No ends to sew in. I know lazy, lazy but it could work really well and I already bought some Lichen and Lace wool to do it! LOL.
So here I am still planning on knitting several sweaters over the summer. Am I setting us up for a really hot, humid one?
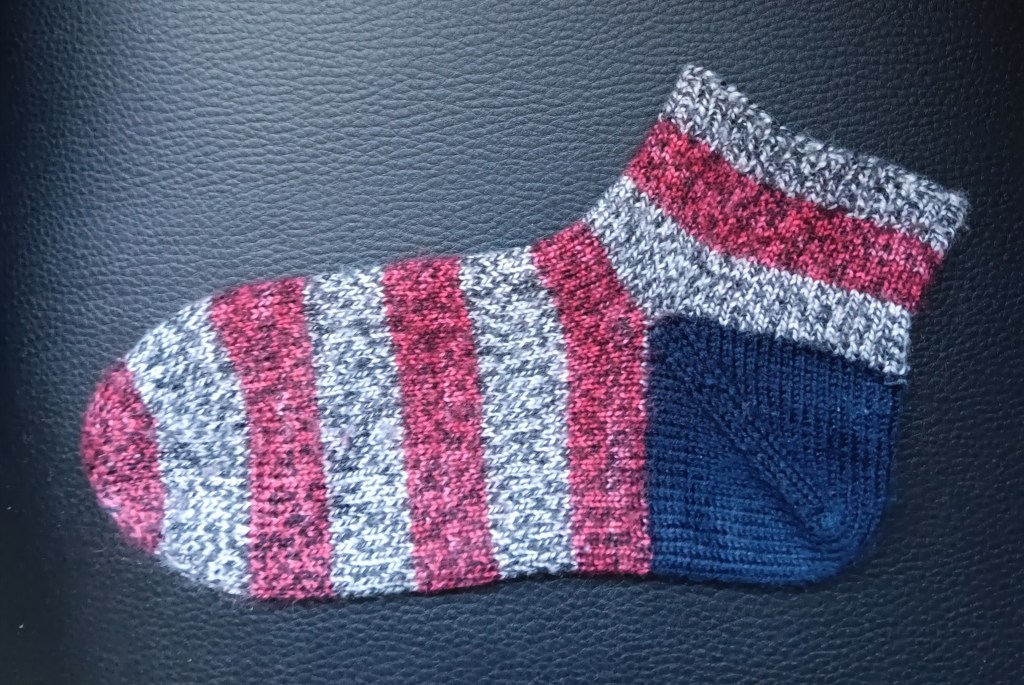
There is one problem though. Where do you begin to work the heel for your desired length of foot?
I have come up with a solution, using a standard type of Short Row heel that gives you that 45 degree line on the heel.
Timber Yarns
I use a wrap short row heel but the shadow short row heel or the german short row heel all work.
Can you see that the heel and the toe look somewhat similar?
I have come up with an idea of how you can use the size of the toe to figure out the length of the short row heel.
Here’s my video.
I wrote up Sock Freedom, an idea for a Toe-Up Sock with a Short Row Heel. It’s a Project Page. There is no stitch by stitch pattern but the project page will give you instructions for taking the measurements and applying them to your sock.
It also includes a modification, of course, for giving you a bit more space for the instep if you need it. I do. You can make a slight gusset for more stitches on the top of the foot so it’s wider where the heel is.
This is totally working for me. Let me know if this is helpful.
The sock idea I talk about in the podcast has progressed a tiny bit since then. The video was yesterday after all. LOL.
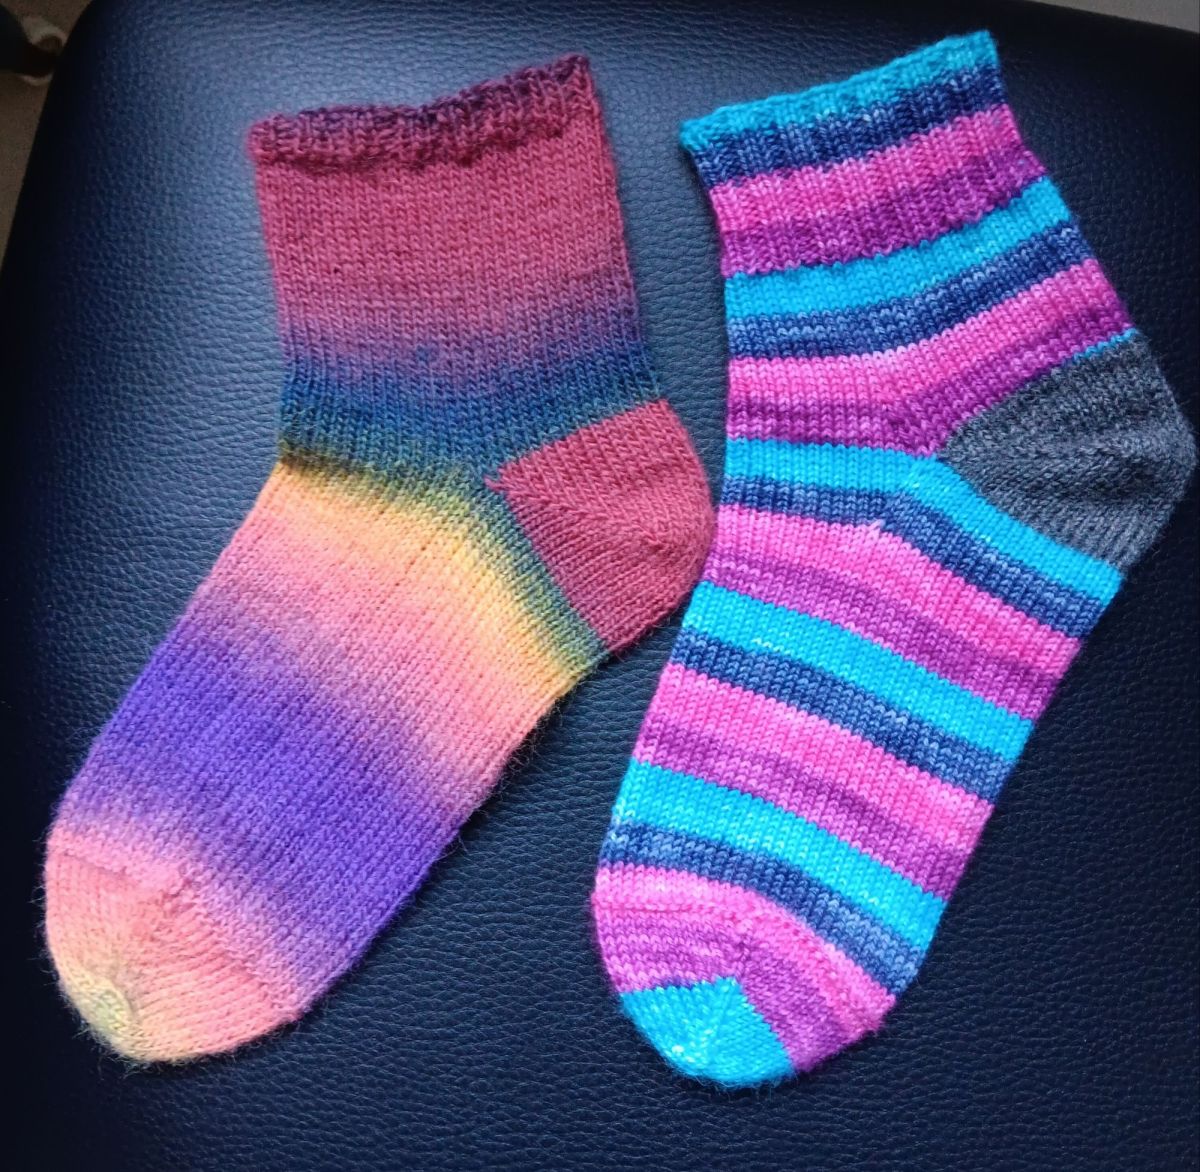
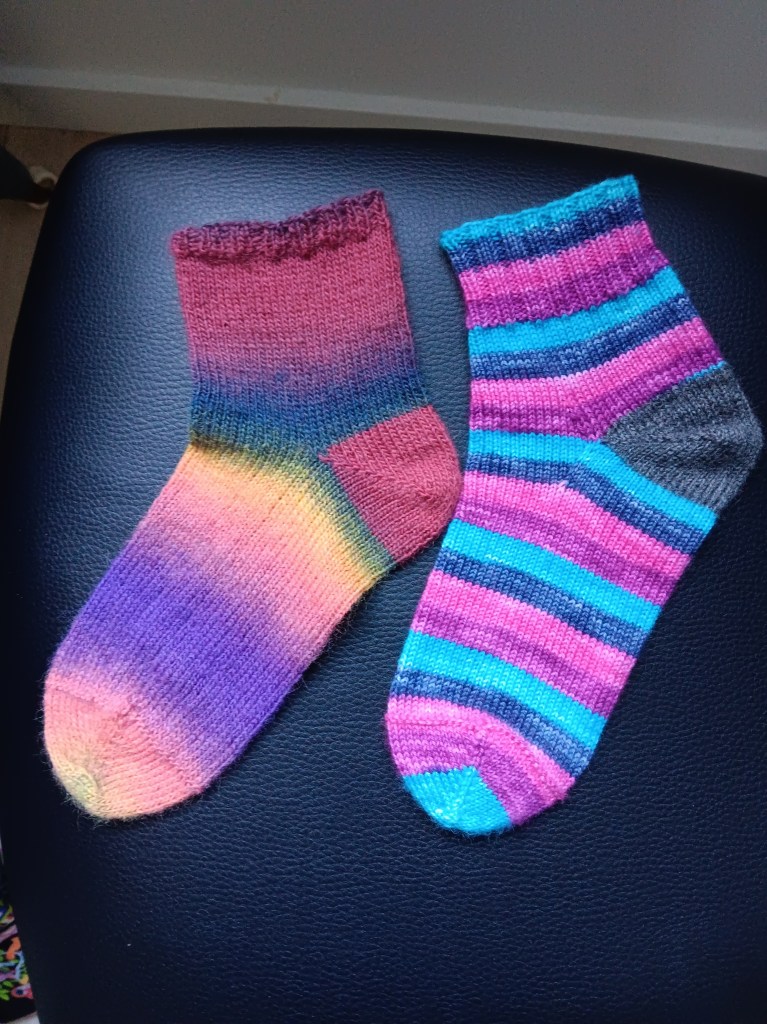
Timber Yarns, twin sock sets (2 x 50g balls with the same stripes).
I tried these on and they are tight around the ankle, at the heel. I need a little more room there. Some people do and some people don’t. Which are you? You probably know your own feet as a sock knitter.
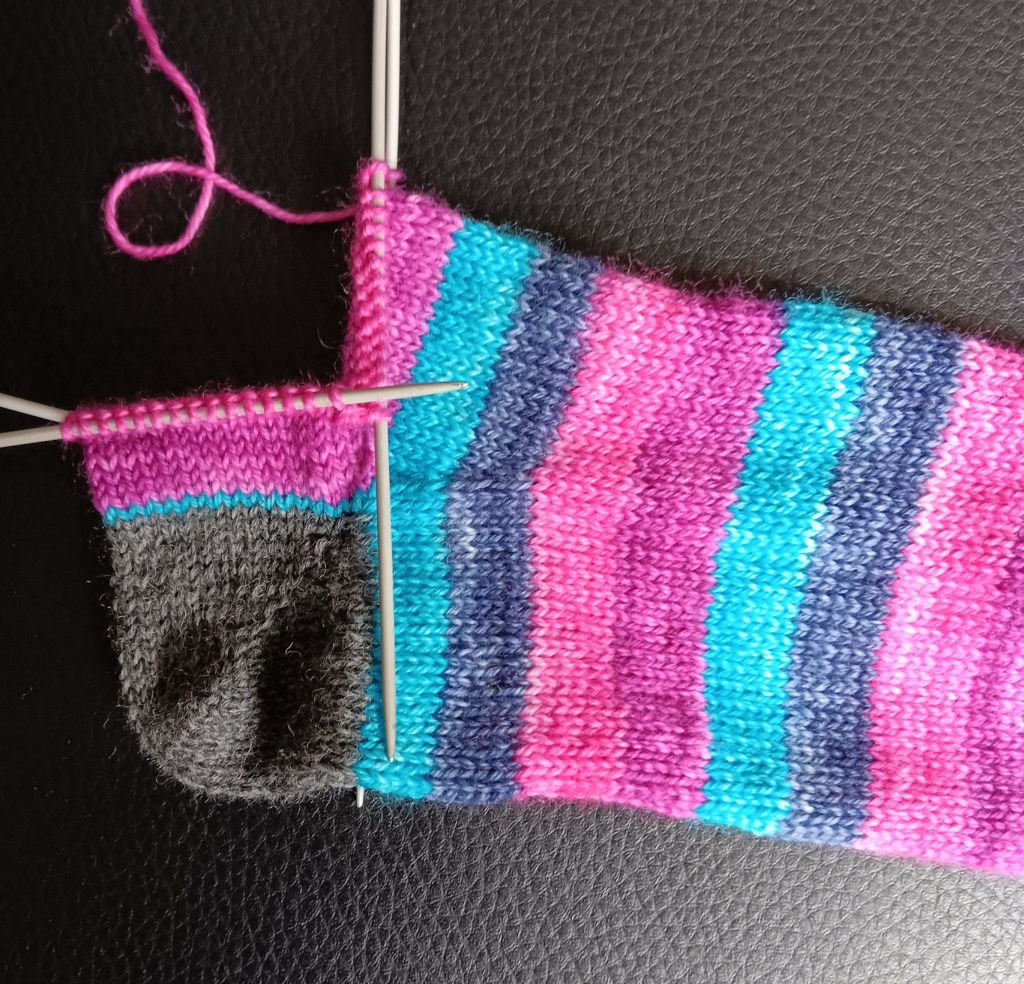
This is a short row heel on half the stitches of my 60 stitch sock. In my case, for this sock, that is 30 sts.
I usually do a short row heel on 60% of the total sock stitches, which would normally be 36 sts for the heel on a 60 stitch sock. That gives me enough room around my heel. I just took this sock, with a heel worked over 36 sts, off my foot! You can see a much deeper heel.
I think you can see that the deeper heel gives me more space around my ankle. So I ripped back the totally finished lovely heel, sigh, and an extra inch of the foot. (This is what makes designing sooo much fun!)
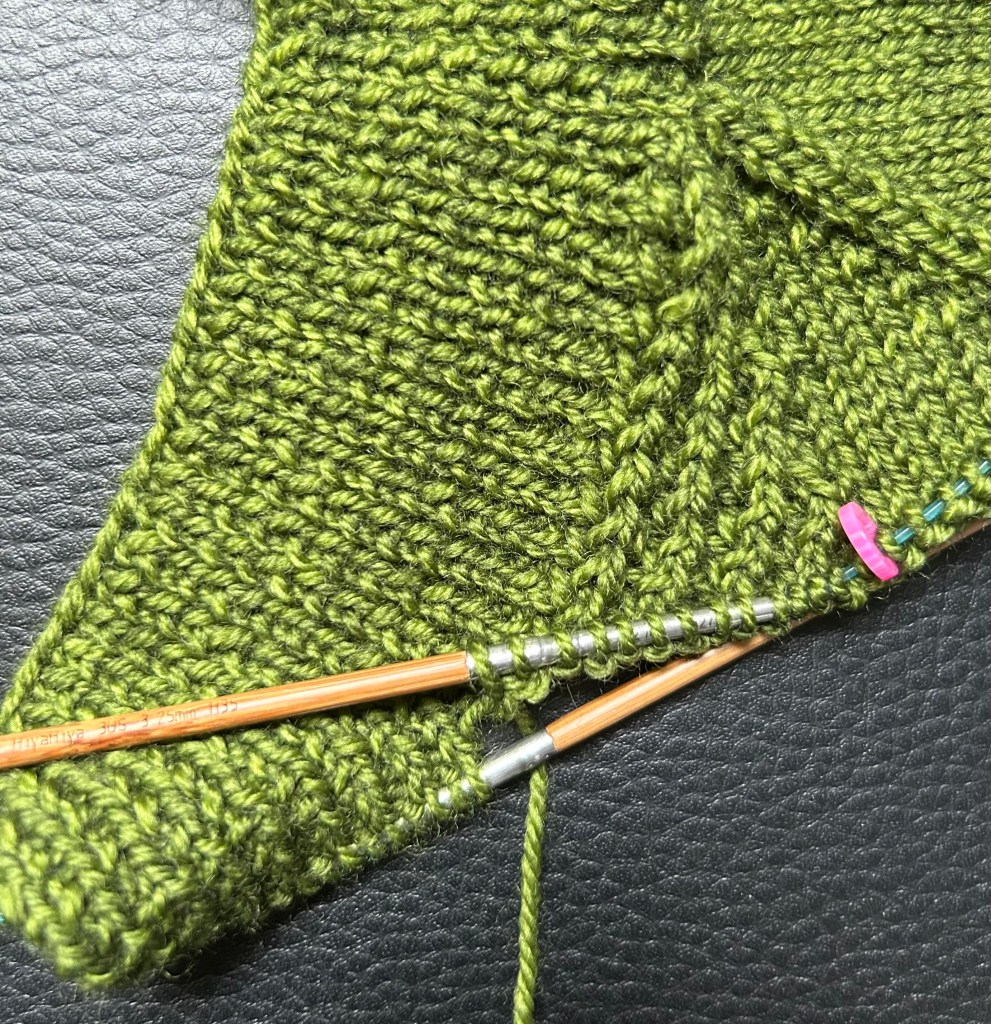
To rework for more ankle room, with 1 inch to go before I start the heel, I worked 4 sets of increases on either side of the top of the foot (8 additional stitches on the top of the foot).
Then I worked the heel again on 50% of the original total number of sock sts (30 sts).
Definitely more room. I tried them on and it’s much more comfortable (except for all those dpns, of course). I decreased the extra stitches away, back to the original 60 sts, as I worked the leg. This is sort of an increase gusset and then a decrease gusset. This seems to be working. Hoorah!
Is second sleeve syndrome a thing? If you suffer, here is a solution. Knit both sleeves at the same time on two circular needles.
It’s a messy start, which you know if you have ever attempted to knit two socks at the same time. So here goes.
This is my Lunenburg pullover which I am really anxious to wear. I have done 5″ on both sleeves. It’s going to be a fabulous spring sweater.
Meanwhile, the Twelve-Point Circular Yoke is moving along. I’m past my waist now and have been working some hip shaping on the Back of this sweater. The end of the body is in sight, well, not exactly in sight, but you know what I mean.
Working on only 2 sweaters feels like monogamous knitting to me. I think I need to add another project to be comfortable. Maybe a pair of socks would fill the void. I’m thinking of casting on this week. I think I know which pattern I’m going to use, but I hate to say it because then I’ll probably change my mind, so it will be official once they are on my needles… although a shawl would be nice too. Sigh, so many options.
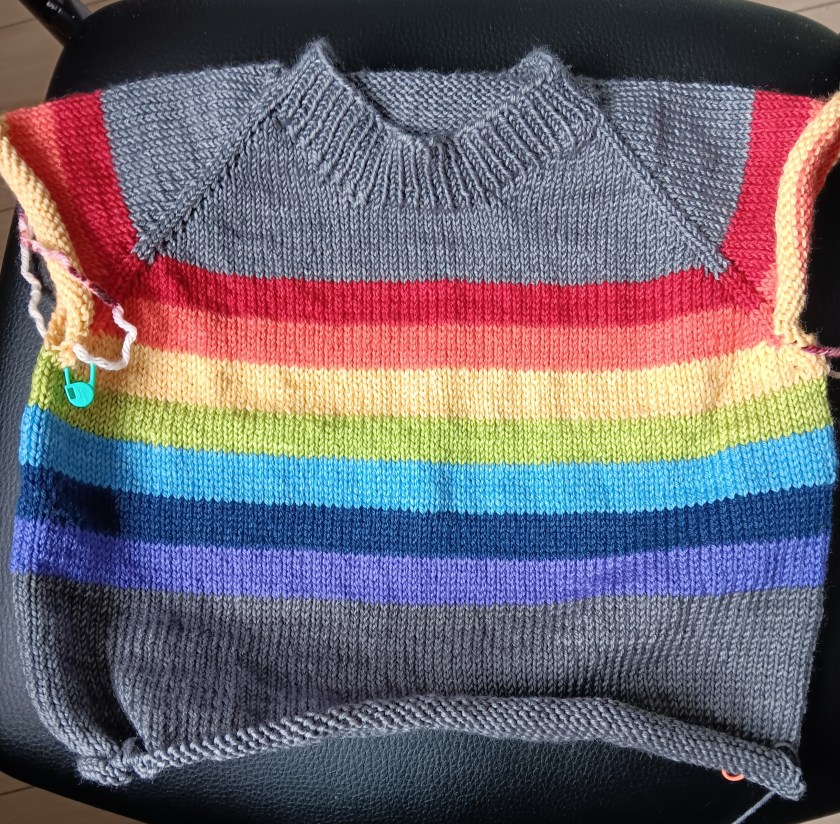
My Family Crew Neck is just buzzing along. Therainbow stripes were a great motivator. I wanted to see what each new stripe would look like.
Now I’m at the point in this Family Crew Neck where I get into trouble. I want the body to be done, so I measure every couple rounds, thinking it will be the length I need before I start the ribbing. Even stretching the tape measure isn’t getting me there and you know I’m trying. Every time I’m sure that I must be there by now! Nope. A couple more rounds, a couple more rounds, a couple more rounds.
This is my weekly Youtube video if you want to see where I’m at on my two sweaters.
To keep my round measuring stress at bay, I am working on my Circular Yoke. The Short Rows are done and now I’m working the helical knitting rounds.
If you are serious about stash busting, this is a terrific technique. It makes one-round stripes, in my case, with 3 colours. That means I don’t have to buy an entire sweaters worth of yarn. I can stash dive and find enough of 3 colours, that when combined, will make up the amount I need for one sweater.
Here’s a video of how I got the stripes started and how to change colours. For this sweater the change takes place at the shoulders. Changing colours in the same place every time is the simplest way to work the helical method.
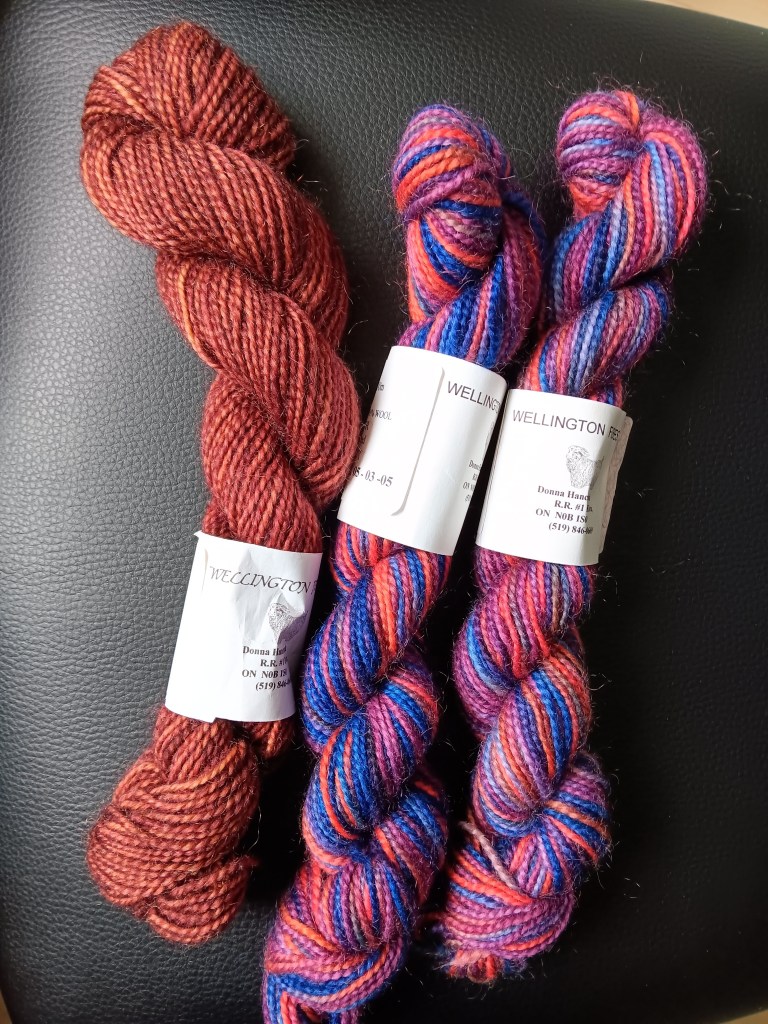
The trouble is that I chose colours that sort of blur into each other, much more than I thought. This is very deep stash from Wellington Fibres.
I am using the brown wool for my increase round, and you would think it would be easy to see, but, no.
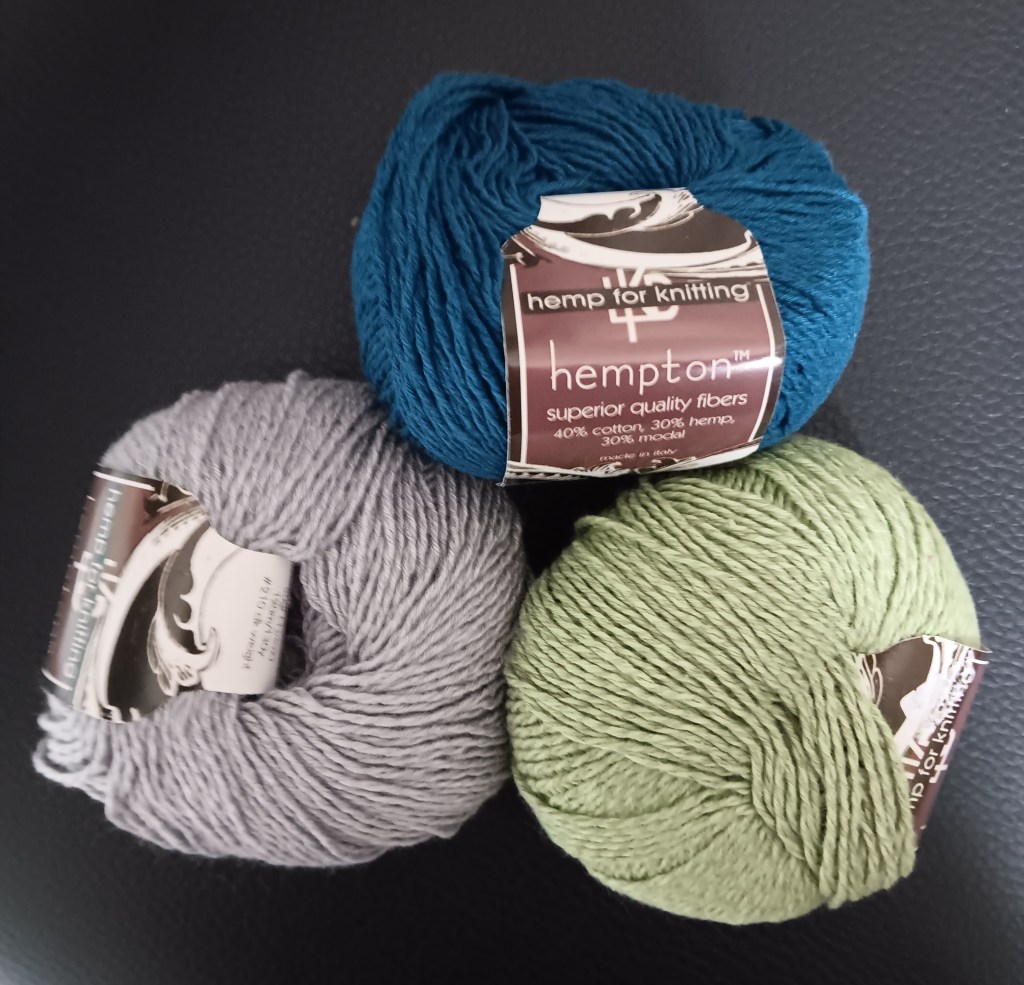
How about starting another one?! Sure, why not. I am thinking of summer here.
I have 8 x 50g of the grey, 8 x 50g of the teal and 2 x 50g of the green. I think that’s enough green to get 3 stripes going in the yoke. This is Hempton by Lana Knits: 40% cotton, 30% hemp and 30% modal. That’s summery yarn, right? Again the grey and green are a little too close in value but I think they will show the helical stripes better. Here’s hoping!