A Couple of FO, Yay.

I’m sure the knitting rule is that if you finish 2 projects you are allowed to cast on 5 more. That’s right, isn’t it? I’m quite sure it is.

So here are my two finished objects. I’m feeling the joy of being at the finish line.

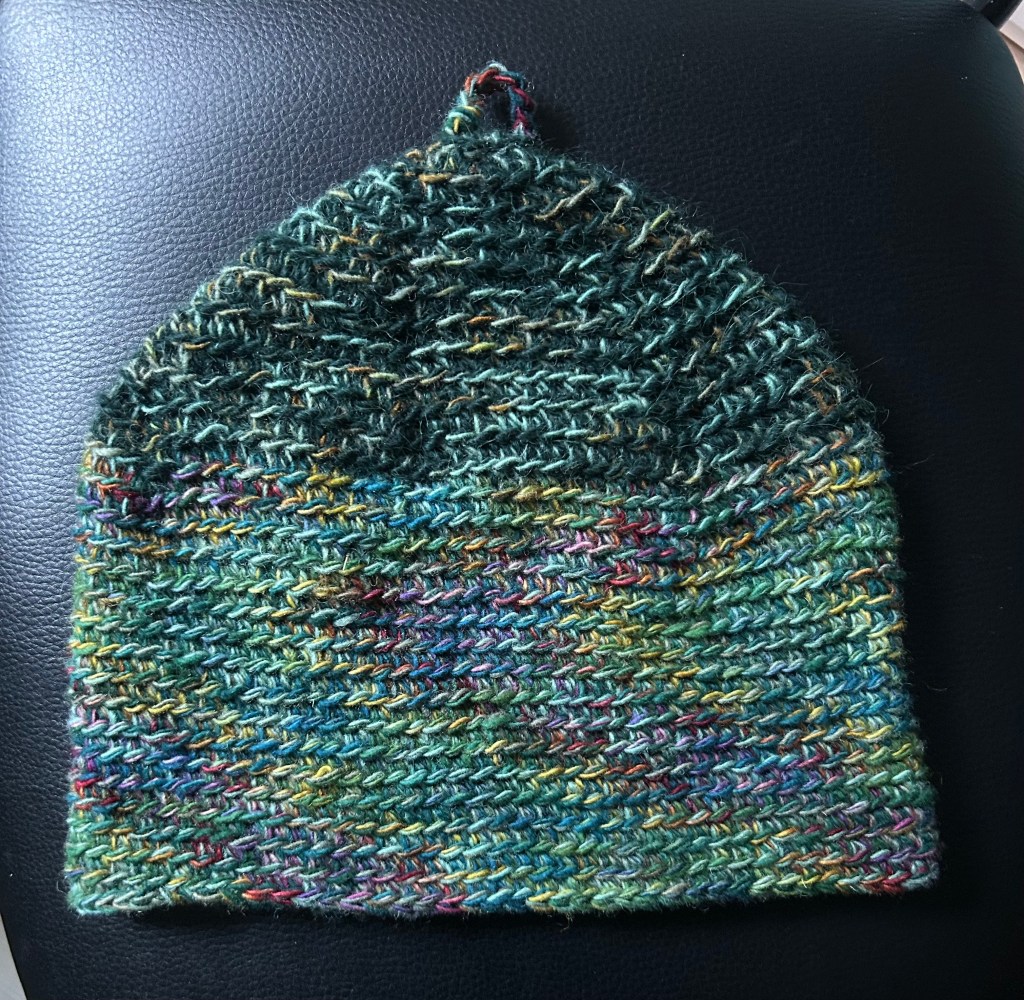
My tea cozy is done. I used an aran weight plus a sports weight held together for the top and 3 sports weight yarns held together for the straight body section. As I had mentioned, I am an incredibly tight crocheter so the funny horizontal lines are because I can’t get my crochet hook under the 2 legs of the stitches to make a single crochet, so I just go into the top leg. It works for me and I like how it looks. Have I inadvertently stumbled on a real crochet stitch?

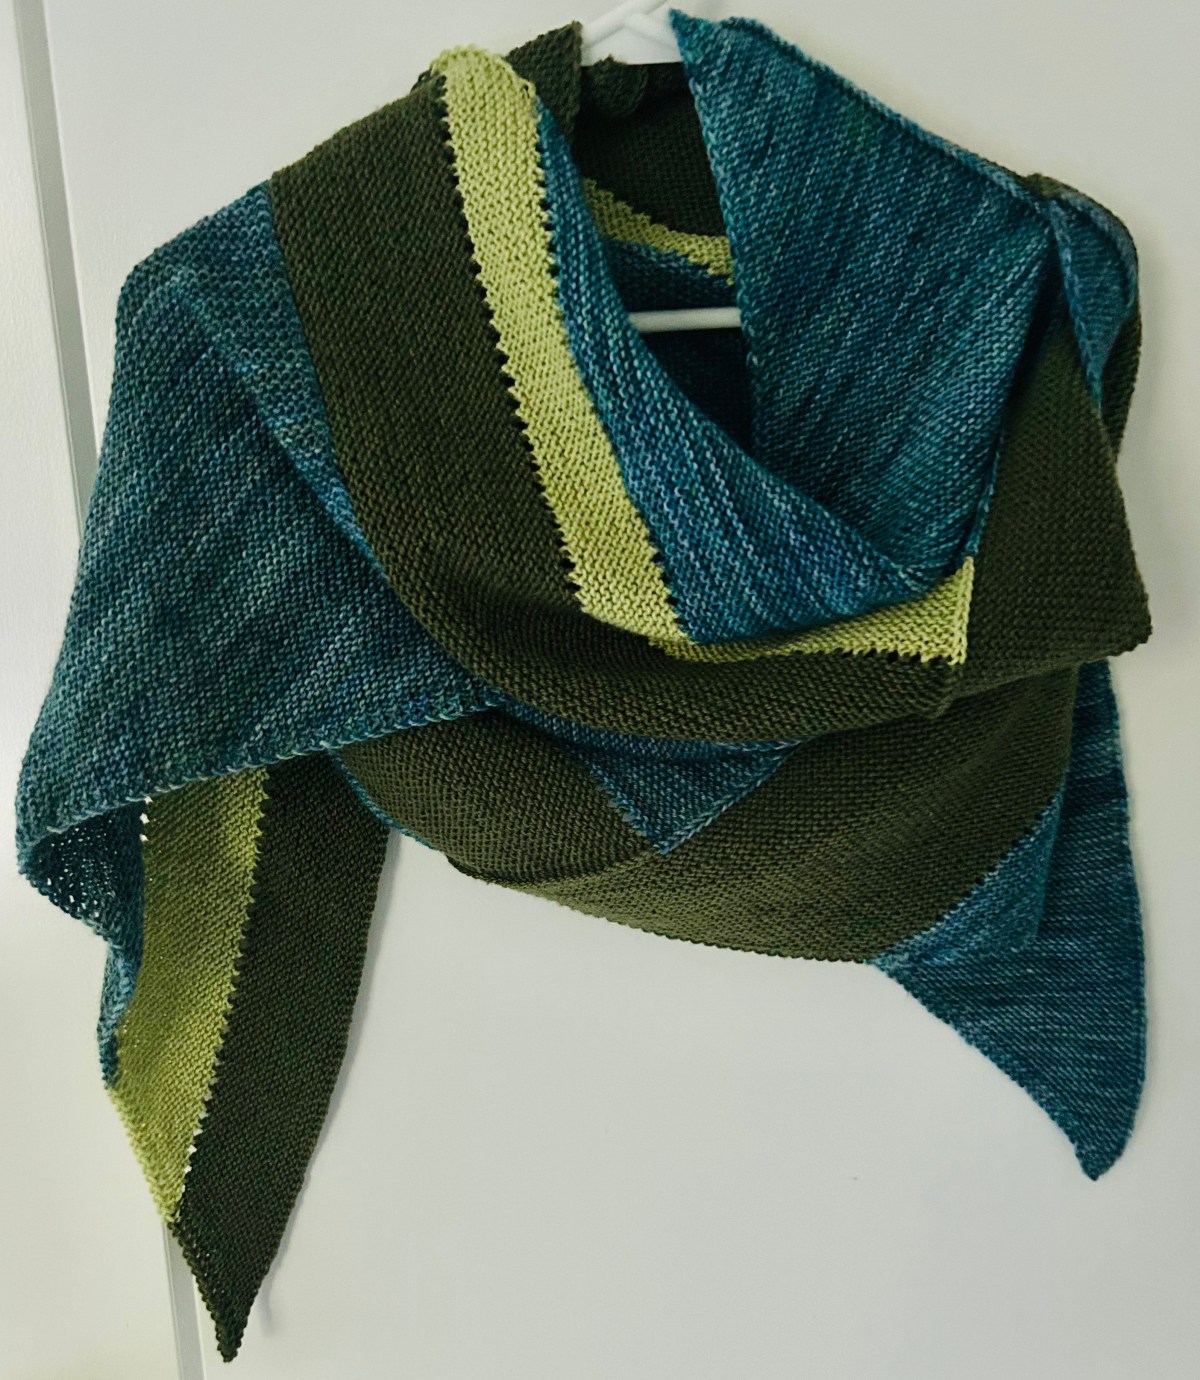
My second FO is my Reversible Ribbon wrap/scarf. Yay. It is easy knitting but an 80″/203cm long wrap is still a large project. I’m all set for winter now. I’ll wrap this around my neck, outside my coat, to hold my hood in place and cover part of my face. I am already warm and toasty just thinking about it.

I added a second contrast colour and am really happy that I did. I’m sending an update for the Reversible Ribbon out with the finished photos in it.

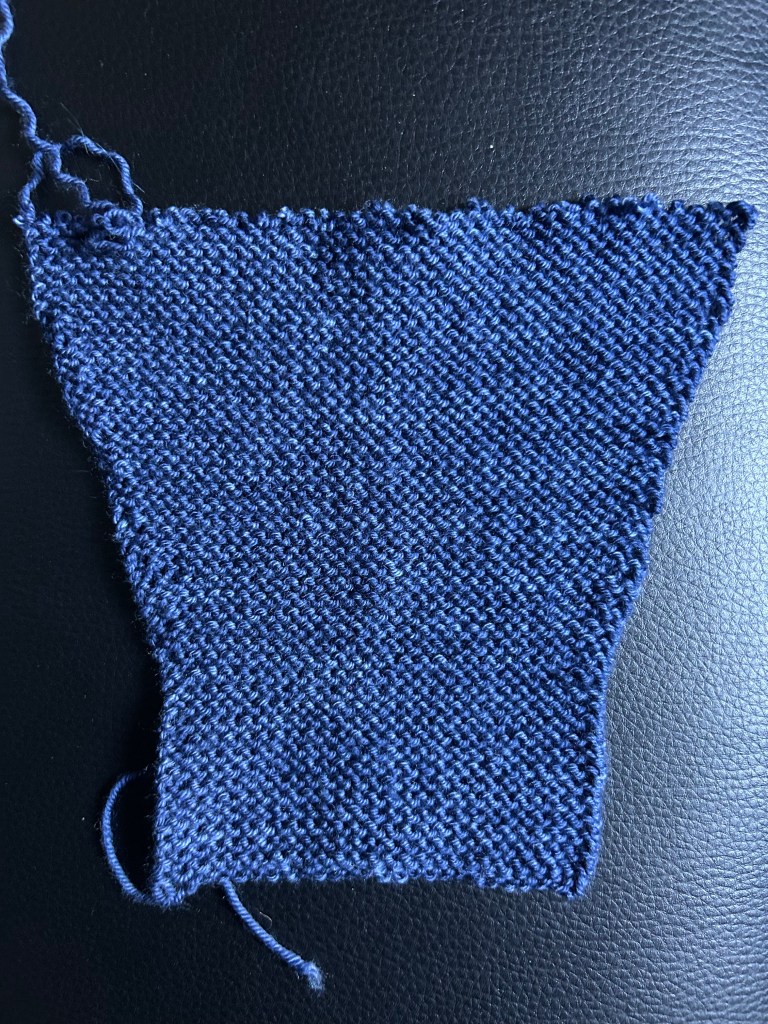
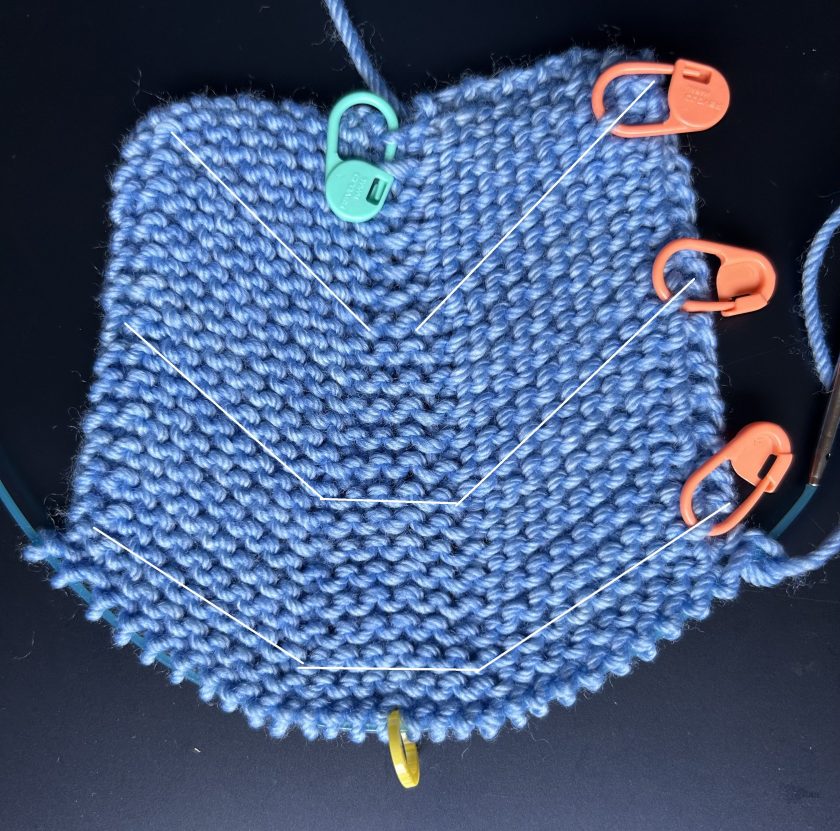
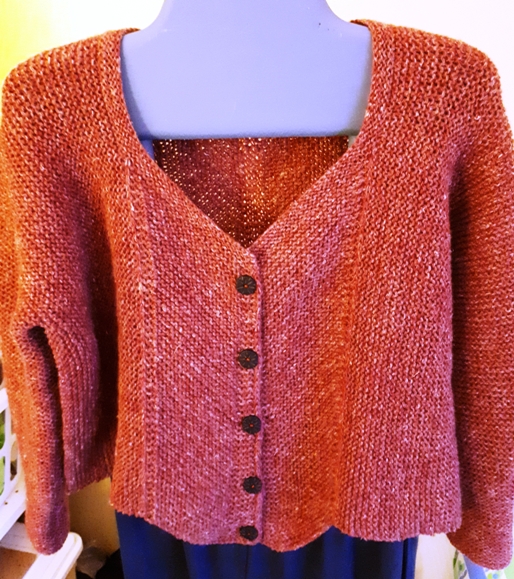
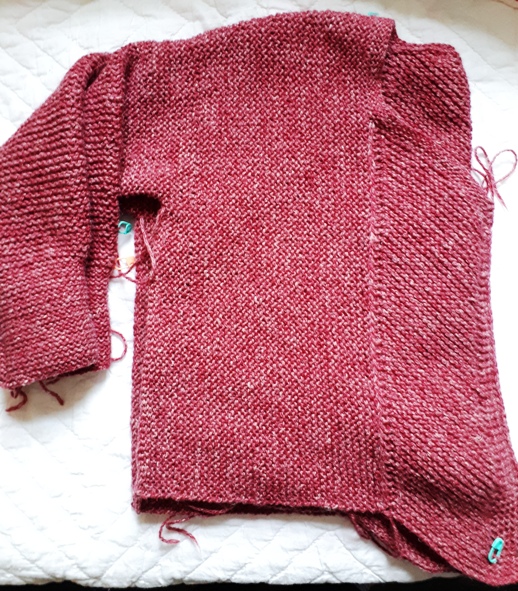
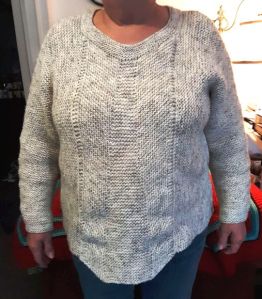
Does a little sweater that still needs to be blocked and the buttons sewn on count as a FO? Sure it does.

This is going to be called the Build A Better V, a baby/child sized garter stitch cardigan. It is a redo of the Build a V without the pointy bit at the bottom. I used left-over DK weight yarn (from the rainbow sweater). The extra bonus is that the different colours show the different parts of the cardigan. Four buttons to sew on and I’m done.

Now I am in a dither. What to cast on?! Maybe that, wait this would be good, wow, look at that. You know how this goes.

I made one decision.

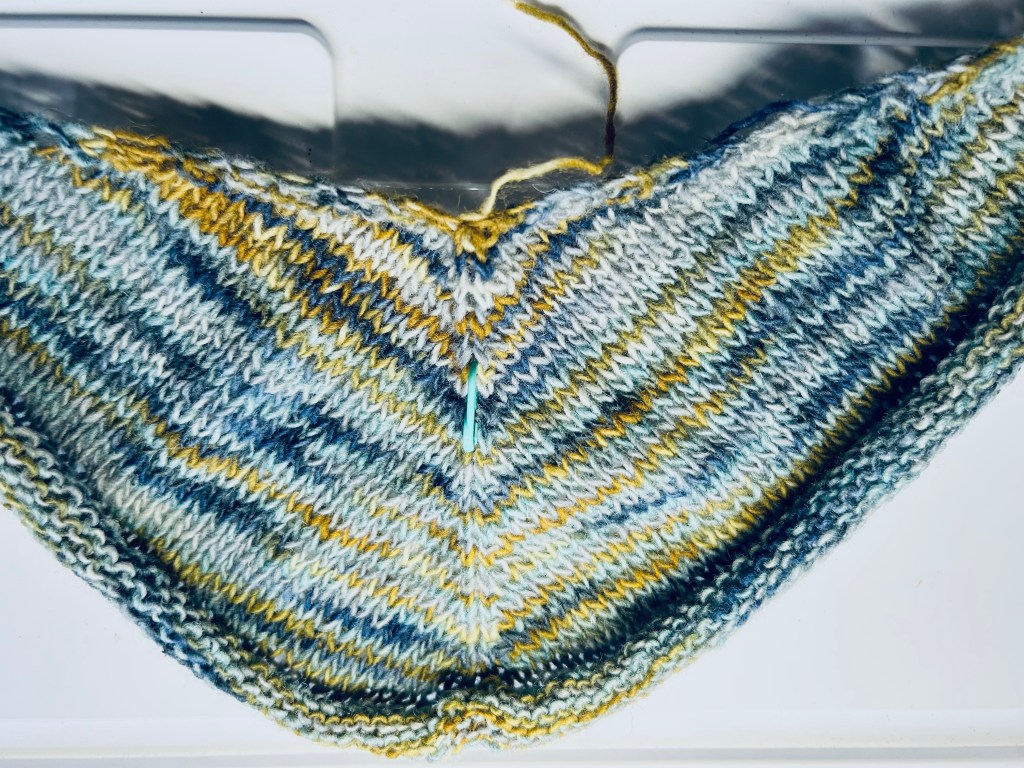
I cast on Winter’s Finery by Romni Hill. I wanted to try some rustic sport weight wool I have from Lichen and Lace. I want to see how it works for a shawl. The pattern is written for fingering weight yarn, so with the sports weight I’m using a 4.5mm needle. What a relief to be using a larger needle. Everything else I’ve been knitting lately has been with 3.25mm needles. I’m really happy to be zipping along with this one.

Now, back to ravelry to contemplate some new projects. See ya, Deb

Cabin Fever patterns by Deb & Lyn and the cabinfever crew

Any Gauge and Gauge-Free patterns by Deb

Deb.gemmell on instagram

Debgemmell 435 on youtube

Two Steps Forward … You Know The Rest

Yup, that’s what’s been happening here. I didn’t realize how frustrated I was until …

I was knitting away on my Build a Better V and everything was going well until I ran out of navy yarn. Yes, arggh, right after knitting one sleeve I realized I didn’t have enough to do a second sleeve. OK, normally that doesn’t bother me that much. I can regroup. I found some yellow wool and made the second sleeve.

Great. I’m happy with that. Then … I tried to unravel the first sleeve and couldn’t do it very easily because of the cast off I used. So, I got the scissor out and I cut it off.

I never do this. I would normally have worked on that cast off edge and unraveled the entire sleeve. I’m not even that upset about this particular sweater. My general frustration is compounded by several projects that are not going well.

I am now working on the second sleeve. I’m astonished at myself. I obviously need to take a vigorous walk or something.

If you want to hear the whole sorry story, here is my youtube podcast.

I’ll be back on track really soon. Cheers, Deb

Cabin Fever patterns by Deb & Lyn and our cabinfever crew

Any Gauge and Gauge-Free patterns by Deb

Deb.gemmell on instagram

Debgemmell435 on youtube

Build a NEW V

I’m taking another look at one of my older patterns. My daughter’s friend has had a baby and I thought I would knit a Build a V baby sweater. It’s a garter stitch Gauge-Free pattern so you can dive into your stash and start knitting.

But my daughter didn’t like the V at the bottom. I’m not sure I do either.

This is the back view.

If you just look at that back centre panel, you can see the V shape of the garter stitch. The V is formed by increasing 1 stitch on either side of a centre marker, every other row, and working a corresponding decrease at the beginning and end of the same row as you work down the back.

I changed how I did these centre panels when I wrote the adult version: Build a Bigger V.

You can see that it’s slightly rounded at the bottom. At least there is no very deep V at the centre bottom.

So I am going to smash these two patterns together and hopefully come up with a better baby/child version.

Here is the beginning. This is the back panel. It started with an increase on either side of the centre yellow marker. Then as I progress down the back I am working the increases worked before and after the centre marker further and further apart.

You can already see that it’s rounding at the bottom. I am knitting with my fingers crossed (difficult), hoping this is going to work out.

Taking bits and pieces from the adult version and adding it to the baby version is a bit of a trick but I think it will be make a better cardigan in the end.

Meanwhile I am still on sleeve island on two adult sweaters and not enjoying it much. Maybe I will knit vests from now on!!!

Cheers, Deb

Cabin Fever patterns by Deb & Lyn If you are also looking for baby/children patterns, we did a lot of them. Check them out.

Gauge-Free and Any Gauge patterns by Deb

deb.gemmell on instagram (not much happening there)

Debgemmell 435 on youtube

Second V

Second one, same as the first. A little bit longer and a little bit A-lined.

Just a short blurb to say hello. I hope you and yours are doing well and that you are finding your knitting a comfort.

Today I clothes-pinned my Build a Bigger V together to see if the A-line shaping was going to be roomy  enough in the hips. Yup. It measures 47″ around at the underarm and 52″ around the bottom. The A-line has done its thing really well.

This is a Back view, one sleeve done.

Now to finish that last sleeve. I’m so close to finishing. I can’t wait. Just in time for spring.

I have another test knit from BjH to show you of Build a V for little people. Cute, eh?build a v

Build a Bigger V

I have been staying at home and working hard, OK not really working hard since how hard can knitting a whole lot be, but my Build a Bigger V is finished, buttons and all. I love it.

build a bigger V (10)
Knit with Hempwol by Hemp For Knitting

I hit the publish button. It’s official, it’s a done deal, the Build a Bigger V is out there. Always a big moment. Now I need to take a walk because hitting that button always gives me the jitters.

If you’re looking for an adventure during these precarious times this cardigan might fill the bill. It starts with stash diving for yarn and needles. Remember that garter stitch takes 1/4 to 1/3 more yarn. Then work the Back and 2 Fronts separately. There is lots of garter stitch knitting which is comforting but not tooooo comforting because you have to work some increases and decreases and work the I-cord edging. Just enough to keep you on your toes.build a bigger V

Pick up and knit along the sides of the Back and one Front. Knit, knit, knit. Separate for the sleeves and knit down to the wrist. Fold it over to see half of your cardigan done.build a bigger V (8)

As I was knitting I kept thinking of different things I might do with this pattern. I couldn’t knit them all but maybe you can. I’ve added Hacker Pages with more options to add to the cardigan. I added the Boxy style where you would add much more ease to the cardigan so that the width of the body reaches your elbow.Build a Bigger V regular width

Build a Bigger V Boxy

How about A-line shaping? I’m knitting this one right now. The Back and Fronts gradually widen toward the bottom.20200222_125900 - Copy

You can also knit it as a Pullover. I love this. Thanks LK. She also worked the Boxy Sloped Shoulder option of working body and sleeve decreases along the top of the sleeve instead of along the underarm seamline. It gives you a sloped shoulder line and really works here.build a bigger V pullover (2)

Build a Bigger V slopped shoulder
Boxy style with shoulder slope

I haven’t included stripes as another option for the Build a Bigger V or 3/4 sleeves which could also be done (my orange version might get these) or colour blocking the different sections or … well, I’ll leave that to your imagination.

I’m really excited about this cardigan (can you tell?) and I hope you enjoy it.

Stay well, Deb

Any Gauge and GAUGE-FREE patterns by Deb

Cabin Fever No-Sew patterns

Debgemmellmods ravelry group

Deb on instagram

Why We Testknit

Sending your brand new pattern to a testknitter is a lot like sending your baby to a new daycare. The phone rings, “your baby is misbehaving”. Your reply, “Oh, no, no, no, not MY baby.”

So there I was knitting away on my adult-sized sweater and thinking I was doing pretty well and then the email pinged and Yup, misbehaving big time.

My first thought was no, no, no (denial). Then cursing (anger at myself for missing this). Saying, “it will block out” over and over, was probably my first clue. After kicking myself black and blue, I had to finally accept that there was, indeed, a problem. Problem solving is my thing, right? I can do this. Hands rubbing together gleefully, it’s time to solve this puppy.

The problem? The myth that you can pick up 1 stitch for every ridge along the side of a garter stitch piece and it will always, but always, allow you to knit in a perpendicular direction with a smooth edge.

If this wasn’t embedded in your brain from your first garter stitch project, here it is. For garter stitch, if your row gauge is 5 Ridges = 1″/2.5cm (black arrow) and you pick up & knit along the side (red arrow), your stitch gauge will be 5 Stitches = 1″/2.5cm, always. Doesn’t that look lovely and smooth?

garter stitch ridge vs sts

Not so smooth on my adult sample.20200306_110448

See all that puffiness? The pick up & knit is not smooth and the Side panel is much shorter than it should be, that’s the real problem. Apparently working decreases at that outside edge of the Front piece so that the Front stitches go in a diagonal direction causes enough distortion that the myth of picking up 1 stitch for each ridge Does Not Work!

It was much worse on the Back. I had been trying not to look.20200306_110526

I know what you’re thinking. How could she miss that?!

Denial is an amazing thing. In the back of my mind I did think something was just a little  wonky but the rule of stitches to ridges thing works every time, doesn’t it? I’m sure of it. I’ve been sure of it for decades.

Nothing for it but to rip back. There might have been a little cursing. OK, more than a little.20200306_174728

I did mention the denial thing, right? Two x 100g balls, plus a bit more, worth of denial. I was into it big time.20200307_093247

And so the midnight awakenings begin until I finally came up with a workable solution. It was actually the second solution that worked but who’s counting. Solution: Work some increases as you pick up and knit.

Ta, da, look at that! Smooth along the pick up edge and a Side Panel that is the correct length. Worth every sleepless night.20200309_172742

I’m sure you’ve never done this. But if you have I feel your pain.

My child-sized Build a V is published and has the correction in it. Yay.

Hope you’re keeping well and happily knitting. Tell me what you’re knitting on my NEW ravelry group: Debgemmellmods.

Stay well.

Deb

Any Gauge and GAUGE-FREE patterns by Deb

Cabin Fever No-Sew patterns

ravelry group: Debgemmellmods

Deb on instagram