Wrap/Scarf time

Summer is ending and it’s time to look toward autumn and, dare I say it, winter.

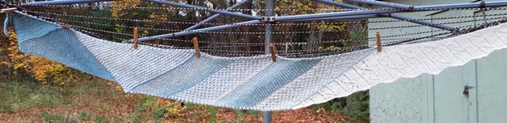
An autumn essential for me is a good sized scarf. That’s what I’m knitting now.

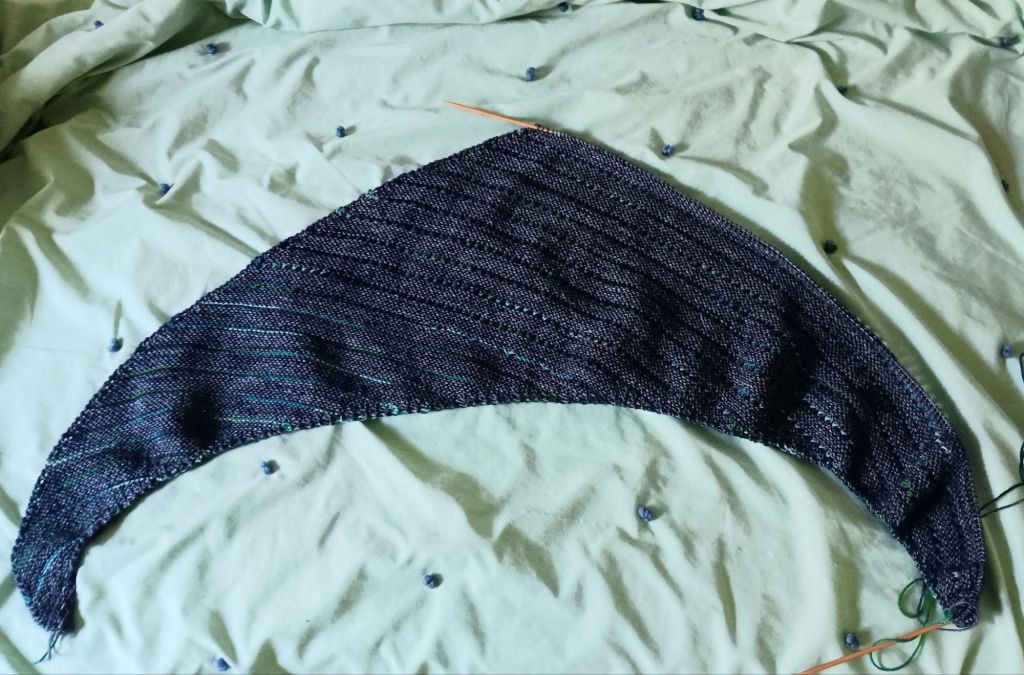
Would you like to join me? I’ll be knitting this for a month or so. I’ve published the pattern with an interim photo, because obviously it’s not done yet LOL, in case you want to knit along with me. It’s Gauge-Free and modular, oh, and the pattern is free.

Reversible Ribbon

As you know, if you’ve been following me, I’m stuck on sleeve island (where did this term come from???) on a couple of sweaters, so for relief I’ve started this new idea for a Wrap/Scarf.

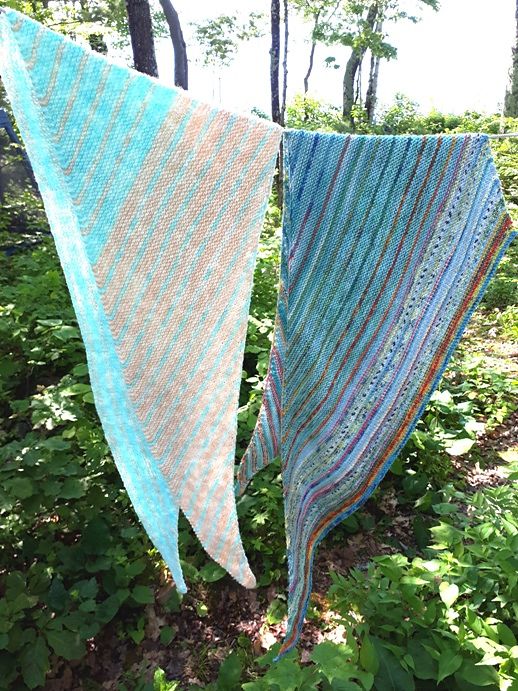
So far I have 2 triangles made and a tiny bit of Triangle 3 up on the top right of the photo.

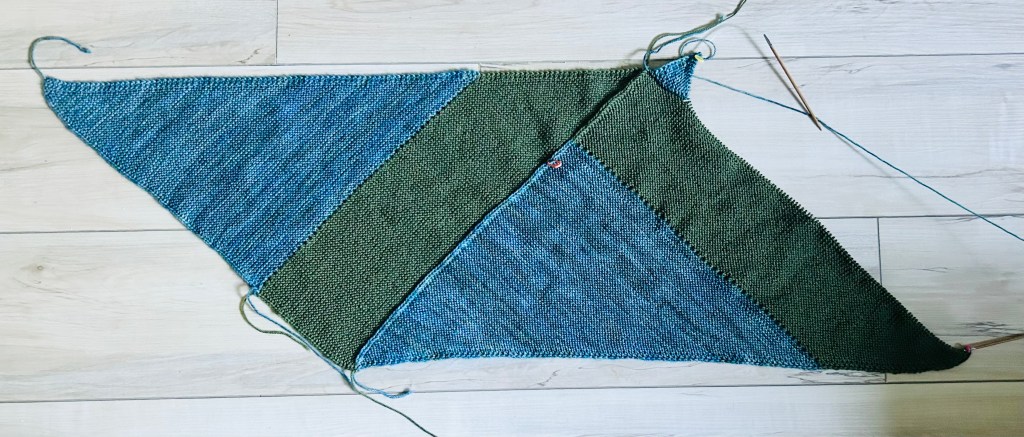
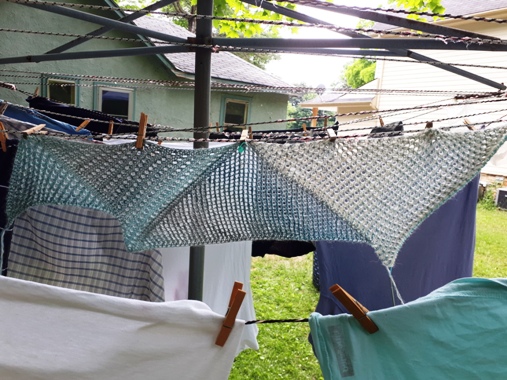
It’s a two colour wrap made with triangles that join-as-you-go. Triangle 1 begins on the left of the photo, in the Main Colour, with increases worked along the top edge. Work as far as you wish then change to the Contrast Colour for the bottom section of Triangle 1.

An Eyelet Row is worked when changing colours which makes it reversible!

The depth of Triangle 1 determines the depth of the wrap/scarf.

Triangle 2 begins again with the Main Colour and joins to the Triangle 1 stitches.

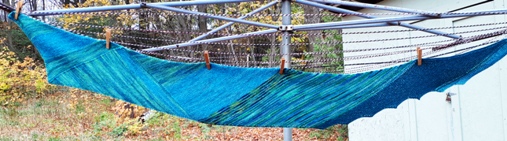
Then count the number of ridges of CC colour in Triangle 1. I have 35 ridges in green. Count 35 sts from the far end and put in a removable marker. Join up Triangle 2 to Triangle 1 until you reach that removable marker and then change to CC. This is going to give you a zigzag of the CC colour.

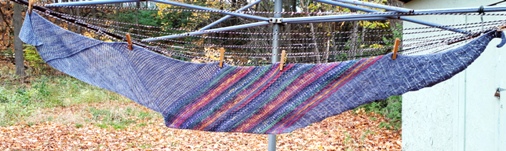
I’ve added some modifications, of course! I’m doing Modification 1 which is to vary the width of the CC sections. I’m knitting each CC section 5 sts narrower with each triangle. Then I think I will either add in a different CC colour or just widen them out again. I’ll decide when I get there. I like to mix it up as I go along. You’re surprised, right?!

I’ve posted this pattern on my debgemmellmods ravelry group if you want to join me. I’d love to see some other colour versions.

Cheers, Deb

Any Gauge and Gauge-Free patterns by Deb

Debgemmellmods 435 on youtube

deb.gemmell on instagram

The In-between

After finishing a large project, what do you do?

Walk away from knitting for a bit? No, no, no, of course not. You cast on something else.

I was thinking about a small project, but what jumped onto my needle was a shawl. Not a small project, sigh.

It wasn’t actually as straightforward as that. I had some navy, hand-dyed sock wool and cast on for socks. A small project, at least small in size, to carry around.

The yarn had cashmere in it, and after I knit the cuff, I thought maybe cashmere is sort of wasted on socks, so I ripped it out and here I am.

This is the Magic Symmetry Shawl, knit starting at the side with 3 stitches with increases worked on the leading edge.

This usually makes an asymmetric shape, but this is going to be symmetrical when it’s done, wider than it is tall. To my mind this makes it so much easier to wear.

I figured out a new stitch to add to the pattern. Doesn’t this show off the contrast colour?

I thought I would knit eyelets in the contrast colour rows. I  worked [Yo, K2tog] and found I liked the wrong side better. So now I knit the right side row and on the wrong side row work [Yo, P2tog]. So happy with how this looks.

It’s not such a large project after all.

Cheers Deb

Gauge-free and Any Gauge patterns by Deb

Deb on instagram

Off to a fast start

3-Act Play Scarf https://www.ravelry.com/patterns/library/3-act-play-scarf

I’m now on the second triangle of three which make up the first Act.

Here’s the beginning. Triangle two is getting attached to triangle one. I just love modular knitting!

I’m working this one with eyelets worked every right side row.

I’m noticing that the eyelets, worked every 4th row in triangle one, look different to eyelets worked every 2 rows.

Fascinating.

Done. You know it’s the right project when it whips along this fast.

On to triangle 3.

Cheers. Hope you are enjoying your summer knitting. Deb

3-Act Play Scarf

Any Gauge and Gauge-free knitting patterns by Deb. https://www.ravelry.com/stores/debgemmellmods

In between

3-Act Play Scarf

One large project is done so of course I wanted to cast on right away. But what to knit now?

It’s that between time. Almost time to think of knitting a sweater for the fall, but who wants to think about summer being over, and too late to do a summer knit.

I don’t know why but I want to knit another 3-Act Play Scarf. This will be my fourth one. Why not? I want this one to be nice and big.

It starts with 3 Triangles, joined-as-you-go. The basic pattern is written in garter stitch. This is the first one I knit out of odd balls.

This time I am diving into the Mods and working eyelets in the first triangle.

I chose to work the eyelets purlwise (one of the 4 eyelet options). I know that wouldn’t be most people’s choice. I have a good reason.

The shaping for this triangle is worked on the wrong side rows. So I combined working the eyelets with a shaping row.

Wrong side row: Shaping row + eyelets worked purlwise.

Right side row: Knit.

Wrong side row: Shaping.

Right side row: Knit.

I get those lovely angst-free knit rows. Yay.

Also there is a knit/purl/knit stockinette section with the eyelets sitting exactly in the middle row which makes my symmetrical heart happy.

So far it’s the perfect knit. Happy August. Deb

Any Gauge and Gauge-free patterns by Deb

Deb.gemmell on Instagram

3-Act Play, Triangle 3

The 3-Act Play scarf begins with 3 Triangles joined-as-you-go. Why make a point of talking about any one Triangle over the other two? It’s because Triangle 3 has some differences the other two triangle don’t have. It can be knit in garter stitch but here I knit it with eyelets and colour stripes. Yes, it was an adventure.

This was the second 3-Act Play scarf I knit. I decided to add Triangle 3 to the centre colour section by knitting it in two colours, plus the eyelets just to keep the eyelet thing going over all three triangles. I wanted to see how that would play out.

I really like how it looks but it is tricky. This is the 4-Row Eyelet pattern in the Mods pages: 2 rows for the eyelets and 2 rows in garter stitch. The colour of the garter stitch rows are the most obvious when it’s done. That’s a bit of a shame since the eyelets are more decorative but that’s the way it is.

It’s tricky because the beginning of the right side rows, where each new stripe is going to begin, is in the centre at the join between Triangle 2 and Triangle 3. I did a video.

3-Act Play scarf: Triangle 3 with stripes

Moving foward, I’ve ordered wool to make a couple more sweaters. I wish it was here already because I want to knit 2 more sweaters before the summer comes. Wait here, I’ll just go look on the porch to see if it’s come, nope, not today.

In the meantime I’m knitting my little grandson a mini-me sweater. It’s a great way to use up all the left-over odd balls and a testknit for my pattern. Daddy’s sweater and little Max’s sweater.

Cheers, Deb

Any Gauge and Gauge-Free patterns by Deb

3-Act Play Scarf is published, gulp.

I did it. I pressed the Publish button on the 3-Act Play Scarf. This is hard to do while my fingers are crossed as well as my toes. Pressing that button is … boy it’s hard to explain, it’s pushing something out into the world and letting it sink or swim, all on it’s own. It’s like taking your child to school on the first day. They know their name and their address, they can count to ten and are hopefully, fairly well behaved. Then you have to watch them walk in that door, turn your back and walk back home.

I have to confess that once this vague and unformed idea for a scarf became a little more concrete, I got totally carried away. The scarf and I started running off in all directions and it was hard to harness it into something I could write down clearly.

The main pattern is worked in garter stitch and is 6 pages long. That includes photos and a title page and all that you expect in a written pattern. The actual instructions are 3 pages.

Then there is a separate download that has lots of modifications (variations) that you can work on this scarf. That document is 7 pages long and that’s the cut down version. Ha, ha, ha, I know, I know, crazy, eh? There are instructions for stripes, 3 eyelet patterns, 4 slip stitch patterns and 3 lace patterns. It is certainly an adventure and not for the weak of heart, as my testknitters found out.

I am making videos for the first 3 Triangles. It’s amateur hour but here is a video about Triangle I to make sure you end it at the right point. 3-Act Play scarf: Triangle 1 This is my little sample.

If you want to follow along with me, I am going to blog about one Triangle a week as I make more videos. I just wrote this down. Now that it’s in writing, I must do it. You can keep me accountable on this.

Cheers, Deb

Any Gauge and Gauge-Free patterns by Deb

Eyelets 4 ways

I’m working on the beginning triangles of a new scarf pattern. The triangles get larger and larger until you have the depth of scarf you desire. These triangles will form one of the tails which will hang down the front of the body. I don’t like to have a colour pattern on the tails of a scarf because then I am always fussing to keep the right side of the pattern showing. I decided to try different ways of working eyelets since they look good on both sides.

I put my scarf in the sink while still on the needle and hung it out with my laundry. I wanted to see how deep the scarf was going to be. The white hand-spun really bloomed. Good to know that as I go forward. 20200707_132839

Triangle One (on the far left) has eyelets worked on the wrong side of the fabric. This is a 4 row pattern more or less based on a stockinette stitch background:

Right Side Row 1: Knit.  Wrong Side Row 2: [YO, P2tog] repeat.  Right Side Row 3:  Knit.   Wrong Side Row 4:  Knit. This last row creates a ridge on the Right Side.  I really like that the eyelet holes sit between 2 Right Side knit rows. I think the holes look bigger and more defined.   

Why bother working the eyelets on the wrong side row? I find that the needle position for working P2tog makes more sense to me and is easier to work than the K2tog. But I get that P2tog may not be your favourite stitch.

So I made Triangle Two with the regular eyelet pattern worked on the Right Side rows with several garter rows in between.

RS Row 1: [YO, K2tog] repeat.  Rows 2, 3, 4, 5 & 6:  Knit.  This pattern places the eyelet holes between two garter ridges.

Just to try that again I worked Triangle 3 with Eyelets worked on the Right Side, every other row. This is one you are probably quite familiar with.

RS Row 1: [YO, K2tog] repeat.  WS Row 2: Knit. 

One more triangle, Triangle Four, and back to the beginning with the P2tog eyelets because, well I’d had enough of the other ones. This time I added a second colour. Same 4 row pattern though.

With Main Colour, work  RS Row 1: Knit.  WS Row 2: [YO, P2tog] repeat.

With Contrast Colour, work  RS Row 3: Knit.  WS Row 4:  Knit. 

I have to say I loved this last one and was sorry when the triangle was finished. I’m going to have to use this again somewhere soon. Do you want another look at my laundry?

20200707_132856

There are many ways to use eyelets. These were a couple of easy combinations. Enjoy.

Stay safe and happy knitting,

Deb

Any Gauge and Gauge-Free patterns by Deb

Cabin Fever No-Sew patterns by Deb & Lyn