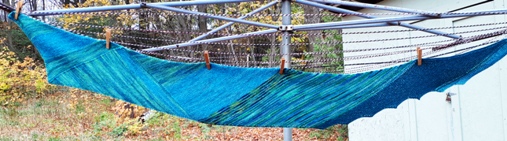
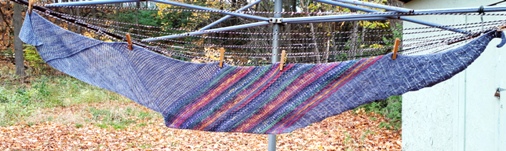
3-Act Play Scarf is published, gulp.

I did it. I pressed the Publish button on the 3-Act Play Scarf. This is hard to do while my fingers are crossed as well as my toes. Pressing that button is … boy it’s hard to explain, it’s pushing something out into the world and letting it sink or swim, all on it’s own. It’s like taking your child to school on the first day. They know their name and their address, they can count to ten and are hopefully, fairly well behaved. Then you have to watch them walk in that door, turn your back and walk back home.

I have to confess that once this vague and unformed idea for a scarf became a little more concrete, I got totally carried away. The scarf and I started running off in all directions and it was hard to harness it into something I could write down clearly.

The main pattern is worked in garter stitch and is 6 pages long. That includes photos and a title page and all that you expect in a written pattern. The actual instructions are 3 pages.

Then there is a separate download that has lots of modifications (variations) that you can work on this scarf. That document is 7 pages long and that’s the cut down version. Ha, ha, ha, I know, I know, crazy, eh? There are instructions for stripes, 3 eyelet patterns, 4 slip stitch patterns and 3 lace patterns. It is certainly an adventure and not for the weak of heart, as my testknitters found out.

I am making videos for the first 3 Triangles. It’s amateur hour but here is a video about Triangle I to make sure you end it at the right point. 3-Act Play scarf: Triangle 1 This is my little sample.

If you want to follow along with me, I am going to blog about one Triangle a week as I make more videos. I just wrote this down. Now that it’s in writing, I must do it. You can keep me accountable on this.

Cheers, Deb

Any Gauge and Gauge-Free patterns by Deb

Bust Darts, Top Down

Why are the fronts of women’s sweaters the same width as the back? Aren’t there two very good reasons why there should be a little more room on the front? You could work two different sizes to fix this but it needs quite a bit of fiddling to get it right. There is an easier way.

You need the extra room exactly where you need it, right? You know where. Not in the upper chest and neckline which could happen if you work two different sizes. Not below the bust either.

Here’s one of my solutions. I used on my latest Any Gauge Raglan Pullover. When working Top Down you can add an extra set of stitches to the Front of the Body starting just under the arm, after the Great Divide.

Can you see a faint line coming out of my underarm at an angle? Here, let me highlight it.

It’s not very visible. The increases are worked on every round. Each increase is worked beside the last one, working from the underarm toward the centre of the front. I added 6 extra bust stitches on each side of the Front, worked the rounds straight down past the largest part of my bust and then began working decreases at the sides of the Front every 4 rounds to get rid of some of these stitches (not all of them because, with Covid, the belly is a little larger than before!!).

I used Twin Stitches. They are the stitches used in the Shadow Short Row system which, if you don’t get rid of the double stitches (the twin stitches) as you would when working short rows, these twin stitches can become increases. It’s magic.

Here’s my video to show you how: Bust Dart for Top Down Pullover using TWK

This is how you work a Twin Stitch. If you’ve been following me for any amount of time, you’ve seen this before. I discovered this while working on the Need A Circular Yoke book. Have you tried this?

Stay safe and keep on keeping on, Deb

Any Gauge and Gauge-Free patterns by Deb

Deb on instagram, because you know there’s more knitting going on.