As I have been knitting away on my vest version of the Build A Bigger V cardigan I have been thinking about the armhole. They are rather a big deal when knitting a sleeveless garment, right?
My other concern was getting some extra bust width on the front. Short rows to the rescue. The mods pages for the cardigan has instructions for short rows to make an A-line cardigan. I used the same idea except for where I began my short rows.
I want the extra width to begin high up so I get an outward slant to the line from the shoulder. High on the front (the top pine) and lower on the back (lower pin).
I worked the short rows with 2 ridges in between. I think it worked.
Progress is being made on my vest version of the Build A Bigger V cardigan, and yes I am knitting like a crazy person. The Front is knit as a pullover. Nice and easy since it’s just the Back again without the beginning triangle at the neck. Done.
Now I have to attach them together so I can knit out to the edge of my shoulder.
Both the Front and Back have a 2 stitch I-cord worked along each edge. I’m going to use those I-Cord stitches for the pick up. Hang on, it’s a tricky ride.
Ta, da. Phew, done. Not hard to do. It’s just lots and lots of stitches.
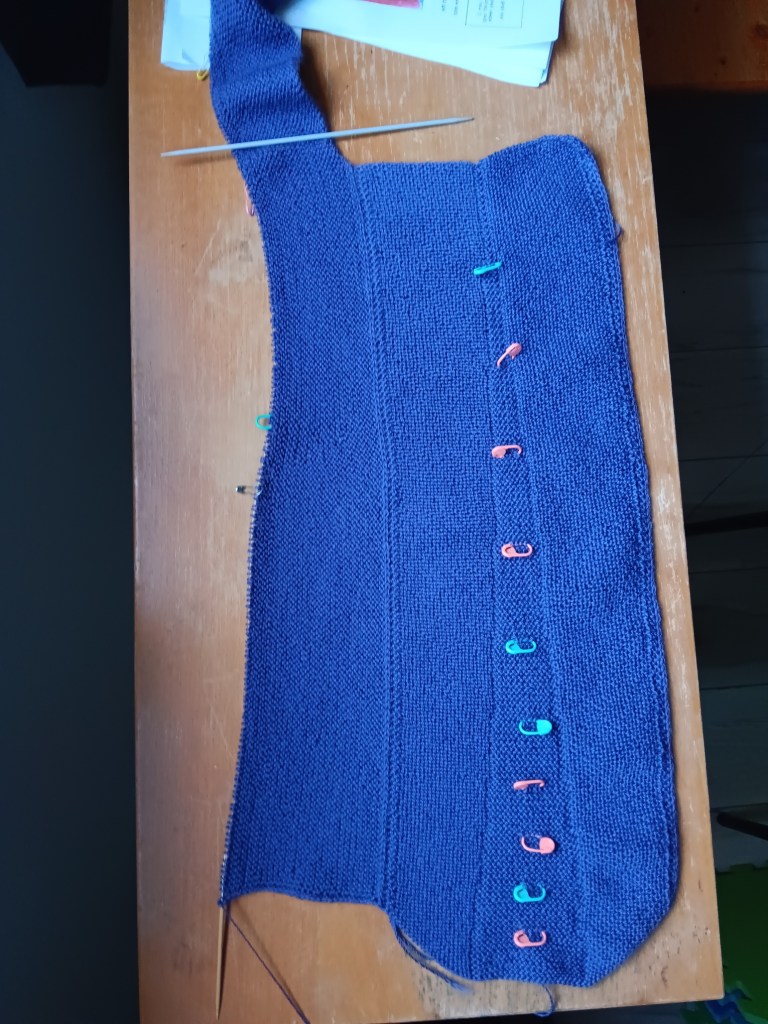
I’m working on the back panel of the Build a Vest with all those markers in place. What are they doing down the centre? I thought you’d never ask.
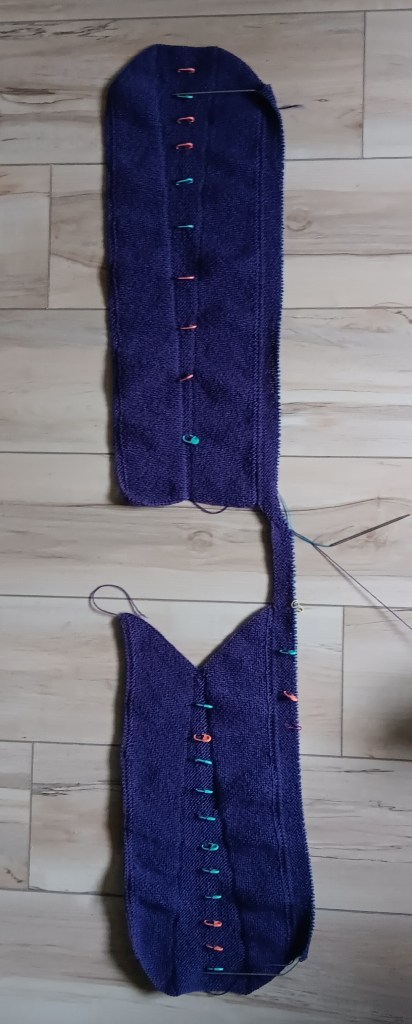
The first Build a V that I worked on was the baby version.
As you can see it also starts with a front and back panel, then is worked sideways for the sleeves.
The back panel looks like this.
See that nice little pointy V at the bottom? I didn’t want that pointing at my derriere on my vest. Would you?
So … all those markers. They indicate x number of ridges as I worked down the back.
This is my Build A Bigger V cardigan, and you can see that the point has been taken away, creating a rounded bottom to the back panel. At every marker I moved the increases further away from the centre marker.
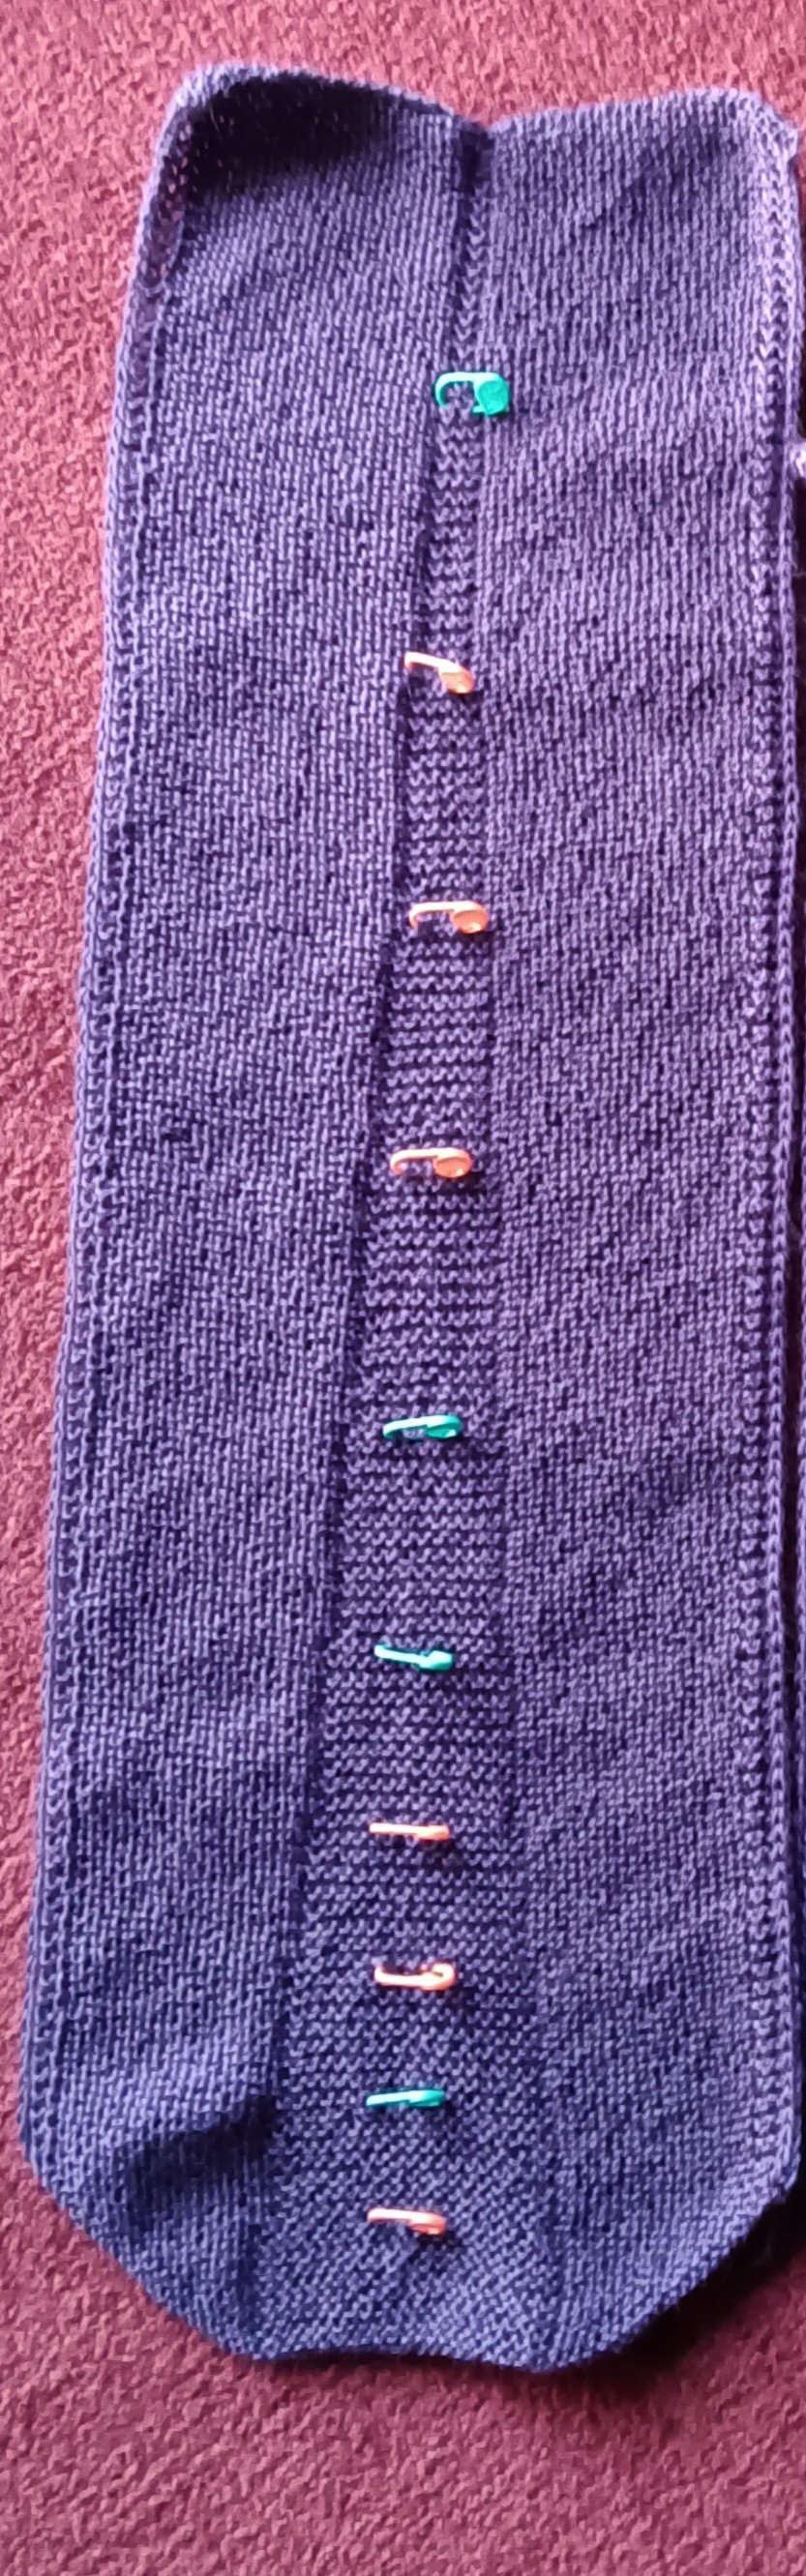
This is my finished back panel of my vest.
The centre section gets wider and wider. As I approached the bottom I started widening the centre section a little more often.
I think this would work for a triangular shawl too, if you didn’t want that sharp triangle point. What do you think?
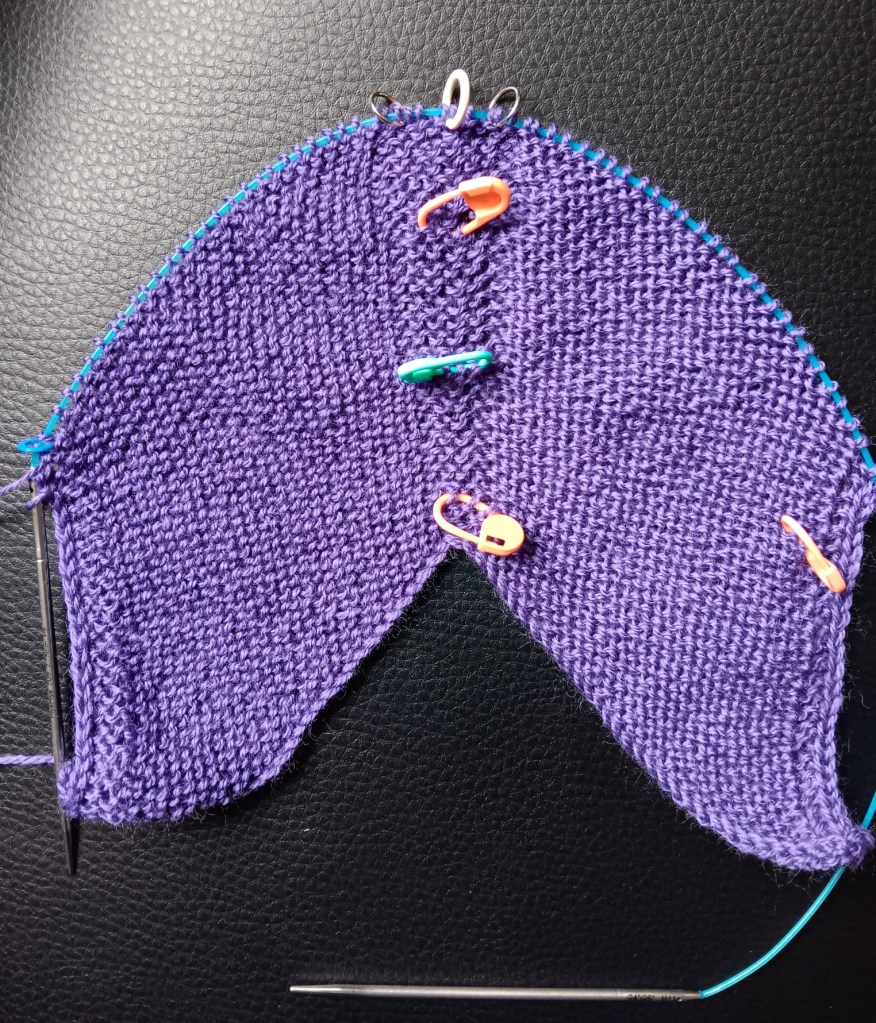
I am using several markers for this project. Only one is required by the Build a Bigger V pattern. That’s the white marker in the centre. The rest help me keep track of the shaping and remind me when and where to do things.
There are 7 more markers here which are all for me. Yes, there are quite a few. Yes, they are different colours and types of markers on purpose.
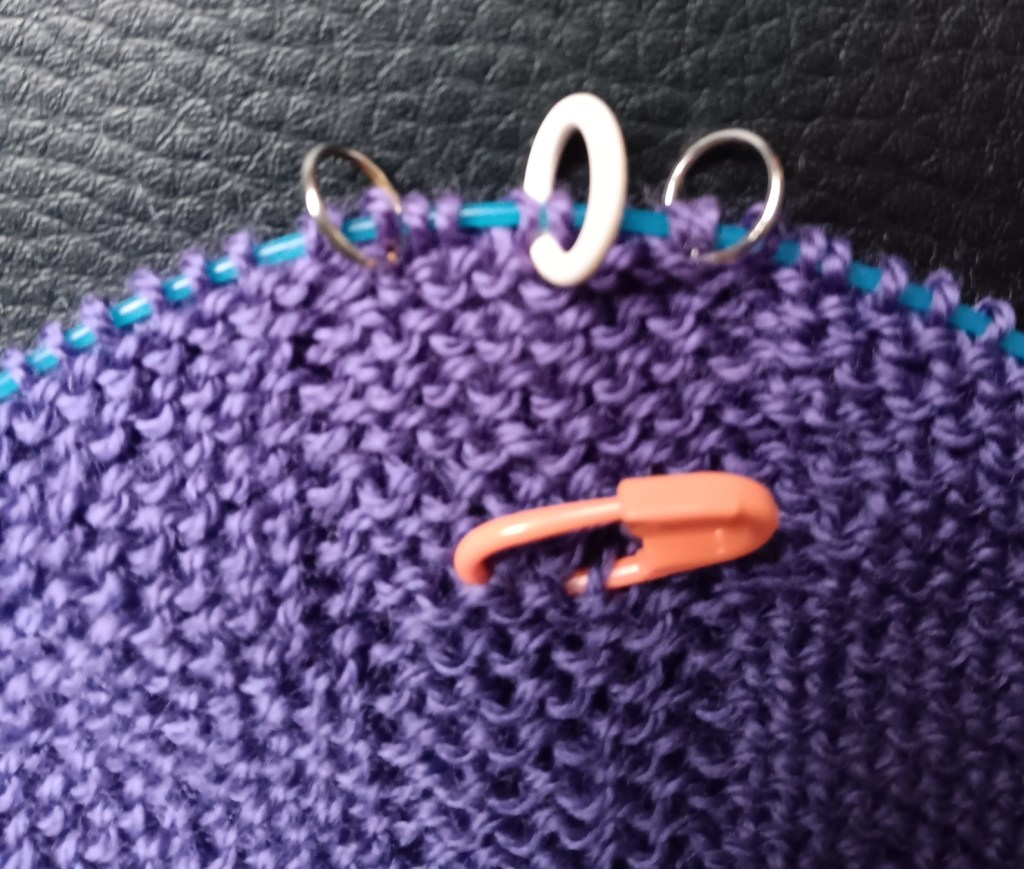
Marker for Right Side of fabric: That orange marker on the right is pinned through the fabric to tell me this is the beginning of the right side row. It is especially helpful at the start of the project when there aren’t as many other things to tell me I’m on the right side. It’s a removable marker so I can move it up as I knit.
Markers for length: The orange, green, orange sequence up the middle are for counting ridges so I don’t have to keep counting from the cast on. I am placing the first orange marker after the first 2 ridges, then every 8 ridges as I continue down this front panel because something happens every 8 ridges in this particular pattern.
Markers delineate: The two metal markers on either side of the centre marker (white) show me where the middle section is. You can place markers on either side of a stitch pattern or some section you need to keep track of.
Markers – do something here: The metal markers on either side of the centre marker also help me find where I need to work increases. The instructions say to work an increase x number of stitches before the centre marker (white). I don’t have to keep looking ahead for those x number of stitches if I put a marker in. I work one increase before the metal marker, knit across the middle section to the other metal marker and work an increase after it.
Markers – pay attention: I have a lot of trouble remembering to do things at the ends of the rows. So the blue marker on the left edge is telling me to pay attention and work a decrease, duh. I know it’s supposed to be there but I have merrily knit right past it so many times, I needed a marker to remind me. It’s a rescue marker.
I have collected several different types of markers for this very purpose. They help me reduce the stress of paying attention, cut down on the amount of ripping back I have to do, and therefore, make my knitting so much more enjoyable.
This vest, and the cardigan I’m modifying it from (Build a Bigger V), will be Gauge-Free. No swatch needed. No talk about gauge at all, none, throughout the entire pattern. How freeing is that?
How can it possibly work?
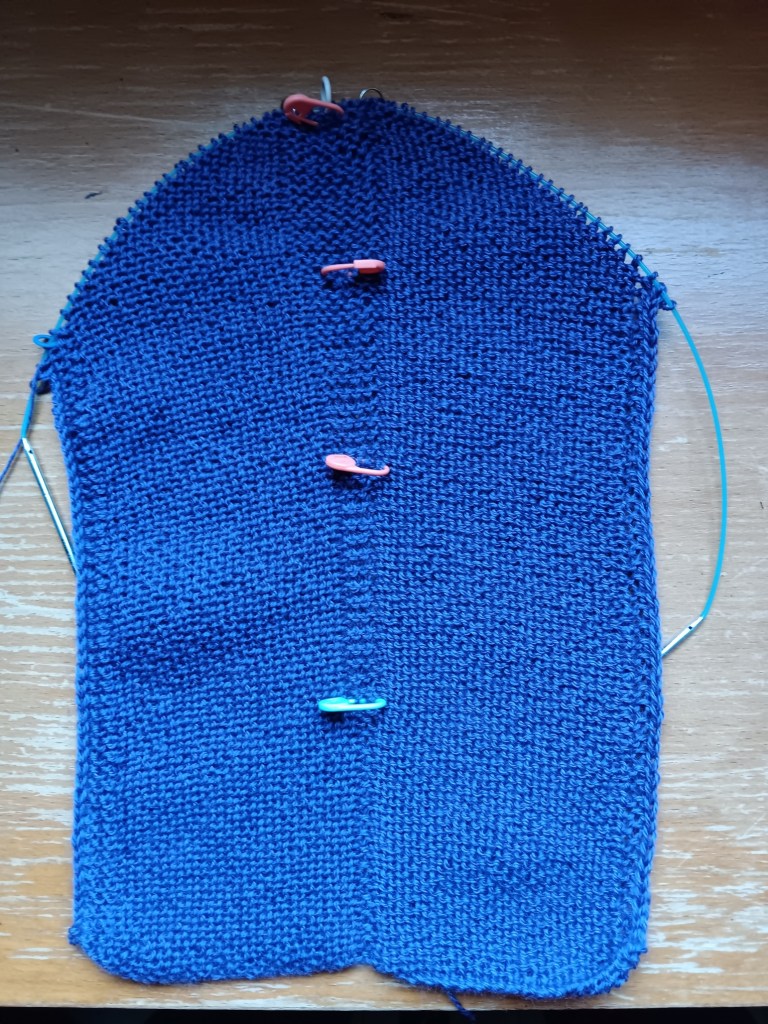
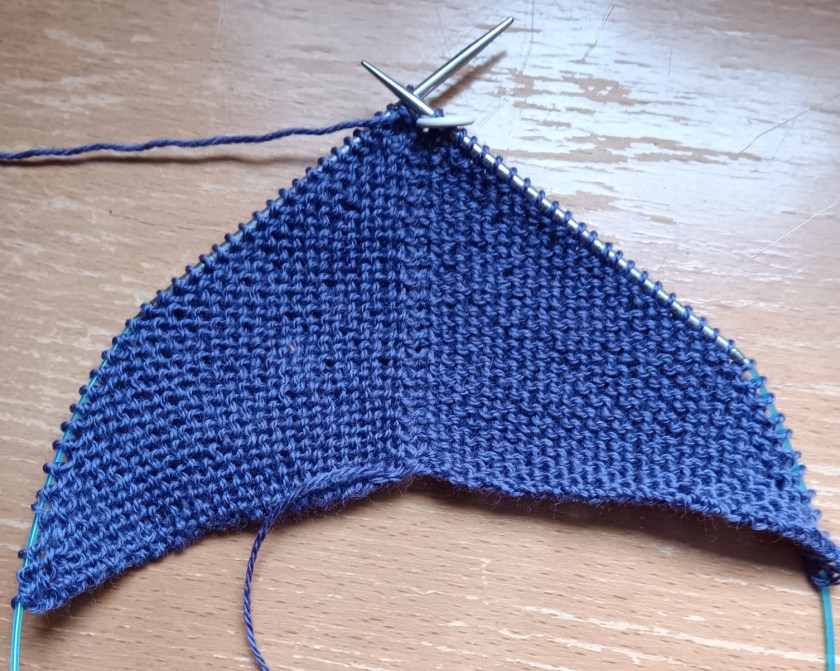
Start with a couple of stitches and build a triangle with increases worked on either side of the centre marker. Work until the solid edge of the triangle is the width of the Back of Neck. Mine is 8″ wide.
Width of Back of Neck is 8″.
That sets the number of stitches for the Back Panel. You need to count the number of stitches you set up with at this point but we don’t care how many stitches per inch you are getting here. Any number of stitches will work.
Now, I will keep the same stitch count as I knit the back panel.
The shaded part here is the Back Panel. The triangle begins at the Back of Neck and the Back Panel is knit down to the desired length.
The decision will be how long I want this vest to be. Lots of knitting for the next week.
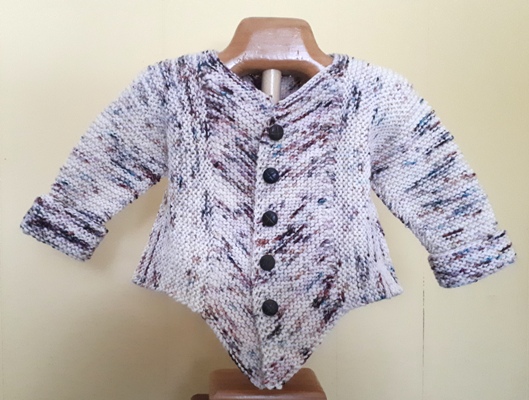
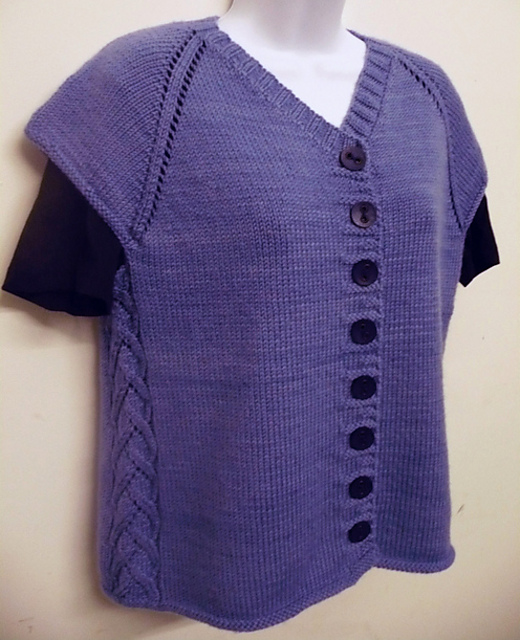
This is a photo of the Build A Bigger V cardigan before I knit the sleeves. This could be a vest as it is in this photo. It has 9″ of ease so if it was a little more fitted … it could work.
But I sort of like the idea of cutting in the armhole, for a sleeveless look (white line).
Better?
At any rate, I’ve started. This is the beginning of the Back Panel. I’m knitting in fingering weight yarn (80/20 fingering by Shelridge Yarns – colour Iris). Yes, this will be a lot of knitting but here I go.
The idea of Building a Vest using the Build a Bigger V cardigan intrigued several knitters. Thanks for voting. Cheers, Deb
I’ve come up with these 4, or maybe 5, options for making a vest. But which one to start first?
I think I might try several over the winter. How about you?
This one would be worked top down in garter stitch and started with a very big square shaped cast on. It would have only a few rounds of raglan shaping. Is it very fashionable (???), not that I’m a fashion diva!
This is based on the contiguous method of construction. Thanks Lynda C. for this suggestion. The contiguous shoulder is worked in the round, increasing 4 stitches every round, one increase before and one after a couple of shoulder stitches on both shoulders. I would need to work some sort of edging at the sides of the armholes because I don’t like having to pick up to finish them.
This is a straight raglan knit and the first one I thought of doing. I would work tuck stitches in the shoulder section to shorten the fabric of the shoulders. Would the shoulders be too bulky?
This one is a straight raglan yoke where the top of the shoulder stitches would be cast off and then at the armhole side of the raglan lines decreases could be worked to narrow the shoulders. Thanks Dana for suggesting this one.
While I was thinking about this a totally random thought came to me. I could add one more possibility, but not a raglan which was my original intention. What if I knit the Build a Bigger V as a vest? The central panels for the back and front are worked separately and then stitches are picked up along the sides of the front and back and knit out for the size of the body and the sleeves.
In fact, it’s a vest once you get to your body width before continuing with the sleeves. This might have possibilities. What do you think?
Do you have a favourite? Have you tried any of these vests?
I want to knit a vest. That’s not so weird, right? They are handy to have. Winter is coming and I want to be prepared.
I could make it in the normal vest way: start with the shoulders and knit the front to the underarm, knit the back, join in the round at the underarm, and well, you get the picture. But no, not doing that because of … the idea.
… where the shoulder is narrower. How can I shorten the shoulder section so that when I cast off the sleeve stitches I have what looks like a sleeveless armhole?
Yes, this is my big question. I know, I know, why bother? Sometimes a question like this grabs my attention and won’t let go so … here we go.
I’ve moved after living in the same house for 32 years. Once my two kids left home, my knitting took over. Walking into my knitting room, knowing I wouldn’t have another one in an apartment, was sad and problematic. What should I move, and what to do with the rest?
Moving some of my yarn forward was fairly easy. I had my knitting guild friends come over and take it away. My yarn now has new homes where it will be treasured.
The hard part was facing all those WIPs. OMG, there were so many. I must admit that I brought many with me. I’m going to go through them and tackle them one at a time, but not right now because I can’t face them.
First on my list is this Bonne Annee by Vera Sanon.
I even chose the same colour.
Why was it in the knitting time-out corner for years? Why was I knitting the extra small size when I need a large? Questions, questions, right?
Once I took out my ruler it was quite obvious. The gauge for the pattern was 24 sts = 10cm/4″ and I was getting 20 sts = 10 cm/4″. Wow, that throws things off just a tiny bit, ha, ha. I’m using fingering yarn but still can’t get gauge, my usual frustration, pardon me, my usual challenge (trying to change my attitude here).
Problem solving commenced and I think I have a reasonably successful body, not perfect, but finished.
My tip of the day is to work your body on two circular needles,one for the front stitches and one for the back. Each time you switch needles you knit the stitches back onto the other end of the same needle.
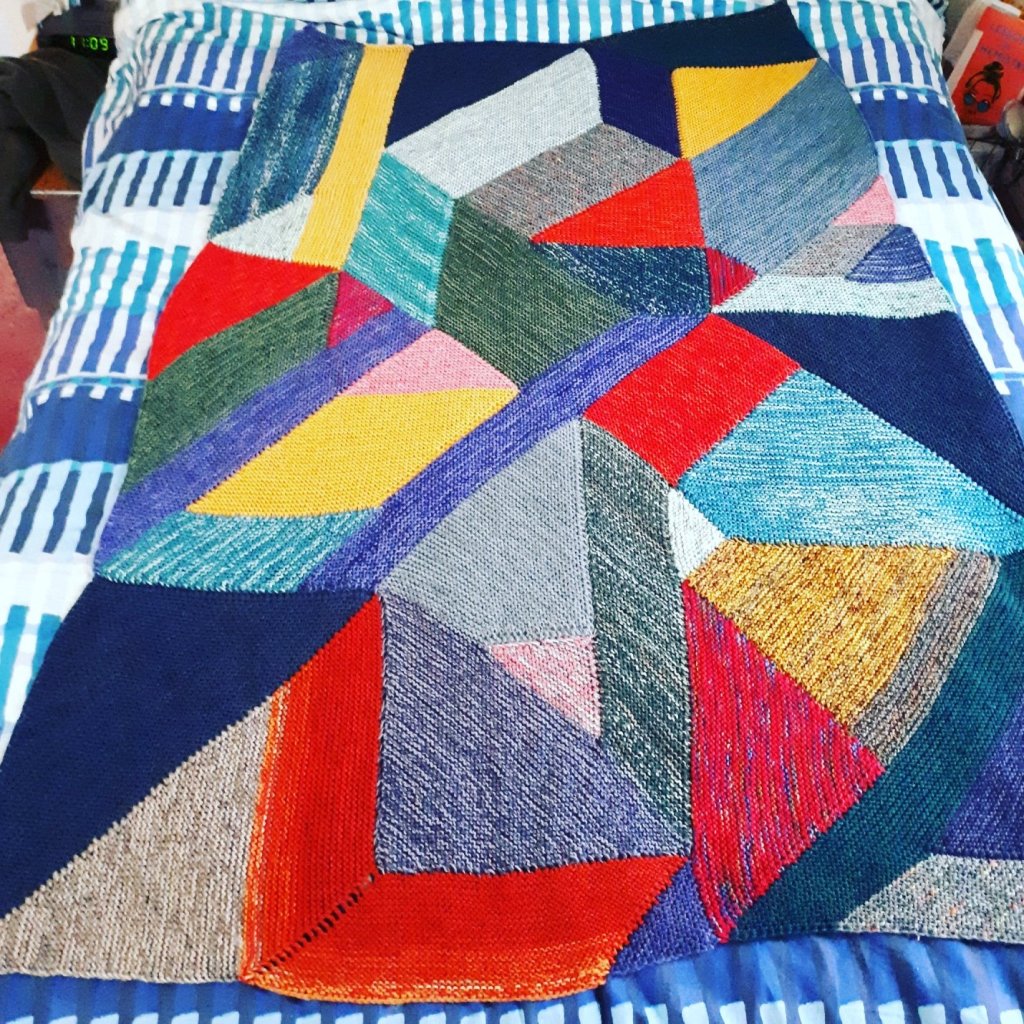
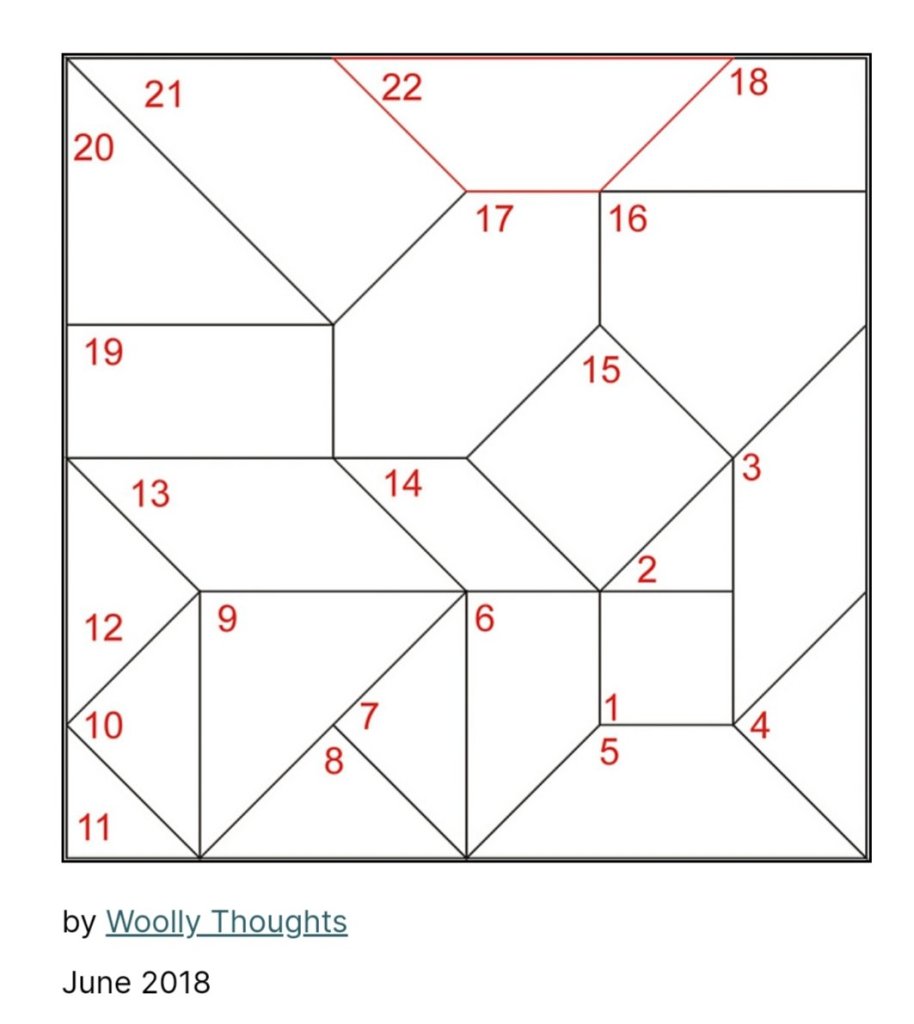
I seem to be in learning mode these days. This is my default when things get tough. Elderly care is taking up a lot of my emotional bandwidth so I need something to concentrate on in small doses. The Jigsaw Blanket by Stephen West was great for this. https://www.ravelry.com/patterns/library/jigsaw-puzzle-blanket
This pattern has lots of information about working all the shapes but does not give you row by row instructions for joining. It was fun to work on trying to transfer techniques to see if I had actually learned anything.
Not bad but I’m thinking of doing one more cushion cover to consolidate my knowledge. I have lots of partial balls left over from both projects.