Two Sweaters and Helical stripes set up

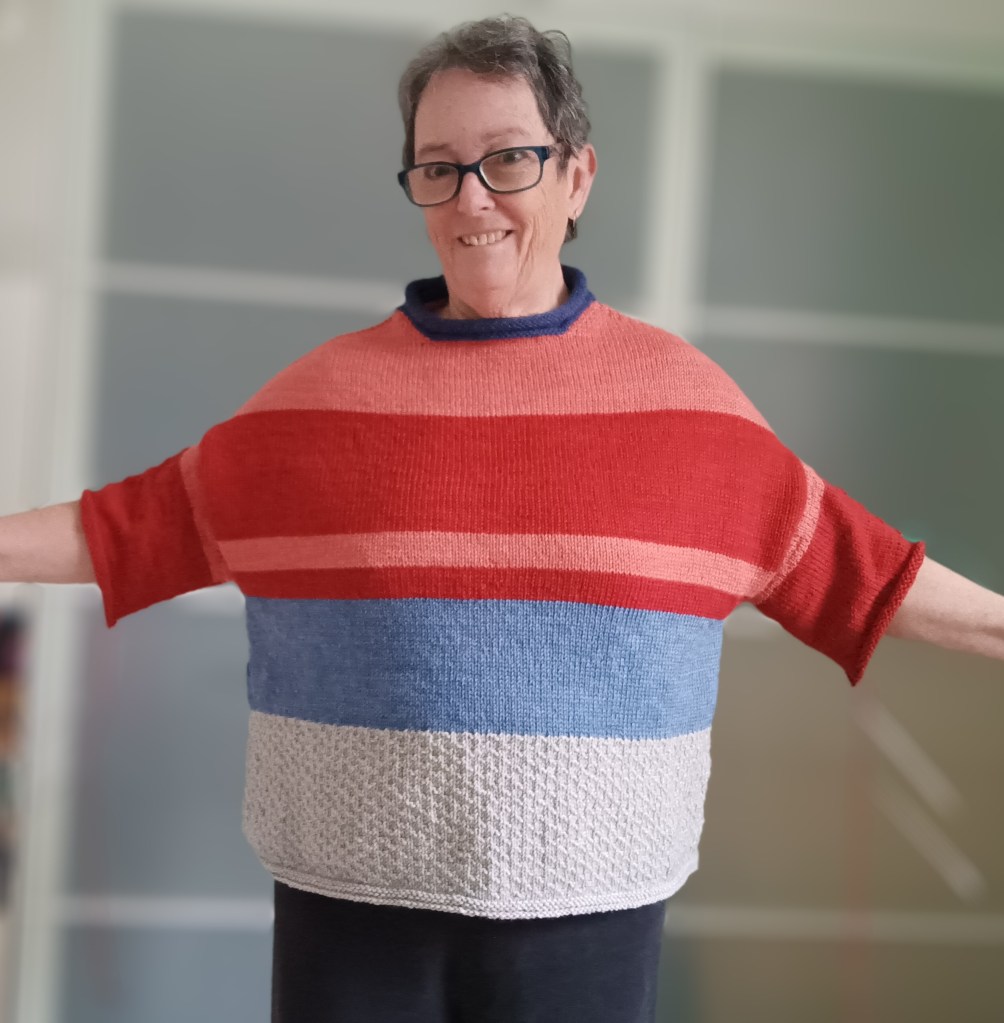
My Family Crew Neck is just buzzing along. Therainbow stripes were a great motivator. I wanted to see what each new stripe would look like.

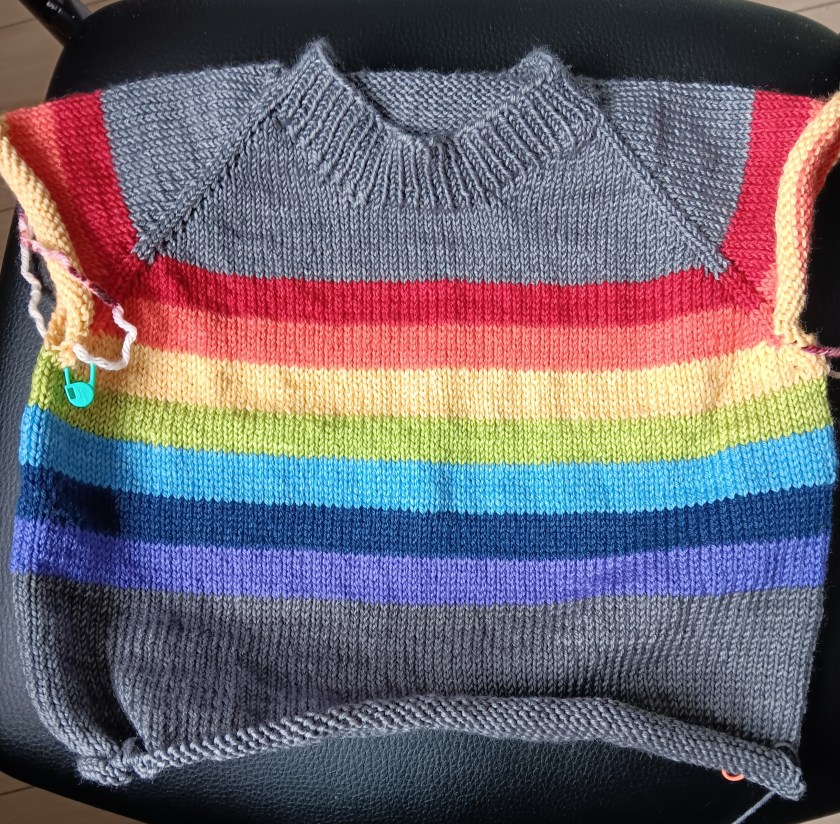
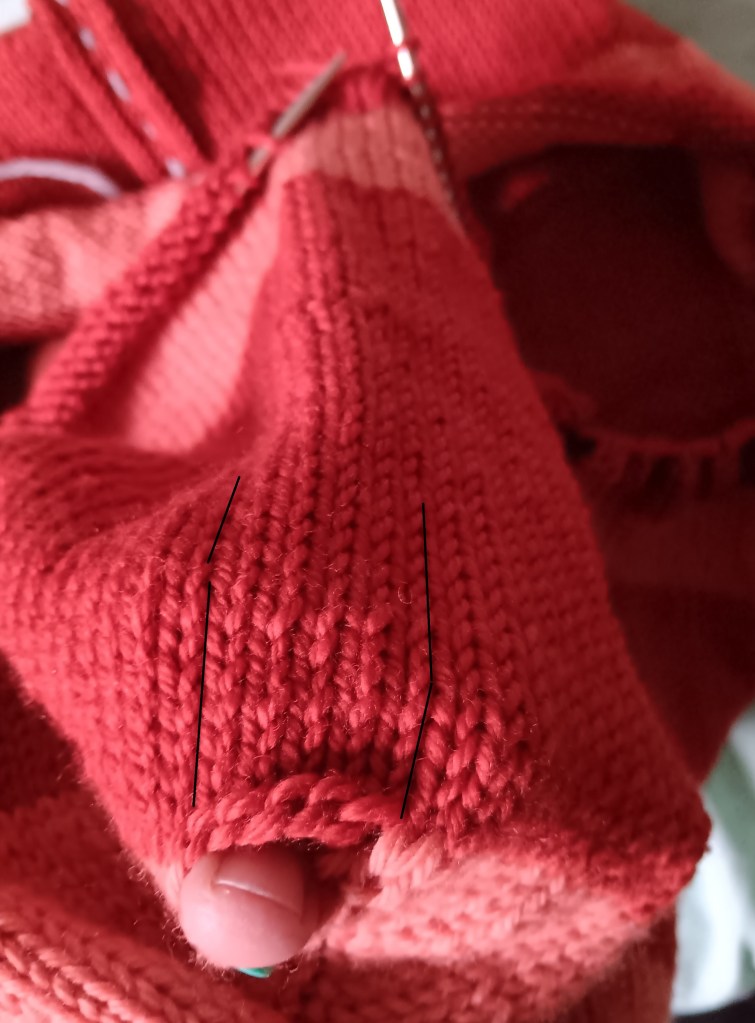
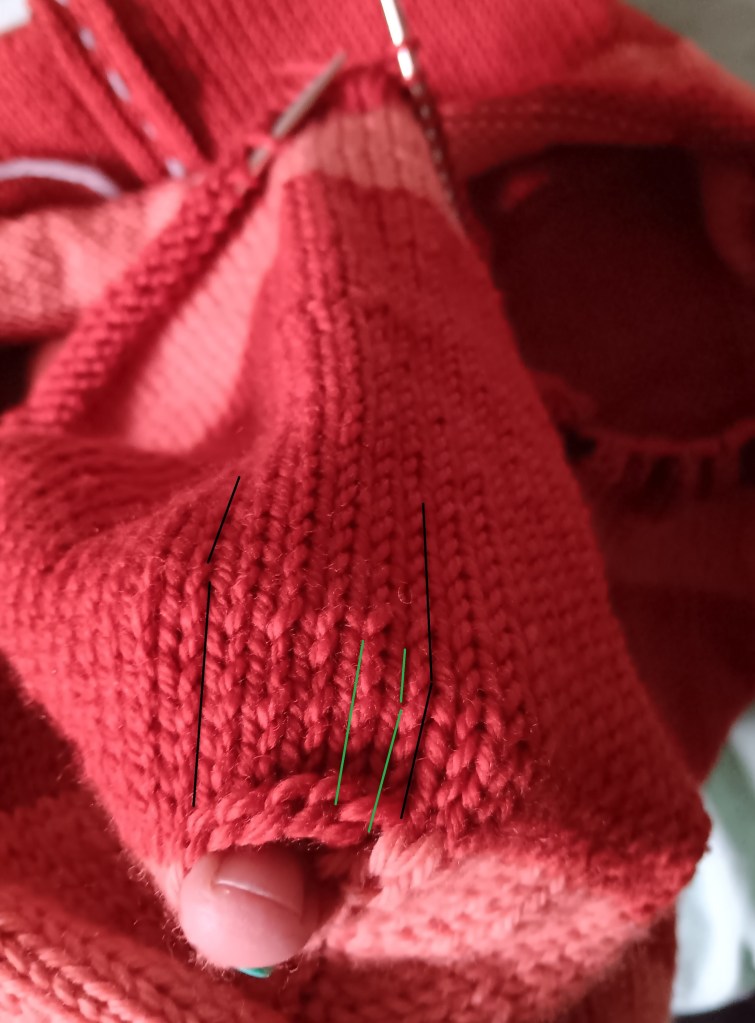
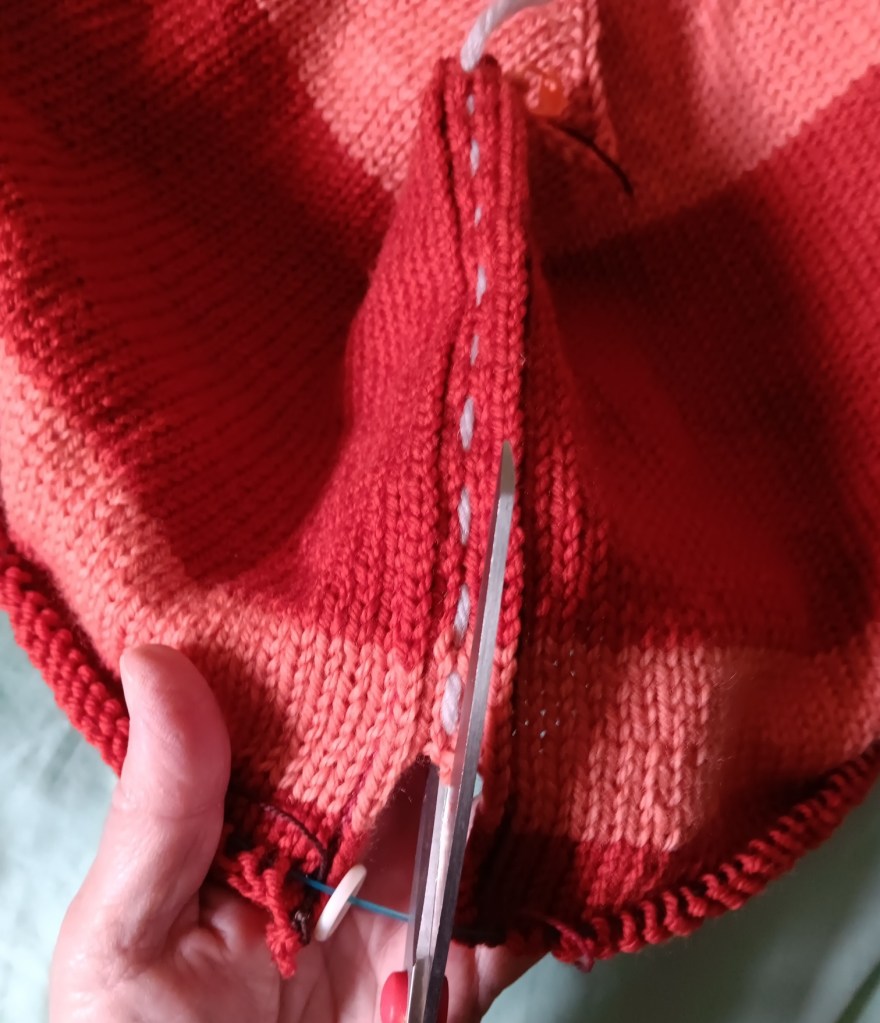
Now I’m at the point in this Family Crew Neck where I get into trouble. I want the body to be done, so I measure every couple rounds, thinking it will be the length I need before I start the ribbing. Even stretching the tape measure isn’t getting me there and you know I’m trying. Every time I’m sure that I must be there by now! Nope. A couple more rounds, a couple more rounds, a couple more rounds.

This is my weekly Youtube video if you want to see where I’m at on my two sweaters.

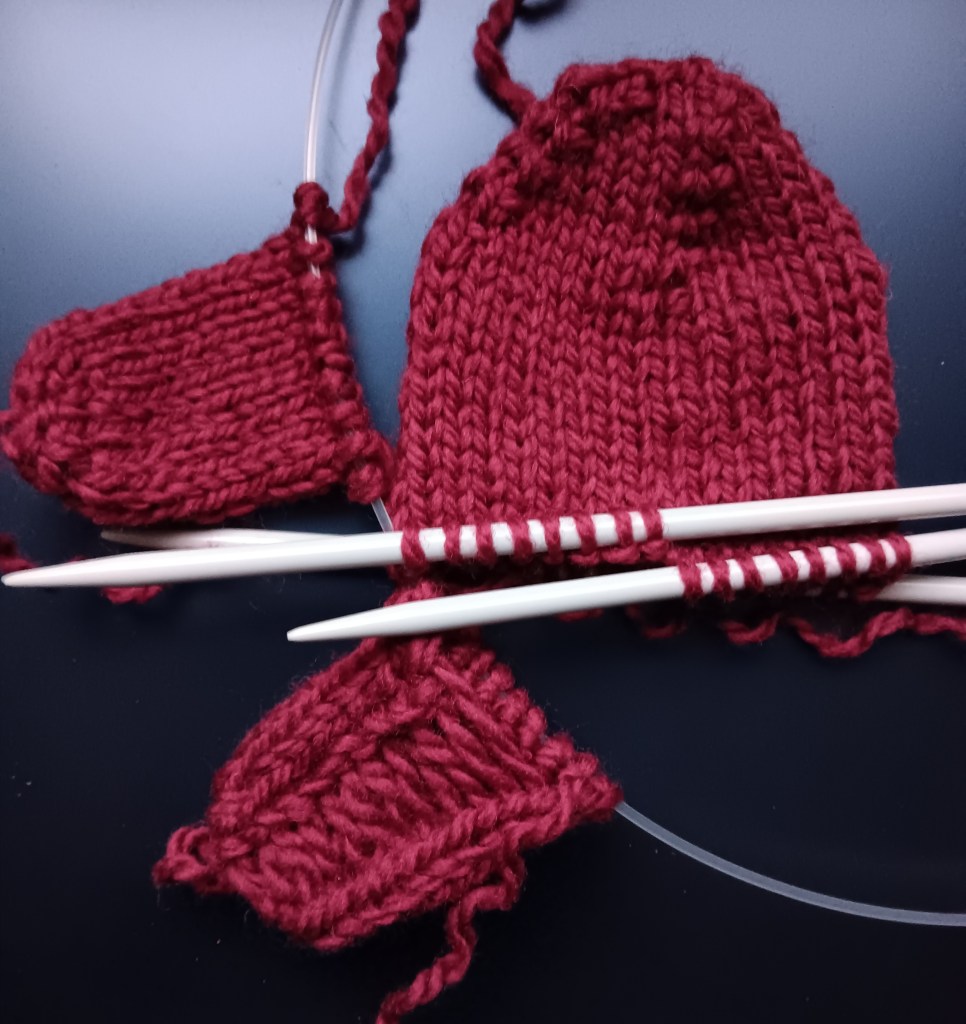
To keep my round measuring stress at bay, I am working on my Circular Yoke. The Short Rows are done and now I’m working the helical knitting rounds.

If you are serious about stash busting, this is a terrific technique. It makes one-round stripes, in my case, with 3 colours. That means I don’t have to buy an entire sweaters worth of yarn. I can stash dive and find enough of 3 colours, that when combined, will make up the amount I need for one sweater.

Here’s a video of how I got the stripes started and how to change colours. For this sweater the change takes place at the shoulders. Changing colours in the same place every time is the simplest way to work the helical method.

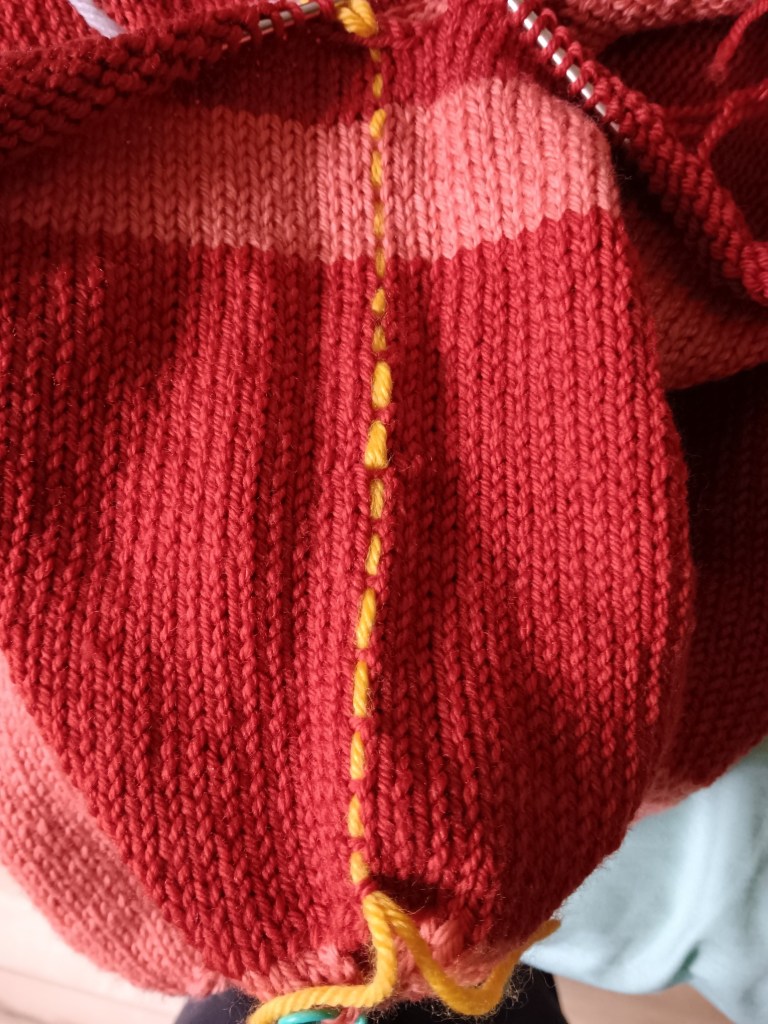
The trouble is that I chose colours that sort of blur into each other, much more than I thought. This is very deep stash from Wellington Fibres.

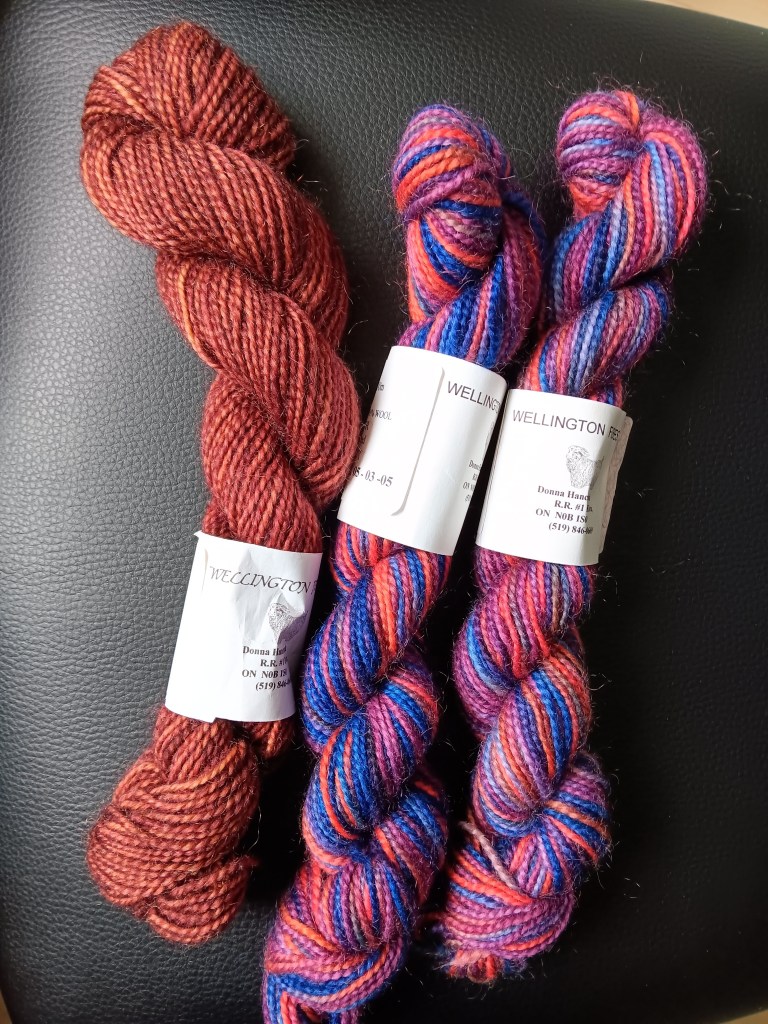
I am using the brown wool for my increase round, and you would think it would be easy to see, but, no.

How about starting another one?! Sure, why not. I am thinking of summer here.

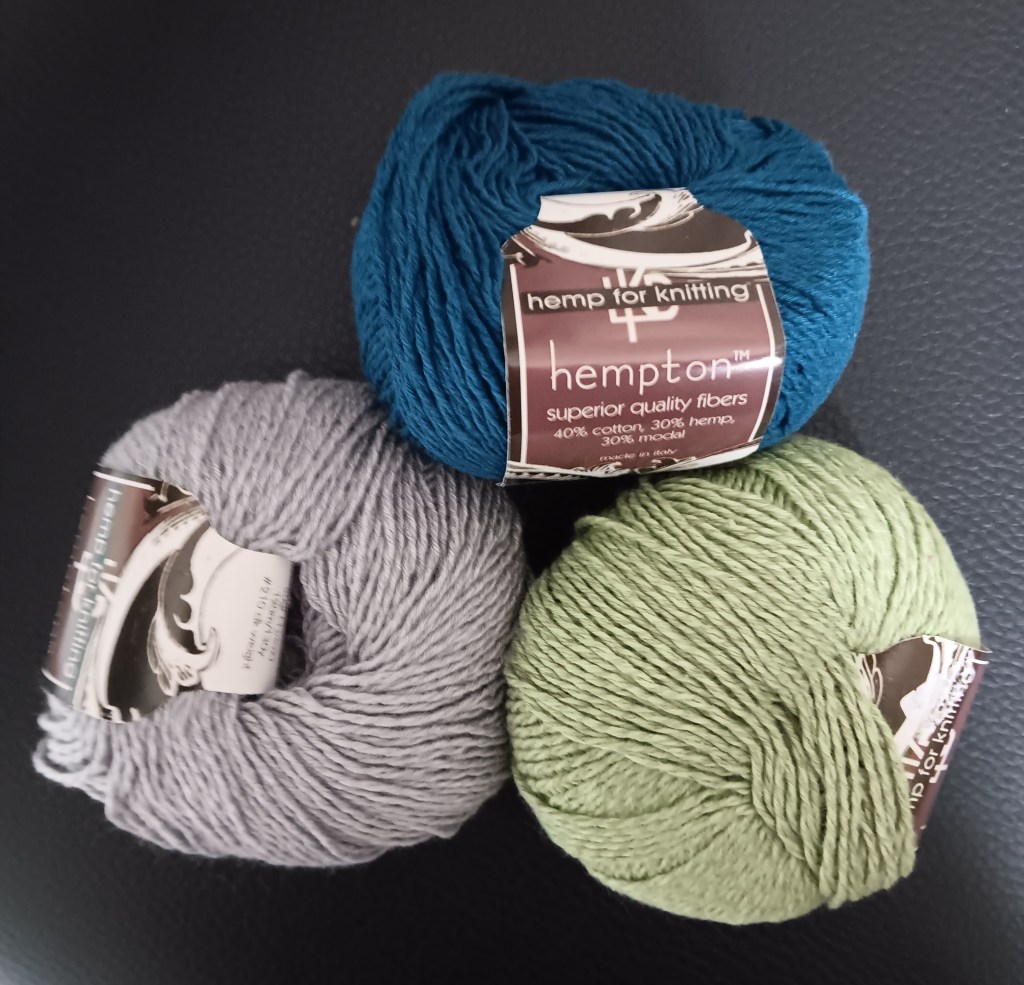
I have 8 x 50g of the grey, 8 x 50g of the teal and 2 x 50g of the green. I think that’s enough green to get 3 stripes going in the yoke. This is Hempton by Lana Knits: 40% cotton, 30% hemp and 30% modal. That’s summery yarn, right? Again the grey and green are a little too close in value but I think they will show the helical stripes better. Here’s hoping!

Cheers, Deb

Any Gauge and Gauge-free patterns by Deb

deb.gemmell on instagram

A Do-over for the Family Crew Neck and a new Circular Yoke beginning.

I had a oops. I didn’t guess correctly on my needle size to get the gauge I wanted for my Family Crew Neck. If I was a smart person I would have notes on the needle sizes I have used before for this yarn, but … no notes. So I guessed. The gauge isn’t even close to what I wanted. So my first beginning of this Family Crew Neck for my grandson is toast.

Say goodbye to this one, it’s way too big. The gauge is closer to 5 sts/1″ and I was looking for 6 – 6 1/2 sts /1″.

New start.

This is obviously working great. I got the gauge I wanted by going down a couple more needle sizes and voila, stripes are appearing like magic.

Here’s my weekly update.

Because I can’t just knit just one sweater, I’m also knitting a Circular Yoke for myself. I started with an I-Cord 24″ long. I think this is a fairly good size for the neck opening. The I-cord idea came to me because I didn’t want to knit a swatch. I could knit the I-cord to the length I wanted, gauge doesn’t matter, it’s the length I needed. Don’t you sometimes just want to dive in? I do most of the time.

Once I picked up stitches around the I-cord I worked short rows using these Twin Stitches. Here’s a close up video of them.

The complete round where you have to close those last gaps from the back and forth short rows, is so much better with these Twin Stitches.

I can’t wait to get going on my 1-round stripes. I’m going to use the helical stripe method. Have you tried this?

Cheers, Deb

Any Gauge and Gauge-Free knitting patterns by Deb

deb.gemmell on instagram

Debgemmell435 on youtube

One more Family Crew Neck and some thoughts about Circular Yokes

It’s time to get started on my 2025 knitting. Have you started? I’m a little late to the party but I had to clear the decks, so to speak, and get those WIPs out of the way. Well, not out of the way exactly, but finished and delivered to the wearers, one of which is me.

Now I am starting on a request from my grandson for a rainbow sweater. It’s another Family Crew Neck, my 6th one. The modification for this one will be rainbow stripes. If you haven’t tried this pattern because of the math, I’ve done a video for the beginning cast on which shows my math for a 4 year old size. You can follow along over the coming weeks.

Also in the works is a top down circular yoke sweater. In the works at this point means I think about it at 3 a.m. There are so many ways to tackle a circular yoke. How could I work the yoke increases? Should I set up 8 or 12 markers and increase there every x number of rounds, as I work down the yoke? Maybe I could do a round with many, many increases and then work straight to the next round of many increases?

I have made 2 decisions so far. I am starting this circular yoke with an I-cord for the neck opening edge.

Then I am going to work in stripes of 2 rounds of variegated wool and one round of brown, worked in the helical method.

If you haven’t tried this, it’s a fantastic way to work one round stripes. Stay tuned. A video may be coming your way.

Cheers, Deb

Any Gauge and Gauge-Free patterns by Deb

deb.gemmell on instagram

Contiguous Drop Shoulder

I’ve published the Contiguous Drop Shoulder pattern on ravelry. It’s an Any Gauge recipe style pattern. Oh, and it’s free. I have done a couple of videos for it too. Have a great time with this pattern. My daughter loves hers.

This one is in chunky weight yarn and was very fast to knit up.

The one for me is taking a little longer. I had a different idea for the sleeves and after knitting them decided it didn’t work. Rip, rip, rip and start again. Now they are mostly done the second time around.

I knit the sleeves with all the orange yarn I have left. I still have a tiny bit of blue and grey, about 2 or 3 rounds of each and then the sleeves are done. Three quarter length sleeves it is.

I used all the one dye lot skeins of worsted weight wool I had. Yay.

I worked the bottom grey colour in a floating seed stitch pattern since that ball of wool was ripped back from another project. I didn’t want to recondition the yarn so the stitch pattern is a distraction from the crinkly yarn. I think it’s doing it’s job.

I don’t know that this stash buster is fashion forward but it is very comfy. Just a perfect winter knit.

Cheers, Deb

Any Gauge and Gauge-Free patterns by Deb

deb.gemmell on instagram

6×6 Cardigan is published

I’ve decided to put my future patterns out for free. I am finding that as soon as I’ve finished the knitting and writing, I really want to get it out to you. The time involved in the publication of a properly priced pattern puts this off for many, many months. It’s more than I want to be involved in right now that I am more or less retired. My friend, Dana, has knit this and given me a couple of much needed corrections. Thanks Dana.

Here is a video tour of the Any Gauge 6×6 Cardigan pattern.

Download your pattern at my ravelry store. I hope you enjoy knitting it. I’m here if you have any questions: debgemmellmods@gmail.com. I knit mine, the purple one, in Shelridge DK and the gold one, for my daughter, is in Estelle Worsted.

It’s time to tidy up before Christmas. So here is where I’m at. Look at this. The Contiguous Drop Shoulder is almost done. I’m so excited. Only the cuffs to go. Watch for the pattern on my ravelry site because it should be up for free as soon as I can get a proper photo.

The sweater colours are a little brighter than this. At 7am,there is not much choice in lighting. I have to leave at 8 to go to curling. But I wanted to show you that the sleeves are almost done. Yahoo. Did I already say I was excited? I’m excited!

I also finished my christmas knitting. One pair of double mittens (one pair stuffed inside the other) of my Any Gauge Mittens. (discount MITTENS is still in effect).

That’s a wrap. Have a wonderful Holiday Season. See you on the other side. I am already planning my next sweater. How about you?

Cheers, Deb

Any Gauge and Gauge-free patterns by Deb

deb.gemmell on instagram

Christmas Crunch Time

Are you knitting for your special people? I am. Even if you’re not, I have some mittens you might want to try.

One pair done. You might remember that I bought wool to make a chunky weight 6×6 Cardigan in burgundy colourway. I didn’t like it. So now I’m pulling it out and knitting mittens with all that wiggly looking wool. I’m going to give them a scrub when I wash them to fuzz them up a bit. They should look fine.

These are the Any Gauge Mittens, knit from the top in chunky or Aran weight (Heavy Worsted) wool for all sizes. Any Gauge Mittens, Top Down 50%Discount Code: MITTENS until Dec. 24, 2024.

I knit one pair with the recommended needle for the wool. Then I knit a second pair with a size smaller needle and the same number of stitches. One pair will fit into the other, for really warm mittens.

You start at the tippy top of the mitten, working increases to the width of mitten you want. I’ve included a size guide in the pattern.

Then you knit the thumbs as a large I-cord. Yup, an i-cord. You get those bars across the inside of the thumb.

Don’t panic. Get your crochet hook out and hook those bars up. They totally disappear. It’s magic.

Enjoy!

Meanwhile, back at the ranch, this is where I’m at with my Contiguous Drop Shoulder. It’s totally working great. I tried it on my daughter and I now have measurements for how long the body and sleeve need to be. I’m on it!

I hope you are enjoying this time of year and not stressing out too much. I am trying my best to keep an even keel and my sweater knitting definitely helps.

Keeping it Merry, Deb

Any Gauge and Gauge-Free knitting patterns by Deb

deb.gemmell on instragram

The Steek, the scissors are out

You don’t have to look if you don’t want to. There will be cutting.

I have used a sewing machine to secure the edges of the steek pathway before but … you knew this was coming, my machine is not out and I’m being lazy and leaving it in the cupboard for now. I really want to see if the crocheted style of steek would work. So here goes. I have knit to the bottom of the armhole depth and cast off the 5 steek pathway stitches.

Now the edges of the steek pathway need to be secured. I used this crochet method. Jessica MacDonald does such a good job of describing and showing how to do this. How to work a crochet steek reinforcement video.

Here we go. This is my 5-stitch steek pathway as seen at the shoulder.

Next, baste down the centre of stitch#3.

Starting at the shoulder, I crocheted into the left leg of stitch#1 and the right leg of stitch#2, using a crochet slip stitch.

I used a crochet hook 2 sizes smaller than my body-sized knitting needle, and for this worsted weight sweater, sock yarn. My crocheting was not elegant. It was awkward and rather slow going but the result is surprisingly tight. I have no worries about it coming apart.

My best tip is to fold the fabric so the stitch line you are crocheting is on the top.

Next go to the bottom of the steek and work again with one leg of stitch#4 and stitch#5.

Here is the steek with both crochet reinforcements done.

OK, here we go. Scissors out. Cut up the centre of stitch#3.

Ta, da. That wasn’t too painful. The wrong side is ok too.

I’m starting my new colour and then I’m going to pick up for my sleeves. Can’t wait.

Cheers, Deb

Any Gauge and Gauge-Free knitting patterns by Deb

deb.gemmell on instagram

To Steek or Not to Steek

Steeks, scary!!! I know, scissors and knitting don’t usually mix. I’m doing it anyway.

I’m doing my armholes as steeks so I can knit round and round and round. I have knit the shoulders so they are wide enough. This pullover is going to have 10″/25cm of ease so the Front and Back of this chunky weight version for my daughter, are both 21″/53cm wide.

Here’s how I start my steek. At the end of the shoulders I cast On 5 sts for the steek pathway.

Now I knit round and round. Yay. I think I will make the armholes around 8-9″/20-23cm deep.

I’m so happy and relaxed. Isn’t this yarn fun? It’s King Cole Hedgerow Chunky. I’m loving the stripes.

Cheers, Deb

Any Gauge and Gauge-Free patterns by Deb

deb.gemmell on instagram

Short Rows to lower the Front

Short Rows are the best. To drop the front of your neckline you basically work back and forth, working more rows across and Back of Neck and never working across all the Front stitches. Every time you turn from the right side to the wrong side at the end of a short row, you create a gap.

Different kinds of short row systems are all about how to close these gaps.

When you cast on for this neckband you cast on many more stitches on the front. The short rows I use end with a decrease: SSK, K1, Turn OR P2tog, P1, Turn (if you knit cuff down heel flap socks you will recognize this short row system). The decreases take care of all those extra Front stitches.

Now the fun part begins, not that knitting short rows isn’t fun, because it totally is.

To knit the shoulders, simply knit round and round, working an increase before and after each of the shoulder markers. That’s an increase of 4 stitches every round until you reach the desired width. That’s the contiguous way.

Almost to my desired width on this chunky weight one. The Short Rows on the worsted weight version are complete so round and round I go. I’m so excited to see it grow. Cheers, Deb

Any Gauge and Gauge-Free patterns by Deb

deb.gemmell on instagram

Contiguous Drop Shoulder, The Beginning

I can’t sit still for long. I have another sweater to knit. This time I’m going to redo one that I have tried before but not to my total satisfaction.

This is a over-sized drop shoulder with contiguous shoulders. You can see the slope that the contiguous line creates. The great thing is that once the V-neck is completed it’s knit round and round, not flat for the back and flat for the front.

So I tried again and thought I had figured out an easier way to get it started.

The neckband done. This is going to be a crewneck worked with short rows to drop the front.

Then I tried out a new idea. You can see that the slope coming down the shoulder is w-a-y too steep. The second slope is much better. So that’s good information. Also the amount of drop in the crewneck was too much.

So that got ripped back to the neckband. No problem, no tears, it’s just part of the deal.

I started again with a shallower crewneck drop and the flatter shoulder slope.

Now I’m off to the races. Just knit round and round until I reach the width I want it to be. How easy is that!

Let me tell you a little about it.

I’m going to offer the recipe for this pullover for free. Once I have my short rows tested I will post it and update it as we go along. This is an Any Gauge pattern. I’m knitting one in chunky weight and a second one in worsted weight. I will be figuring it out as I go along. Do you want to knit along with me?

Cheers, Deb

Any Gauge and Gauge-free patterns by Deb

Deb.gemmell on instagram