Christmas Crunch Time

Are you knitting for your special people? I am. Even if you’re not, I have some mittens you might want to try.

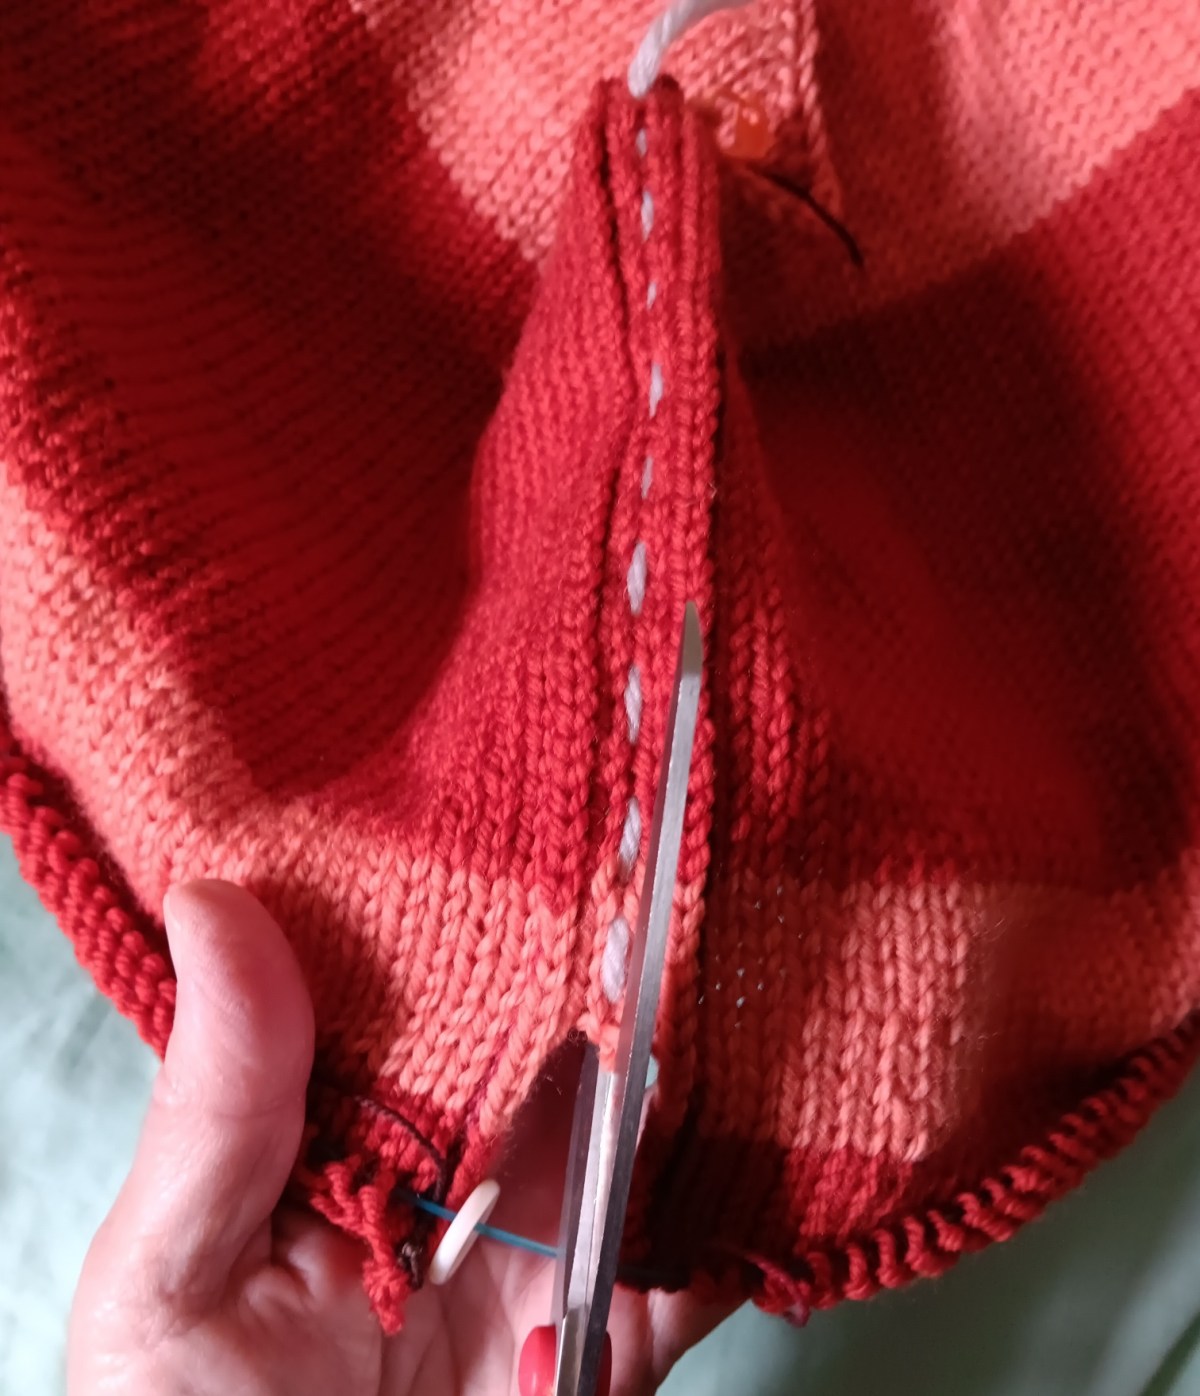
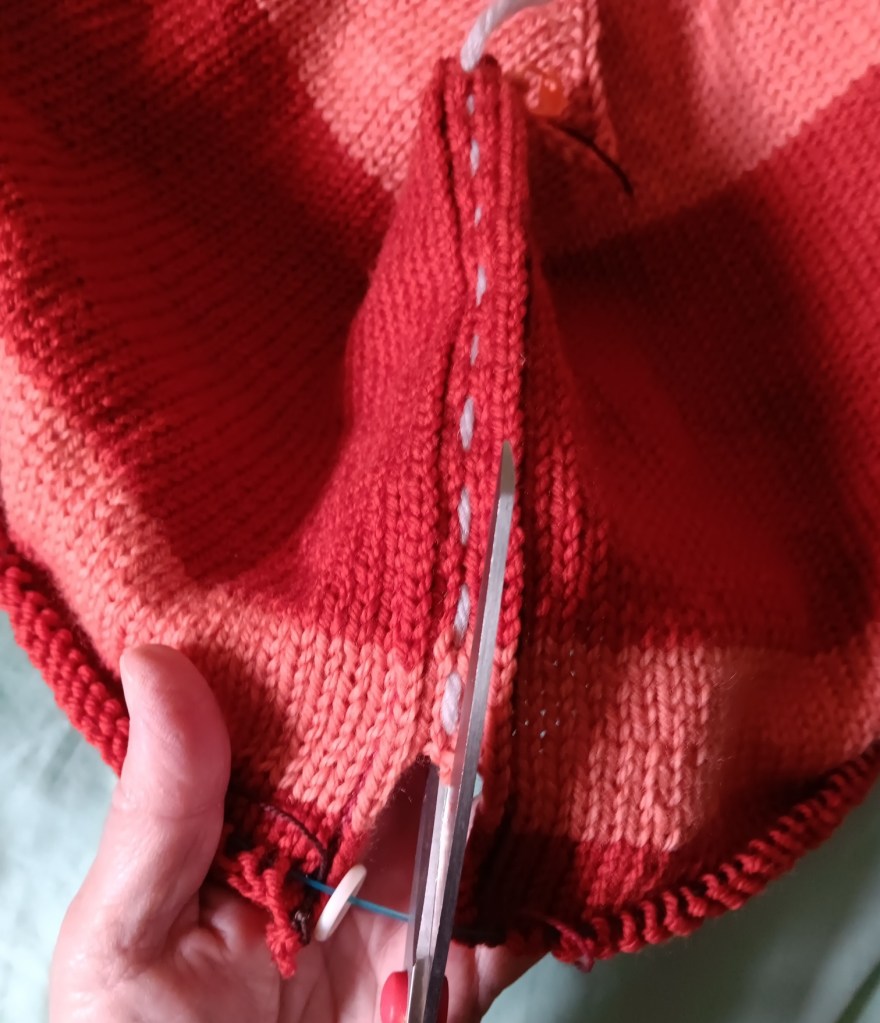
One pair done. You might remember that I bought wool to make a chunky weight 6×6 Cardigan in burgundy colourway. I didn’t like it. So now I’m pulling it out and knitting mittens with all that wiggly looking wool. I’m going to give them a scrub when I wash them to fuzz them up a bit. They should look fine.

These are the Any Gauge Mittens, knit from the top in chunky or Aran weight (Heavy Worsted) wool for all sizes. Any Gauge Mittens, Top Down 50%Discount Code: MITTENS until Dec. 24, 2024.

I knit one pair with the recommended needle for the wool. Then I knit a second pair with a size smaller needle and the same number of stitches. One pair will fit into the other, for really warm mittens.

You start at the tippy top of the mitten, working increases to the width of mitten you want. I’ve included a size guide in the pattern.

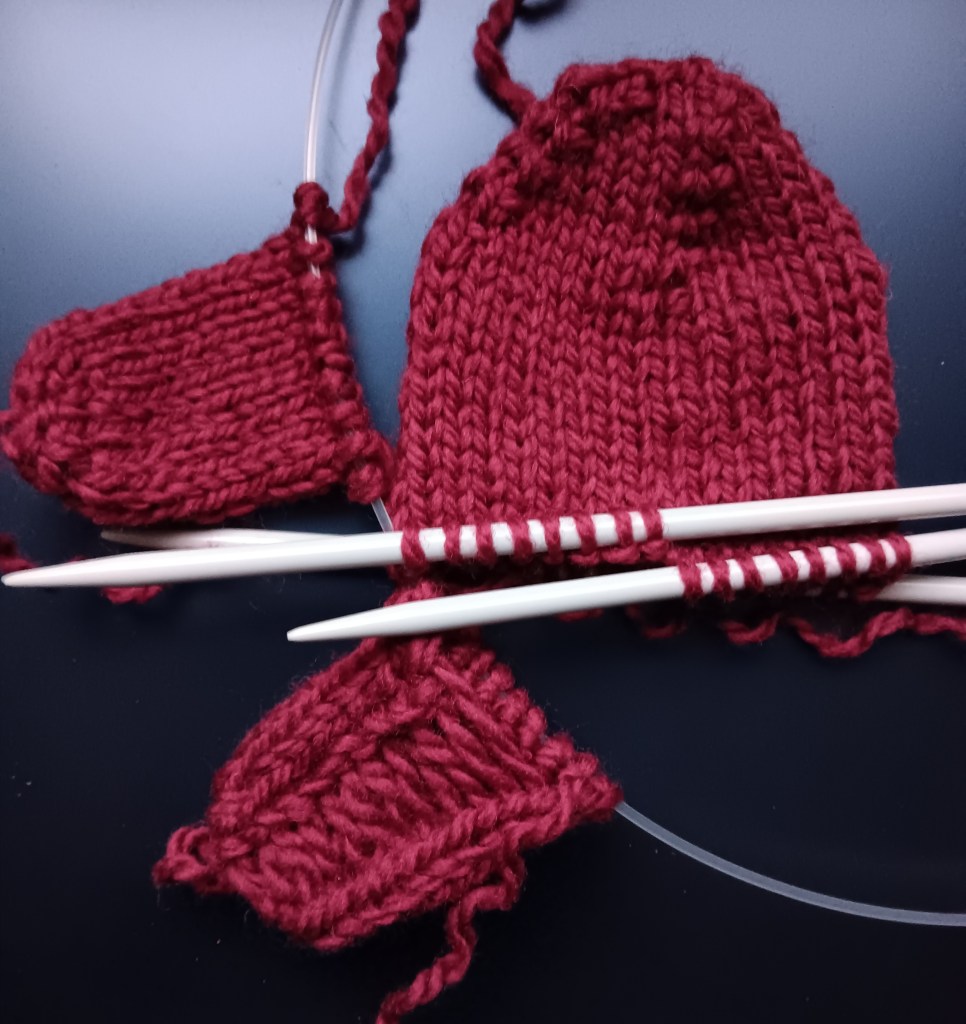
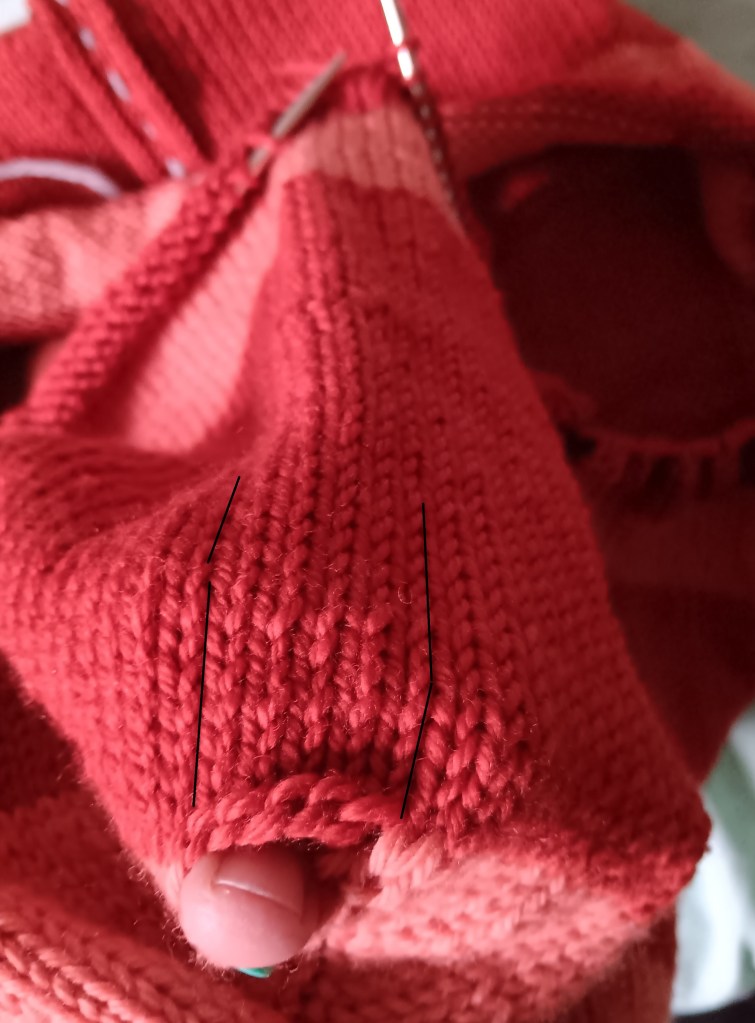
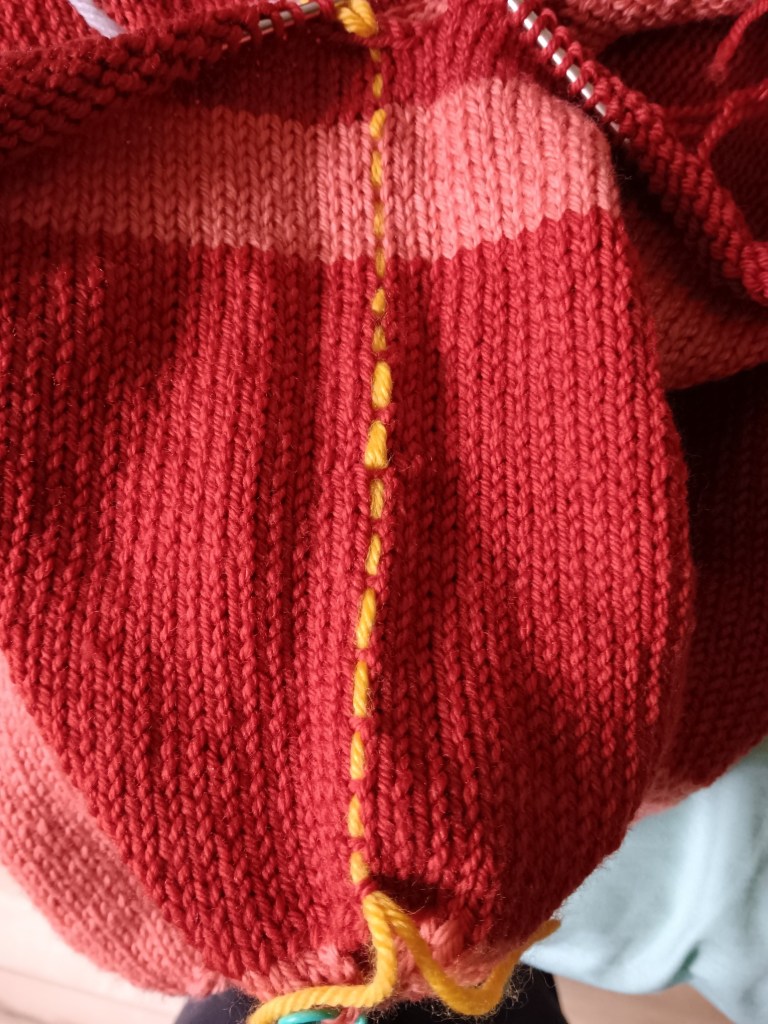
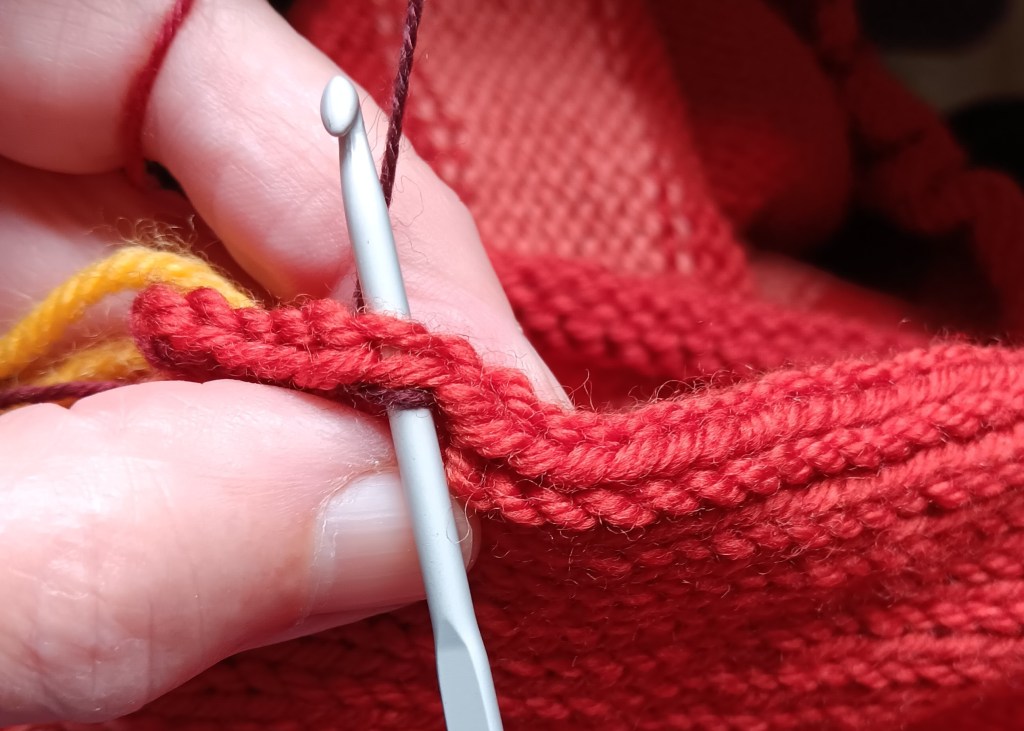
Then you knit the thumbs as a large I-cord. Yup, an i-cord. You get those bars across the inside of the thumb.

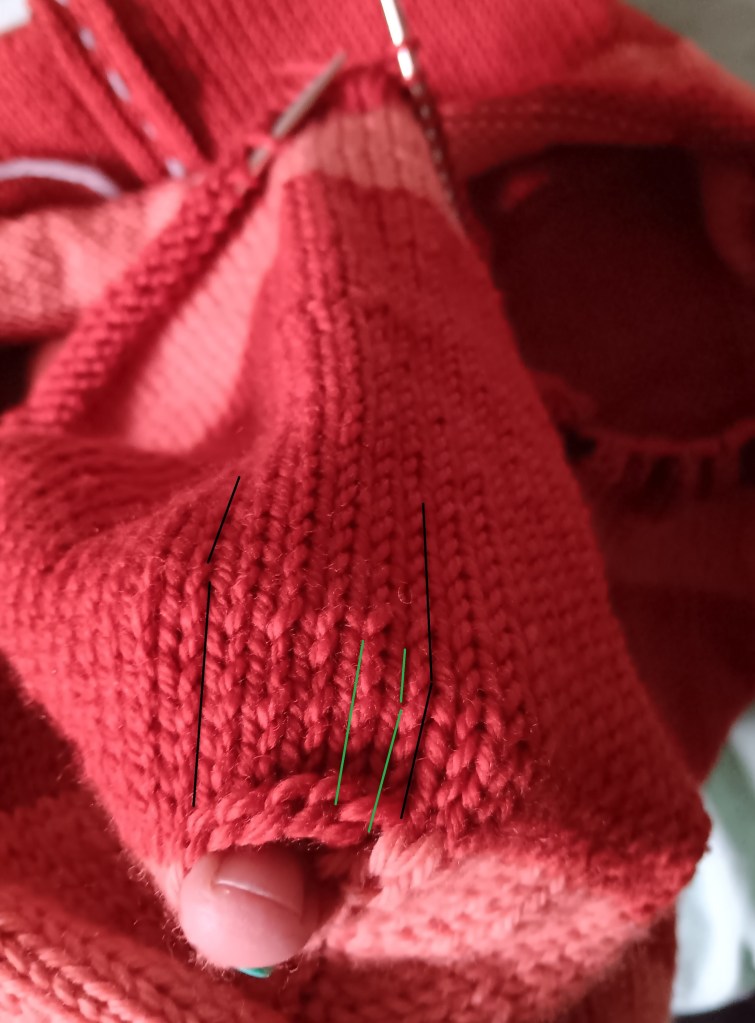
Don’t panic. Get your crochet hook out and hook those bars up. They totally disappear. It’s magic.

Enjoy!

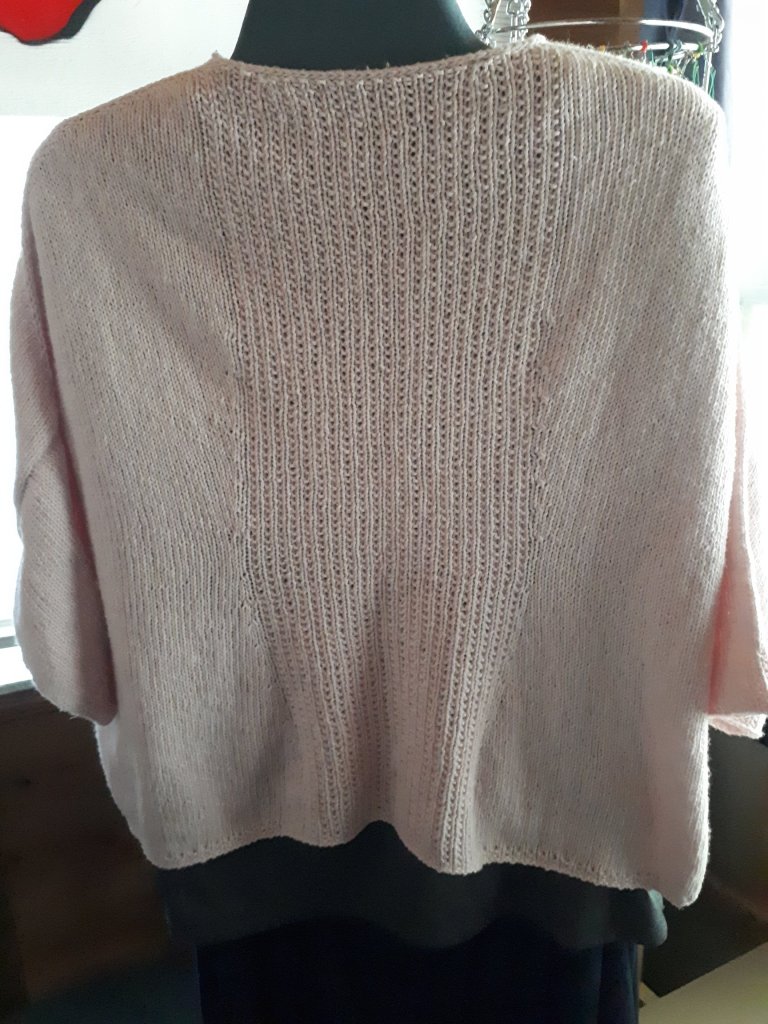
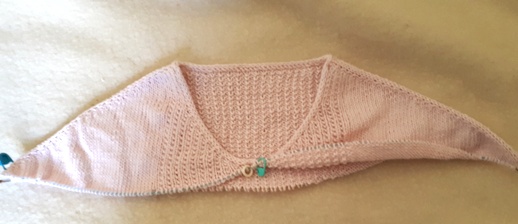
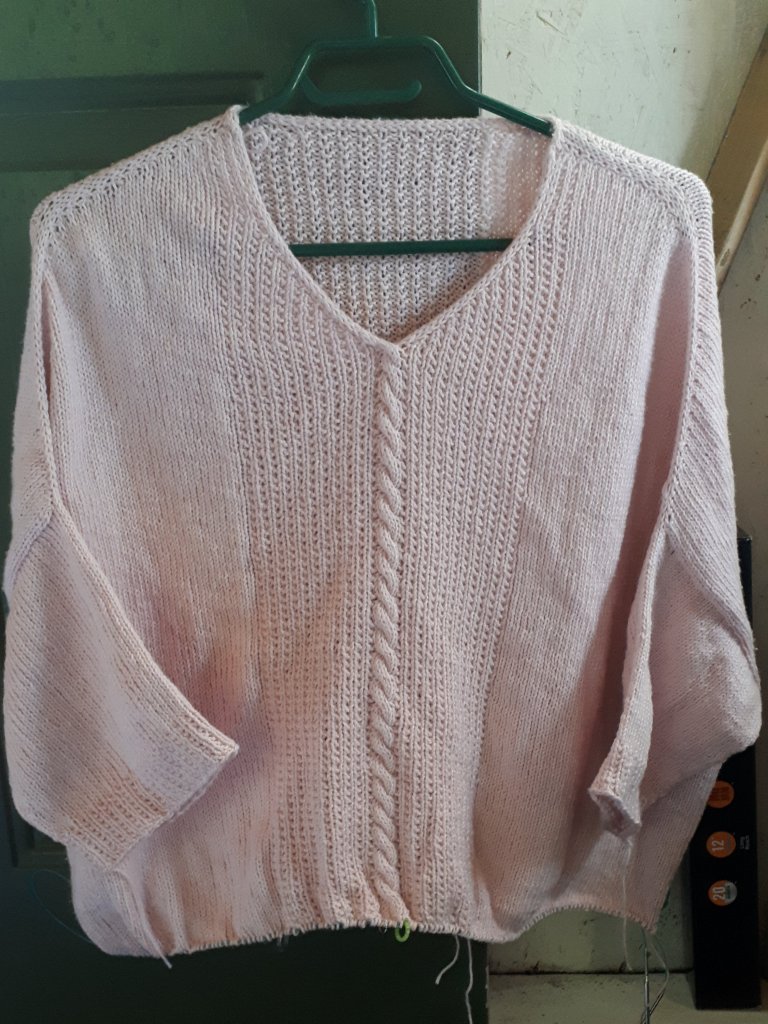
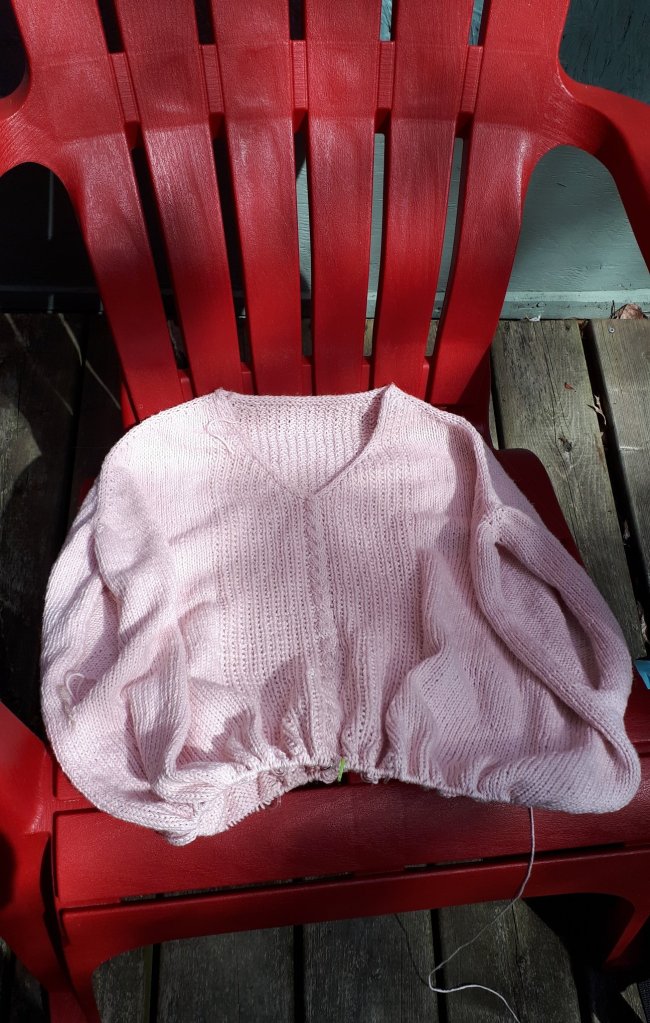
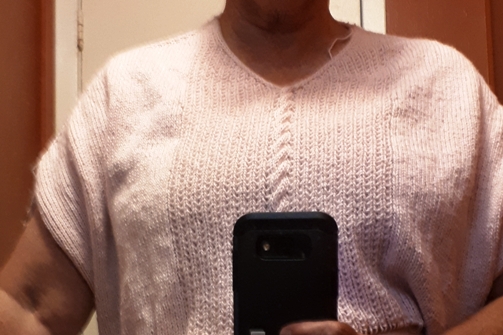
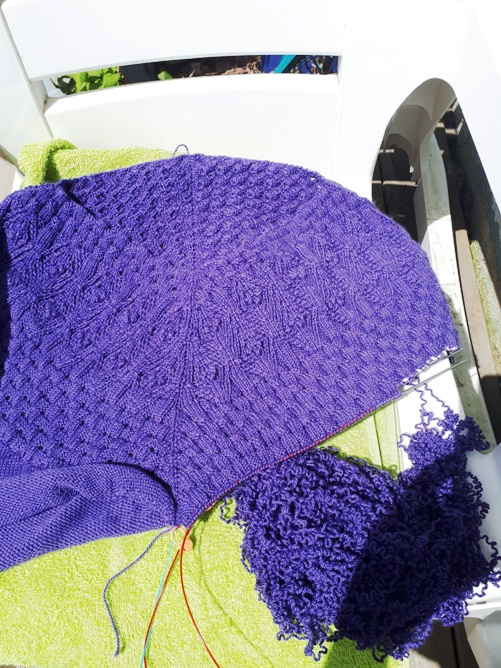
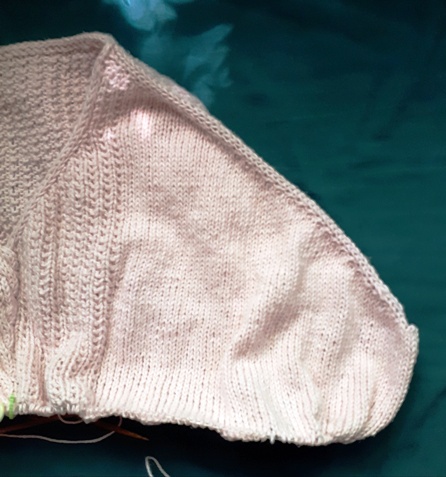
Meanwhile, back at the ranch, this is where I’m at with my Contiguous Drop Shoulder. It’s totally working great. I tried it on my daughter and I now have measurements for how long the body and sleeve need to be. I’m on it!

I hope you are enjoying this time of year and not stressing out too much. I am trying my best to keep an even keel and my sweater knitting definitely helps.

Keeping it Merry, Deb

Any Gauge and Gauge-Free knitting patterns by Deb

deb.gemmell on instragram

The Steek, the scissors are out

You don’t have to look if you don’t want to. There will be cutting.

I have used a sewing machine to secure the edges of the steek pathway before but … you knew this was coming, my machine is not out and I’m being lazy and leaving it in the cupboard for now. I really want to see if the crocheted style of steek would work. So here goes. I have knit to the bottom of the armhole depth and cast off the 5 steek pathway stitches.

Now the edges of the steek pathway need to be secured. I used this crochet method. Jessica MacDonald does such a good job of describing and showing how to do this. How to work a crochet steek reinforcement video.

Here we go. This is my 5-stitch steek pathway as seen at the shoulder.

Next, baste down the centre of stitch#3.

Starting at the shoulder, I crocheted into the left leg of stitch#1 and the right leg of stitch#2, using a crochet slip stitch.

I used a crochet hook 2 sizes smaller than my body-sized knitting needle, and for this worsted weight sweater, sock yarn. My crocheting was not elegant. It was awkward and rather slow going but the result is surprisingly tight. I have no worries about it coming apart.

My best tip is to fold the fabric so the stitch line you are crocheting is on the top.

Next go to the bottom of the steek and work again with one leg of stitch#4 and stitch#5.

Here is the steek with both crochet reinforcements done.

OK, here we go. Scissors out. Cut up the centre of stitch#3.

Ta, da. That wasn’t too painful. The wrong side is ok too.

I’m starting my new colour and then I’m going to pick up for my sleeves. Can’t wait.

Cheers, Deb

Any Gauge and Gauge-Free knitting patterns by Deb

deb.gemmell on instagram

To Steek or Not to Steek

Steeks, scary!!! I know, scissors and knitting don’t usually mix. I’m doing it anyway.

I’m doing my armholes as steeks so I can knit round and round and round. I have knit the shoulders so they are wide enough. This pullover is going to have 10″/25cm of ease so the Front and Back of this chunky weight version for my daughter, are both 21″/53cm wide.

Here’s how I start my steek. At the end of the shoulders I cast On 5 sts for the steek pathway.

Now I knit round and round. Yay. I think I will make the armholes around 8-9″/20-23cm deep.

I’m so happy and relaxed. Isn’t this yarn fun? It’s King Cole Hedgerow Chunky. I’m loving the stripes.

Cheers, Deb

Any Gauge and Gauge-Free patterns by Deb

deb.gemmell on instagram

Done

Gauge-free and Any Gauge patterns by Deb

Yes, it’s done!

Am I happy? Yes.

What do I think about my first boxy style pullover?

It’s comfy to wear. Fourteen inches of ease might have something to do with that.

It was a lot of knitting. I was amazed when I weighed it and it only weighed 400g. It felt like it should have been more than that. The yarn is a cotton/linen blend by Sugar Bush called Cabot.

I really like the 3/4 length sleeves. Actually, what I really loved was that the sleeves where so nice and short, LOL. Maybe you can relate?

I would change a couple of things next time.

I would slope the sleeves to match the shoulder line.

I worked shaping on either side of the back panel. I like it.

Next time I would work the decreases and increases inside the pattern itself. Then the panel would have an hourglass shape. I feel like the back on these sweaters needs a little distraction from all that stockinette fabric.

I’m happy with my experiment. Will I knit another one? Maybe.

Cheers, Deb

Gauge-free and Any Gauge patterns by Deb :

Deb.gemmell on Instagram

Stages of sweater making

Gauge-free and Any Gauge patterns by Deb https://www.ravelry.com/stores/debgemmellmods

There are distinct stages in sweater knitting – places where you can take a look and feel satisfied with your progress. A good thing too because a sweater is a long project. Taking the time to sit back and congratulate  yourself makes it all worthwhile.

Getting started with all the adventure ahead of you – that’s the easy part.

There’s a point where it seems to become a sweater and not some random bit of knitting. For this pullover, it was joining it up at the bottom of the V.

Trying something new is also fun. The idea to work the steeks was not what I had planned for this construction. But why not?

Getting the sleeves done is always a  relief. Once the sleeves are there it really is a garment. These are 3/4 length so not long at all. Yay.

Now I’m coasting down to the bottom and wondering how long I really need this sweater to be. I’d like to be done. This is where I need to buckle down and keep going.

I’m so close to being finished. Now I’m looking to cast on something new. Hmmm.

Cheers,  Deb

Gauge-free and Any Gauge patterns by Deb https://www.ravelry.com/stores/debgemmellmods

Deb.Gemmell on Instagram

Did the Steeks work?

Any Gauge and Gauge-Free patterns by Deb

I know you’ve been waiting with baited breath to see if picking up around my steeked sleeve opening would hold as I knit my sleeves. You haven’t?!

Well, I was holding my breath, even as I did it. And, guess what, I found one more skein of the pink. Yay.

On the inside you can see the crochet work I did and the cut ends.

On the outside, the pick up is very neat and tidy. I picked up 3 stitches for every 4 rows.

One 3/4 length sleeve finished. I have to say that this construction sure makes short work of sleeve knitting. I love that.

As I approach the end of this large experiment I cast on for a new project. I’m holding it as a carrot in front of this sweater so that I get it done.

I can’t be the only one who does this, am I?

Cheers, Deb

Any Gauge and Gauge-Free Patterns by Deb

Deb.Gemmell on instagram

Summer knitting

I hope you are doing some summertime knitting. I am almost finished my third skein of cotton.

Hmm, it looks like it must be more yarn than that, doesn’t it? Maybe it’s the end of the 4th skein. It might have been an idea to take note of how much I had when I started. Notes?! Ha.

That’s the last of the pink, unfortunately. I’m still stash busting and using what I have on hand. I have one skein of gray to finish. So that’s next.

I’m knitting up the pink as fast as I can. I really want to pick up around my sleeves. I’m going to do some sort of short gray sleeve. Yarn is running out. Yikes.

What is your summer project?

Cheers, Deb

Gauge-free and Any Gauge patterns by Deb on ravelry.

Steeks, Here We Go

I’m a little shaky as I write this because I just did it. I have sleeve openings!!

Yahoo. My steek is cut. I’m so happy to be able to put this sweater on.

It looked like this before I started this morning.

Here are the 5 steek stitches for my sleeve opening. Now it’s time to open that steek.

I was going to machine stitch the steek before cutting but the thought of getting my machine out, finding a place to set it up and getting it ready was daunting. I decided to try the crochet method. There are lots of videos available.

I grabbed a small crochet hook and some lace weight yarn and got started. I worked a slip stitch through both legs of stitch #2 and stitch #4 of the 5 steek stitches.

I found that folding the fabric to make a ridge of stitches made it easier to crochet into.

There they are. Two rows of slip stitches with a nice clear path in the centre to cut.

A big breath in and snip.

Ta, da, a sleeve opening. Isn’t that amazing?

Both sides of the steek roll to the inside of the sweater. Steeks really are wonderful. I’m just going to sneak over and admire mine again.

Cheers, Deb

Any Gauge and Gauge-Free patterns by Deb

On instagram: Deb.Gemmell

Two steps forward and one step back

I’m glad I celebrated finishing the lace section of my Corbis sweater because, you guessed it, the one step back part is coming up.

I finished the sides, working the German Short Rows. I was very pleased with it. Then I measured the width and maybe you guessed it, too small. At least it would have fit pre-covid but not now. I’ve bumped up a size and well …

I spent an afternoon outside on my rocking chair ripping both sides out. Sigh.

Now I am redoing both side panels with a larger needle. One side is done and the second side will be finished shortly. Yay. This is a big win!

That’s the quick story of this sweater. I’m still looking forward to finishing. It’s going to be terrific.

Since I don’t work on only one project I’ll give you a quick update on my top down slope-shoulder sweater. I finished the sleeve steek knitting.

If you haven’t done a steek before, this is my method, working from the top down or the bottom up. At the beginning of the sleeve opening cast on 5 steek sts. Knit round and round to the finished length of the sleeve opening. Then cast off the 5 steek stitches.

I find this makes the machine stitching of the steek much easier. That’s coming up soon but for now I’m going to continue working the body round and round.

I hope you’re having as much fun as I am, ha, ha. Cheers, Deb

Any Gauge and Gauge-Free knitting patterns by Deb

Celebrate as you go

It has occurred to me lately that working on two pullovers at the same time is not the best idea I have ever had. It seems like very little progress is made on either one. I am missing that satisfying feeling of getting something done. So today I am celebrating getting the lace section of the Corbis Sweater by Natasja Hornby DONE.

The left side is on waste yarn. The right side is ready to work. Short rows here I come. I’m excited.

My other project, the slope-shoulder pullover, is also coming along slowly. I decided to take MP’s advice to keep knitting and see how I felt about continuing or if it was time rip it out. It felt good so I’m carrying on.

I solved the problem of the centre front join by working a 6 stitch cable. That divides what was the beginning and the end of the rows when I was working the top of the yoke flat. The beginning of the round is still in the centre front, which is a little weird, but this is working.

Next is the long section for the sleeve openings. Usually you would work the front and back flat for the length of the sleeve opening. I had a car trip coming up (navigator and passenger only, of course) so I decided to continue to work in the round. It’s easier to be looking at the right side all the time. Not so much attention needed. This requires a steek. Eeek, a steek!

Yes, I’m going to cut the fabric to make the sleeve openings. To get started I cast on 5 sts at the end of each of the shoulders. These 5 sts are my steek stitches and the hole makes the machine sewing easier to work. Then I will cut. I can’t wait. I love this technique.

Lots of excitement to come. I’m looking forward to feeling like I’m getting somewhere on these two projects.

Cheers, Deb

Any Gauge and Gauge-Free patterns by Deb

Deb.Gemmell on instagram