Build A Vest is Done

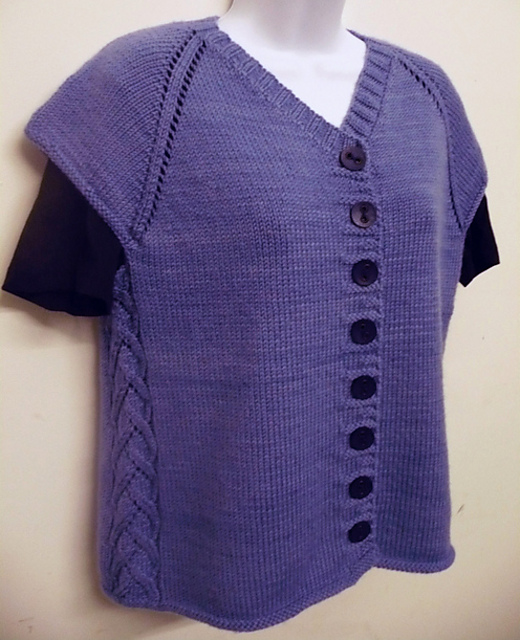
My goal this year was to knit fingering weight garments. I’m finding it a slow go. So this is a short post to celebrate. I’m so happy to have it finished.

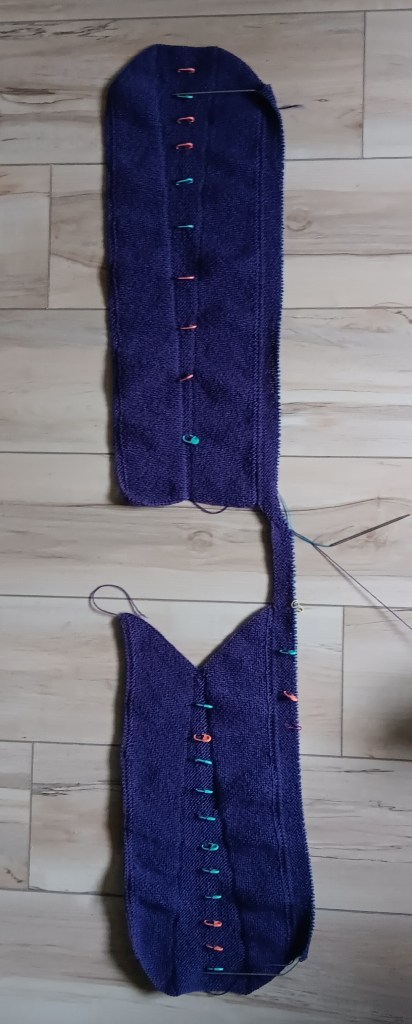
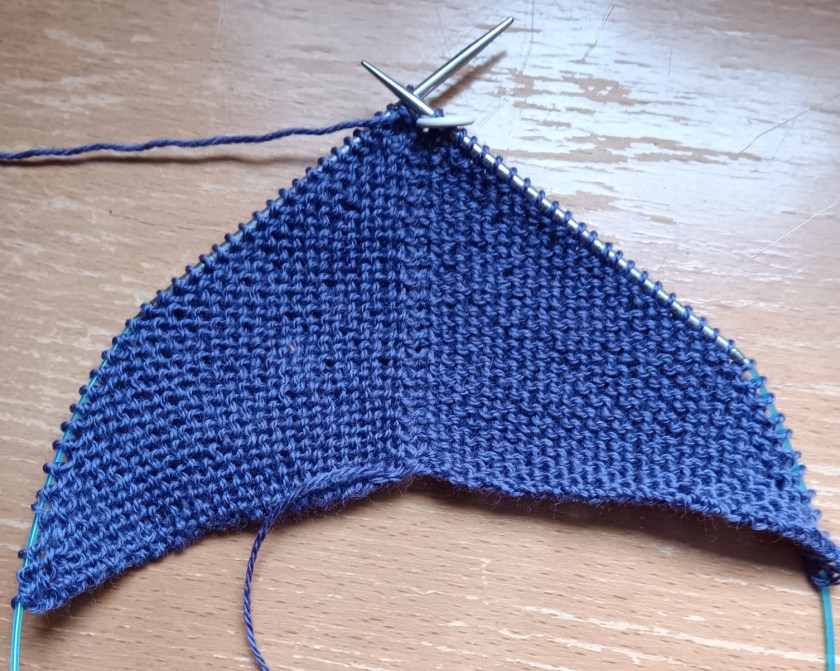
This is my first one. A vest version of the Build A Bigger V. There are fewer changes for the vest than I had thought at first. The biggest change is no sleeves, of course, so the final bit was knitting out to the sides to get the correct fit around the body.

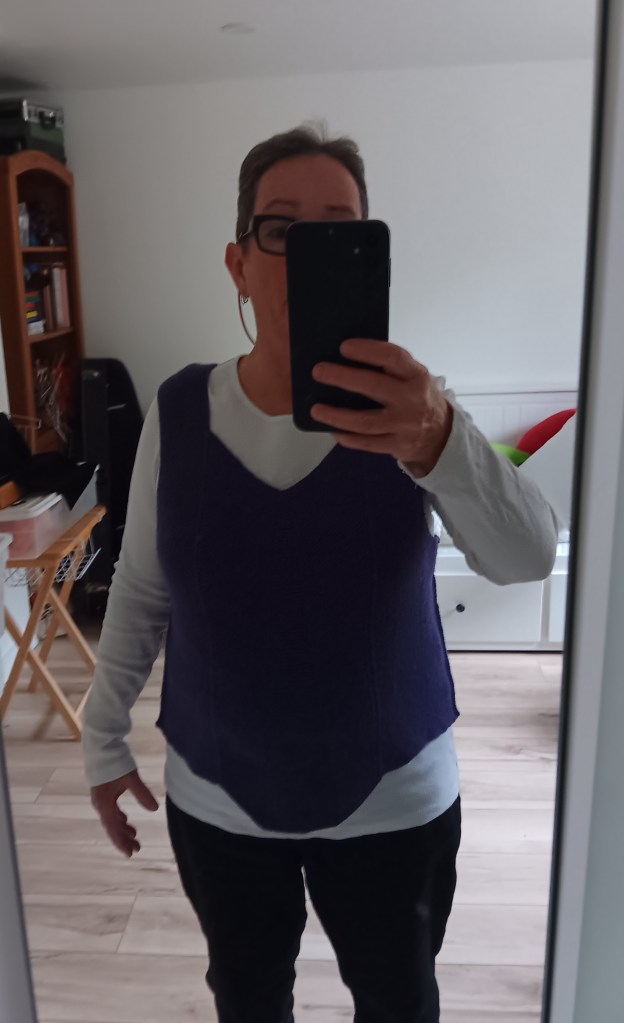
It fits well, it’s light weight and did I mention, it’s Done.

I’m so excited. I just had to show you (over and over again, apparently).

Now it’s time to finish up some small things. They are soooo satisfying after finishing a bigger project.

Are you busy with small knitting or longer projects? I hope it’s going well.

Cheers, Deb

Any Gauge and Gauge-Free patterns by Deb

deb.gemmell on instagram

Build a Vest: joining Front and Back video

Progress is being made on my vest version of the Build A Bigger V cardigan, and yes I am knitting like a crazy person. The Front is knit as a pullover. Nice and easy since it’s just the Back again without the beginning triangle at the neck. Done.

Now I have to attach them together so I can knit out to the edge of my shoulder.

Both the Front and Back have a 2 stitch I-cord worked along each edge. I’m going to use those I-Cord stitches for the pick up. Hang on, it’s a tricky ride.

Ta, da. Phew, done. Not hard to do. It’s just lots and lots of stitches.

Bye for now, Deb

Any Gauge and Gauge-Free patterns by Deb

deb.gemmell on instagram

Gauge-Free, Build A Vest

This vest, and the cardigan I’m modifying it from (Build a Bigger V), will be Gauge-Free. No swatch needed. No talk about gauge at all, none, throughout the entire pattern. How freeing is that?

How can it possibly work?

Start with a couple of stitches and build a triangle with increases worked on either side of the centre marker. Work until the solid edge of the triangle is the width of the Back of Neck. Mine is 8″ wide.

Width of Back of Neck is 8″.

That sets the number of stitches for the Back Panel. You need to count the number of stitches you set up with at this point but we don’t care how many stitches per inch you are getting here. Any number of stitches will work.

Now, I will keep the same stitch count as I knit the back panel.

The shaded part here is the Back Panel. The triangle begins at the Back of Neck and the Back Panel is knit down to the desired length.

The decision will be how long I want this vest to be. Lots of knitting for the next week.

Cheers, Deb

Any Gauge and Gauge-Free patterns by Deb

Deb.gemmell on instagram

Build A Vest, ready, set, go >>>

This is a photo of the Build A Bigger V cardigan before I knit the sleeves. This could be a vest as it is in this photo. It has 9″ of ease so if it was a little more fitted … it could work.

But I sort of like the idea of cutting in the armhole, for a sleeveless look (white line).

Better?

At any rate, I’ve started. This is the beginning of the Back Panel. I’m knitting in fingering weight yarn (80/20 fingering by Shelridge Yarns – colour Iris). Yes, this will be a lot of knitting but here I go.

The idea of Building a Vest using the Build a Bigger V cardigan intrigued several knitters. Thanks for voting. Cheers, Deb

Any Gauge and Gauge-Free patterns by Deb

Deb.gemmell on instagram

Sleeveless Vests, let me count the ways.

www.ravelry.com/stores/debgemmellmods

I’ve come up with these 4, or maybe 5, options for making a vest. But which one to start first?

I think I might try several over the winter. How about you?

This one would be worked top down in garter stitch and started with a very big square shaped cast on. It would have only a few rounds of raglan shaping. Is it very fashionable (???), not that I’m a fashion diva!

This is based on the contiguous method of construction. Thanks Lynda C. for this suggestion. The contiguous shoulder is worked in the round, increasing 4 stitches every round, one increase before and one after a couple of shoulder stitches on both shoulders. I would need to work some sort of edging at the sides of the armholes because I don’t like having to pick up to finish them.

This is a straight raglan knit and the first one I thought of doing. I would work tuck stitches in the shoulder section to shorten the fabric of the shoulders. Would the shoulders be too bulky?

This one is a straight raglan yoke where the top of the shoulder stitches would be cast off and then at the armhole side of the raglan lines decreases could be worked to narrow the shoulders. Thanks Dana for suggesting this one.

While I was thinking about this a totally random thought came to me. I could add one more possibility, but not a raglan which was my original intention. What if I knit the Build a Bigger V as a vest? The central panels for the back and front are worked separately and then stitches are picked up along the sides of the front and back and knit out for the size of the body and the sleeves.

In fact, it’s a vest once you get to your body width before continuing with the sleeves. This might have possibilities. What do you think?

Do you have a favourite? Have you tried any of these vests?

Cheers, Deb

Any Gauge and Gauge-Free patterns by Deb

Deb.gemmell on instagram

Is it time for a new experiment?

https://www.ravelry.com/patterns/sources/debgemmellmods

I have an idea. Uh, oh. It won’t go away.

I want to knit a vest. That’s not so weird, right? They are handy to have. Winter is coming and I want to be prepared.

I could make it in the normal vest way: start with the shoulders and knit the front to the underarm, knit the back, join in the round at the underarm, and well, you get the picture. But no, not doing that because of … the idea.

What I really want is a top down raglan …

This is the Side Pattern Vest
https://www.ravelry.com/patterns/library/side-pattern-vest-631 by Cabin Fever,
designed by me. It’s a lovely knit in worsted weight yarn.

… where the shoulder is narrower. How can I shorten the shoulder section so that when I cast off the sleeve stitches I have what looks like a sleeveless armhole?

Yes, this is my big question. I know, I know, why bother? Sometimes a question like this grabs my attention and won’t let go so … here we go.

Cheers, Deb

Any Gauge patterns by Deb

Deb.Gemmell on instagram

CenterPointPopover

Happy long weekend. I hope you are enjoying some knitting. I have been busy knitting the vest version of the Centerpointpopover by mamasteddybear. I’m going to show you my progress. My vest doesn’t look nearly as neat and tidy as the pattern photo below but that’s life as a knitter.

I’m very interested in these sloped shoulder top down knits that I keep seeing. So I thought I would start with a small project just to see how it looked on me. This one was terrific fun to knit. It starts with the Front which looks like this:

Then the Back begins:

Here the back of neck is the correct width and the stitches are put on spare yarn. Now the front and back get attached at the shoulders and the shoulder shaping begins. From here it looks like a knitting blob and is not worth photographing. You know how that goes, right? You just have to keep the faith that it will turn into something.

Body shaping is done and one sleeve worked and it’s clear that it is a garment.

This is the true colour of the popover. I don’t know why my phone insists that it might be blue.

Now I have the other sleeve done and a short bit for the body length.

I haven’t bound off the bottom edge yet because I would like it to be longer. I washed and blocked it with 2 circular needles still holding the bottom edge open.

I gained 3″ in length from the blocking. Yay. Just what I wanted. It’s drying now. I have to finish the neck edge and cast off the bottom and then we’ll see. I’m going to go do something else now. Standing and watching it dry does not seem to be moving things along any faster.

I really enjoyed knitting the Centerpointpopover. This is a very inventive construction and you know how I like that. I would recommend it.

Cheers and here’s hoping you are knitting something fun too. Deb

Any gauge and Gauge-Free knitting patterns by Deb

Gradient done 2×2

My gradient vest is coming along. Not famously but, well, you can see for yourself.

I think it’s an improvement on the original (below on the right).

I’ve tried to make the lines between the colours less distinct. I think I failed. There are still lots of horizonal lines going on.

This is my range of colours. Starting with yellow through red, multi-coloured, purple and into blue and then green (if I get that far).

I’m using two colours all the time. Two rounds in one colour and two rounds in a second colour.

Each colour is worked with a second colour for approximately half a ball.

It goes like this:

Yellow & Red

Red & Multi-coloured

Multi-coloured & Purple

Purple & Blue

It hasn’t turned out as I expected. That’s not new. I’m carrying on anyway just to see how it turns out.

Cheers, Deb

Gauge-Free and Any Gauge patterns by Deb

Deb on instagram

I’m Stalled. Solution? Take something apart.

Here is a vest that I don’t wear. It fits great. I like the wool and the style. There’s just one little thing that bugs me.

That yellow band across my bust. I know, I know, it’s stupid to be self-conscious but … I am and I can’t talk myself out of it. So there it sits on the shelf, unworn, through no fault of its own.

The rainbow of colours that Dragonstrings dyed for me are terrific. So what’s a knitter to do?! Give it a tug, of course and … recycle it.

Now to figure out how to graduate the colours. Once gradient sweaters are knit the whole system seems so straight forward but I find it rather daunting. I scrounged around my stash and added one more skein to the mix of colours because more has to be better, right? The bottom multi-coloured skein is the addition and hopefully will work to help me graduate the colours.

The original vest sequence was: starting at the top, Red, Yellow, Green, Blue and into the Purple at the bottom.

This time, I’m going to reverse the circle direction.

New sequence: Yellow at the top, Red, multi-coloured, purple, blue, green.

OK, decision made. It’s in writing and I just told you all about it so here goes.

Have you done a gradient? Did it turn out like you thought it would?

Cheers, Deb

Gauge-Free and Any Gauge patterns by Deb

Deb on instagram