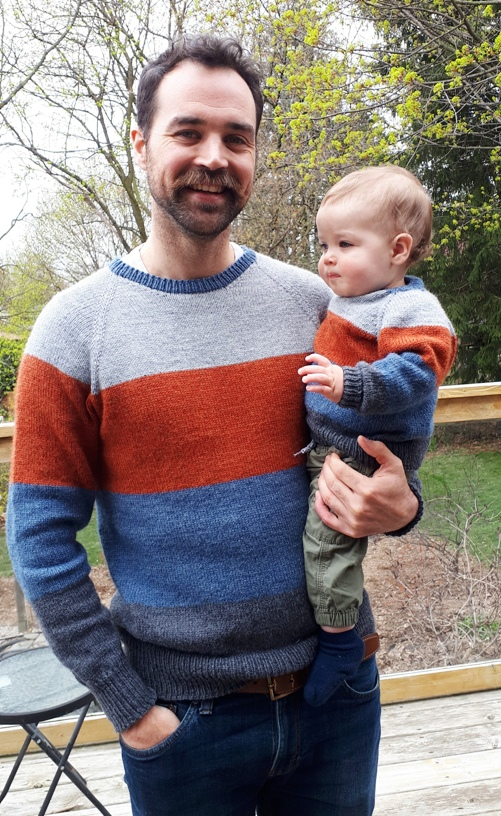
I’m working on one more pullover pattern (Family Crew Neck) before shawl knitting takes over. Summer seems to be more suited to shawls and I understand, snow withstanding, that summer is really on its way.
I have devised several construction systems over my years designing Cabin Fever patterns. These were based on formulas which were then decorated with stitch patterns.
Now I want to present them to you as basic patterns so that you can do the decorating part. I know you can do this. You’ve been knitting for some time so you know a couple stitch patterns that you love. These basic patterns are an ideal place to let them loose on the front, back or sleeves.
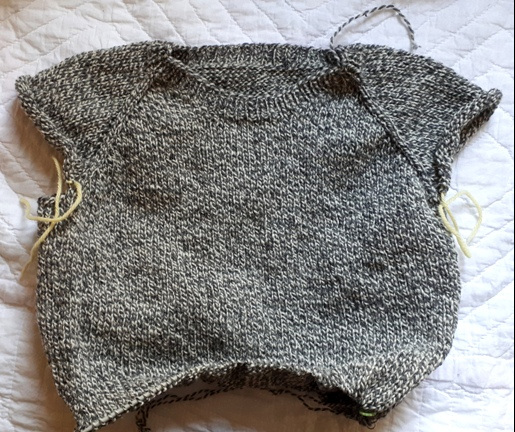
The Family Crew Neck Raglan is my next project. I’ve done two prototypes so far. The recipients are very happy with them.
I’ve started on one more so that I can add in all the little bits of advice on keeping track. I have two more on the go so lots to show you coming up.
It’s still cool here so perfect for sweater knitting outside. I hope you are enjoying spring.
All that knitting and there it sits, a sweater I never wear. After looking at it and putting it on it seemed obvious that with some changes it just might become a sweater I would enjoy wearing. Why not try it? I’m not wearing it anyway so …
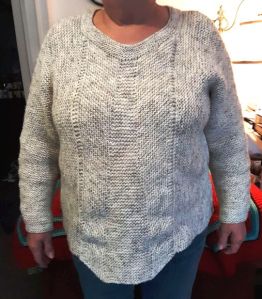
This is the one of my Gauge-Free Raglan Pullover samples. I wanted to show it in a heavy wool with a big cable down the centre front and back. It also has a smaller cable down the centre sleeves. So all in all it’s a good design which I never wore.
I made a plan: shorten this pullover and add some more height to the neckband.
Getting started required a bit of cursing. This is mandatory before going into the kitchen to get the scissors. I sewed the tail end in at the bottom of this sweater too well!! Ha, that will teach me. One little snip and a big rip back, around 4 1/2″, with my fingers crossed. It worked. It feels much lighter. I hope it looks cute and jaunty now instead of a big heavy pullover.
Next the neckband. Because it was picked up around the neck opening and worked up, I think this will be a fairly easy fix. I undid the cast off, put the stitches on a smaller needle and worked 3 sets of short rows to raise the back of neck. Because I was only doing a few short rows with big chunky wool, I worked the short row Turns on the Front itself starting just past the Front raglan line. Usually I might start the short row turns at the centre sleeve and work them towards the Front and down into it a little way. But, hey, I’m taking risks anyway so why not up the ante. (That big cable you can see on the right is the centre front.) Thick wool really makes the short rows do their work quickly.
Ta, da, here it is. I’m so happy with it now. I had it on yesterday and it feels light and fun.
Now I’m rummaging around my pile of knits to see what other magic I can work. How about you?
Spring has sprung and it’s time to wash and then put away the heavy woollies. As I take out sweater after sweater, I wonder why certain ones never got worn. I liked it when I knit it. I like everything while I’m knitting. I thought at the time I would wear it. Why didn’t I? Maybe it’s time to find out and do something about it.
Here is one of my Gauge-Free Raglan Pullovers. This was one of the last ones I knit as a sample for the pattern and I took a couple of short cuts or at lease didn’t give it the time and consideration I could have. I pick it up and put it down a lot. I even get as far as putting it on and then take it off. Hmm, I wonder why? It’s time to find out.
I like the woolly feel of it. I like the big cable down the front and back and the little cable down the sleeves. It was fun to knit. The fit is fine. It’s totally worth the time and effort to get right. Time to investigate. I put it on one more time. What’s bothering me?
I think it would be more attractive if it was shorter. It feels heavy when it’s on so making it shorter would make it feel lighter.
I think the neck opening looks too wide for me. I would like to fill it in more.
I wish the neckband was raised at the back of neck. I can feel the edge of it lower down on the back of my neck than I would like. Making the neckband wider will help but I think I’ll do some short rows to raise the back of the neck this time.
I’m feeling better already. I have a plan. It starts with ripping. I know ripping can be painful but this is in a good cause and seems right.
Rip back to a shorter length. This is knit top down so all I have to do is snip one stitch of the cast off and start ripping until the length seems best and then re-knit the bottom ribbed edge.
Rip out the neckband. Since it was picked up around the neck opening and cast off at the top edge of the neckband, I have another easy rip back.
Use the yarn I took off the bottom of the sweater to reknit the neckband to deeper length with short rows to raise the back of the neck.
Now I’m getting excited. This is sooo going to work.
Do you have some sweaters you need to rework? Have you done this before?
How attached are you to symmetry? When I try to work asymmetry into my own designs they seem to work hard to revert to something symmetrical. I’m trying to work against this tendency. Sometimes it works.
The other factor in favour of asymmetry is that my mind and maybe yours, is restless and easily distracted. The thought of working too much of the same thing is not appealing right now.
So I’m working on a scarf or shawl in 3 sections where I, and eventually you, will be able to change it up.
It starts with triangles that begin small and get larger and larger, worked join-as-you-go to your desired depth of scarf, in this case about 8″/20cm deep.
Then there is a straight centre section worked on the bias. This is a simple 2 row repeat so you will be able to play. I tried 3 different stitch patterns: stripes, eyelets and the daisy stitch. Do you have some other favourite stitch patterns that could work?
I didn’t do this for long as you can see. I made the first section very long. I was afraid if I kept going I would have to wind this scarf around my neck several times as if I was a giraffe. But hey, if that’s a good look for you, go for it. I took the scissors to my prototype, snip, snip, first two triangles are gone and now it’s a much better shape for me.
Then for the final section I worked a scalloped edge which can go on forever, OK not forever but certainly until you run out of yarn, stitches or patience.
After surgery, my scarf is 66″/168cm long and weighs 125g.
What do you think? Would you like the option to make both ends match? Where do you stand on the symmetry/asymmetry question?
Second one, same as the first. A little bit longer and a little bit A-lined.
Just a short blurb to say hello. I hope you and yours are doing well and that you are finding your knitting a comfort.
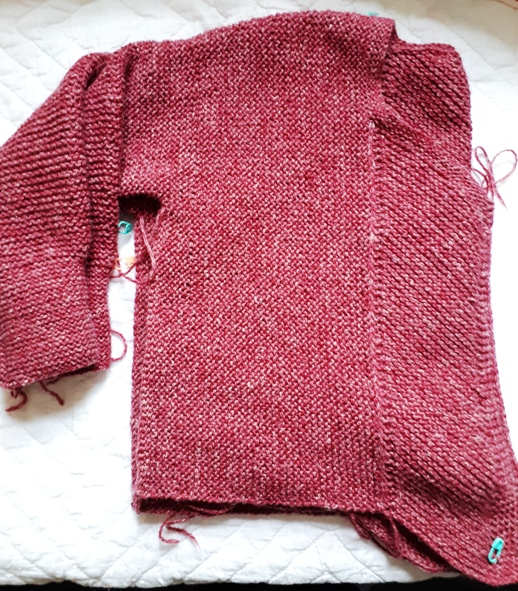
Today I clothes-pinned my Build a Bigger V together to see if the A-line shaping was going to be roomy enough in the hips. Yup. It measures 47″ around at the underarm and 52″ around the bottom. The A-line has done its thing really well.
This is a Back view, one sleeve done.
Now to finish that last sleeve. I’m so close to finishing. I can’t wait. Just in time for spring.
I have another test knit from BjH to show you of Build a V for little people. Cute, eh?
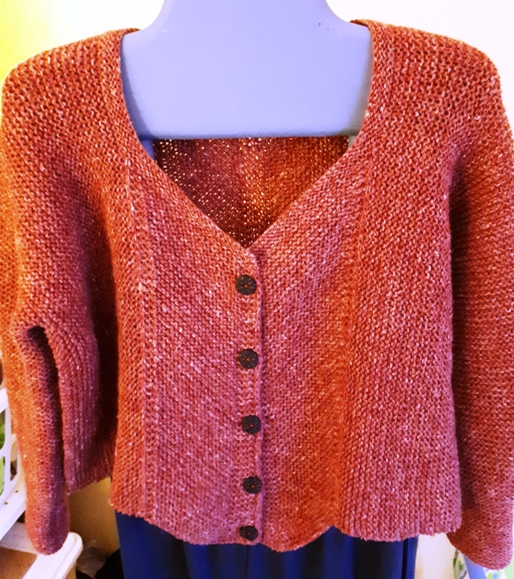
I have been staying at home and working hard, OK not really working hard since how hard can knitting a whole lot be, but my Build a Bigger V is finished, buttons and all. I love it.
I hit the publish button. It’s official, it’s a done deal, the Build a Bigger V is out there. Always a big moment. Now I need to take a walk because hitting that button always gives me the jitters.
If you’re looking for an adventure during these precarious times this cardigan might fill the bill. It starts with stash diving for yarn and needles. Remember that garter stitch takes 1/4 to 1/3 more yarn. Then work the Back and 2 Fronts separately. There is lots of garter stitch knitting which is comforting but not tooooo comforting because you have to work some increases and decreases and work the I-cord edging. Just enough to keep you on your toes.
Pick up and knit along the sides of the Back and one Front. Knit, knit, knit. Separate for the sleeves and knit down to the wrist. Fold it over to see half of your cardigan done.
As I was knitting I kept thinking of different things I might do with this pattern. I couldn’t knit them all but maybe you can. I’ve added Hacker Pages with more options to add to the cardigan. I added the Boxy style where you would add much more ease to the cardigan so that the width of the body reaches your elbow.
How about A-line shaping? I’m knitting this one right now. The Back and Fronts gradually widen toward the bottom.
You can also knit it as a Pullover. I love this. Thanks LK. She also worked the Boxy Sloped Shoulder option of working body and sleeve decreases along the top of the sleeve instead of along the underarm seamline. It gives you a sloped shoulder line and really works here.
Boxy style with shoulder slope
I haven’t included stripes as another option for the Build a Bigger V or 3/4 sleeves which could also be done (my orange version might get these) or colour blocking the different sections or … well, I’ll leave that to your imagination.
I’m really excited about this cardigan (can you tell?) and I hope you enjoy it.
Does this idea of Gauge-Free really seem weird to you? What do you mean you can just pick out some yarn and start with no stitch counts and no idea of a gauge you need to get? How can you knit the correct size? Any yarn at all? Any needle I think is reasonable? How can that be?!
If you are knitting at home more than usual during this time and want a stash diving project, give this a try: Gauge-Free Triangles Scarf/Shawl. This is one of the workshops I teach and I’m offering it Free here for the duration. Knit GAUGE-FREE or, as I call it, knitting without a safety net!
The trick to knitting Gauge-Free is getting started in the right spot. You need to start where you can get to the size you need, regardless of your gauge, and measure it with a ruler (tape measure).
Here’s a beginner project, the GAUGE-FREE TRIANGLES SCARF/Shawl that totally works because it starts at the corner of the first triangle.
It’s a modular, join-as-you-go project. You can use any yarn with any needle you think is reasonable. You can knit a scarf with all your odd balls or have a more thought-out plan of two colours. You can knit every triangle a different colour or knit stripes (as soon as you work stripes you have a right side and wrong side, keep that in mind). You can knit this as a large rectangular shawl (or is it called a stole?) if you make ‘Triangle I’ about 12″-14″/30-36cm deep or even deeper and then go on from there for as long as you need it to be. Add a stitch pattern or two?
If you make many scarves you can sew them together into a blanket.
It all began because I had an idea. I like shawls with long tails. A perfectly triangular shawl does not give me enough of a tail drape down in front of me to hold the shawl in place. I want to get the stapler out so that it doesn’t shift around.
I thought that adding wedges to a standard triangular shawl would do the trick.
Take a triangle shawl …
and add wedges to elongate the tails.
Even after the first attempt I could see that it would work. So the Wedges Shawl soon became an obsession.
I moved the wedges closer to the centre line but otherwise the original concept was kept intact.Here is the worsted weight version. I used 100g of worsted weight wool by Twishandshoutfiberarts and 100g of Paton’s Classic Wool (purple).
I worked all of the Wedge Shawl Variations: (left to right on the photo below) Garter Wedge, Stockinette Wedge, Garter Ridges Wedge and Eyelet Wedge. It certainly made things interesting.
Then I progressed to double check with Fingering weight yarn out of my stash. The purple is Estelle Alpaca Merino Fine and the variegated is by Richard Devries. I worked the Garter Wedge, Garter Ridges, Garter Wedge again, Stockinette Wedge, Garter Wedge once more and Eyelet Wedge. I was running out of yarn by the end and my Eyelet Wedge was only 4 rows deep, sigh.
Next I needed to work out the Eyelet Wedges to my satisfaction since they were not matchy, matchy ( Symmetrical or Not). This one is Eyelets all the way. I love it and not only because of the orange in all the wedges (although it is a factor).
And look at those tails … nice and long.
So now you can give it a try: Wedges Shawl is now on ravelry. I hope you enjoy knitting them. I sure did.
The shawl Wedges won’t leave me alone. I’m dreaming about them. It’s the first thing I want to do in the morning, not before my coffee of course, that would just be silliness, but before my breakfast which had to wait an hour while I started a new shawl.
I want to see if I can refine a process to get longer tails. I’ve started with a standard Isosceles Triangle Shawl shape. I find these shawls difficult to wear because the tails aren’t long enough to hang down the front and keep it anchored in place. This will be the true test of the Wedges for Longer Tails idea.
I started with a garter stitch tab in the usual manner and worked in garter stitch until I was ready to do the first wedge. This time I’m working the Shawl Tip so that when I block it I will be able to stretch the top edge nicely.
Then I got a little a lot ahead of myself and thought I would add a mosaic pattern to the wedge. I was feeling very smug. I knew exactly what I was doing. The first wedge with mosaic patterning went really well.
Although I tried and tried, I couldn’t get the second wedge on the other side to work well. Out it all came. Time for a break.
Note to Self: Remember K.I.S.S. (Keep It Simple Stupid!).
Keeping my own advice in mind I worked garter stitch wedges. Ahh, much better. Whew, I’m getting somewhere.
Can I feel smug now? I’m trying not to.
Writing out the pattern and moving on to my next wedge. Thanks for reading,
In my search for a better fitting shawl I have found that I like long tails. The triangle shawl I like then is no longer a true triangle. With long tails I can wrap it around my neck and have two long tails hanging down. This gives me styling options which if you knew me you would be laughing right now, style, ha!! Ahem, to continue, I could leave the tails hanging (I’m sure this vertical makes me look taller, at least 5’1″). I could also tie the tails under my chin to keep my neck nice and snug.
So long tails … here the standard triangle shawl which starts at the top and has a spine down the centre with increases.
You can make the tails longer by working increases every row along the top edge. That’s the shawl I was knitting as a sample for our Cabin Fever Retreat in October where we are diving into 3 different shawl shapes, the triangle being one of these.
Then, just as I was getting into it, I had a thought (this is not always good). Here is my thought. What if I put short row wedges in the shawl. Wouldn’t that make it wider than it is tall and produce longer tails?
I think this is what is going to happen to the shawl I’m knitting.
Here is the first wedge knit in purple. The wedge is only 2 rows deep near the spine of increases and 4 rows deep at the outside. It seems to be rounding the top edge already.
So I tried a couple more.
The second wedge was shorted rows over 6 rows and the third was over 8 rows. Obviously more rows would make more of a difference.
I think there is something I could do with this idea. More wedges or just wider wedges? What do you think? Wider wedges would allow space for some patterning which would be cool don’t you think?
I was also definitely sorry I didn’t work the Shawl Tip. Next time.







 Here is the worsted weight version. I used 100g of worsted weight wool by


