Mid-sweater Block

I’m knitting a sweater for my son-in-law (Family Crew Neck) at his request. I was so very pleased to be asked. I have measurements and am ready to go. But this has turned out to be a challenge.

I’m trying out a new-to-me yarn and to be a good little knitter, I knit a swatch. I changed needle sizes twice and now have gauge. I even washed it. Pat on the back, I am being very, very good! I cast on.

Part way through I started to panic. It’s small. I did all the math again and then three more times and as far as I could tell the body is around 2″ smaller than it should be. I kept measuring it over and over, hoping it would be a little bigger each time. Ha, ha, I bet you’ve never done this.

Then the light bulb went on. I have a swatch. I find them somewhat unreliable at the best of times but this time I had one to blame. I measured my gauge on it and then on my sweater and … I had tightened up. This never happens to me. I am a really loose knitter. I was working with needles 2 sizes smaller than recommended to get gauge on my swatch and now I was telling myself that that was a mistake.

Hmmm, I washed my swatch just like I’m supposed to. Ah, ha. Another light bulb moment.

I dumped the whole sweater in the sink, needles attached and all, spun it out in my washing machine and laid it out (nice and neatly, not like this photo) and let it dry.

Voila, it relaxed and although it’s still 1/2″ smaller than I would like, it’s going to be fine. Phew.

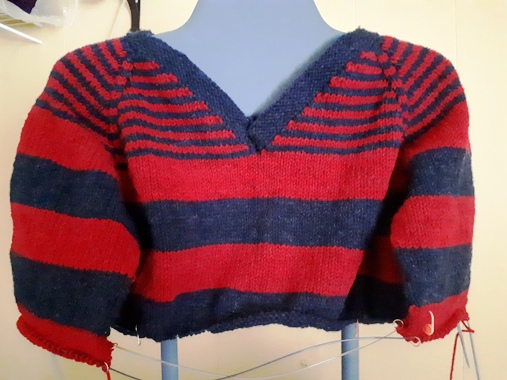
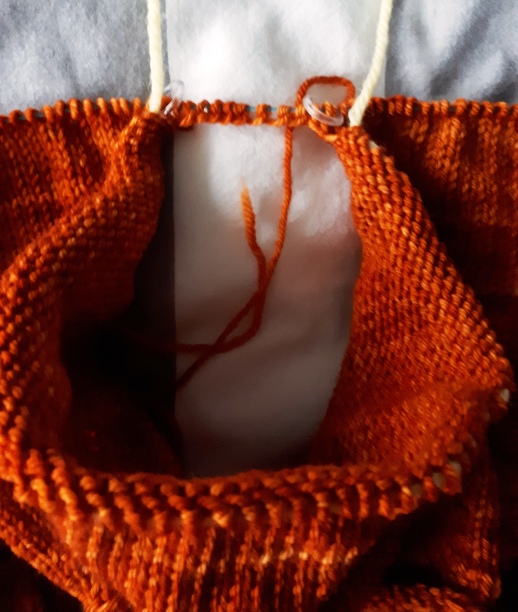
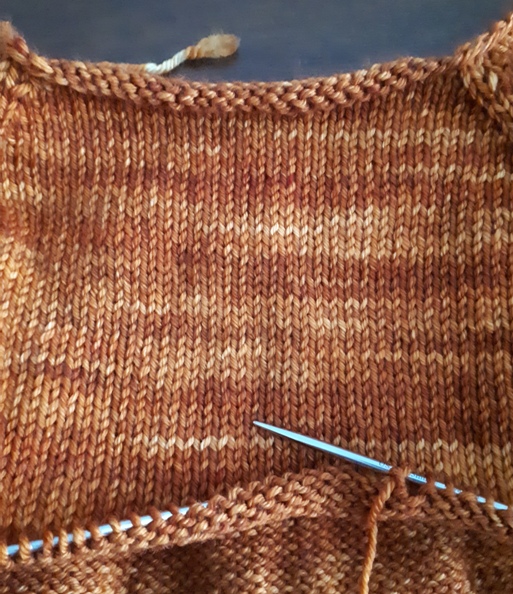
I’m on the sleeves right now. I took out 1 round of knitting and started with new yarn. Here’s the difference in gauge. You can see that already the new section of the sleeve has a tighter gauge. I’m trying not to look at it.

Ignore the marker. That was for counting rounds so the sleeve stripe will be the same length as the body stripe.

I’m hoping to get this done this week. I don’t know if that’s possible but I’m giving it my best shot. Audio books, short walks and lots of knitting.

Cheers, Deb

Family Crew Neck raglan pullover

Any Gauge and Gauge-Free patterns by Deb

Gradient done 2×2

My gradient vest is coming along. Not famously but, well, you can see for yourself.

I think it’s an improvement on the original (below on the right).

I’ve tried to make the lines between the colours less distinct. I think I failed. There are still lots of horizonal lines going on.

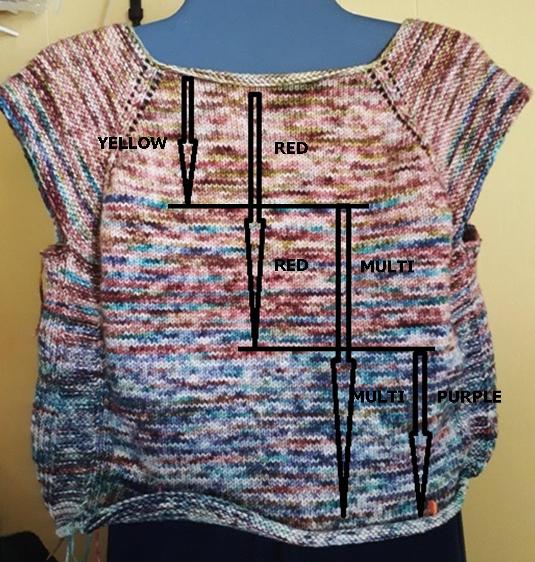
This is my range of colours. Starting with yellow through red, multi-coloured, purple and into blue and then green (if I get that far).

I’m using two colours all the time. Two rounds in one colour and two rounds in a second colour.

Each colour is worked with a second colour for approximately half a ball.

It goes like this:

Yellow & Red

Red & Multi-coloured

Multi-coloured & Purple

Purple & Blue

It hasn’t turned out as I expected. That’s not new. I’m carrying on anyway just to see how it turns out.

Cheers, Deb

Gauge-Free and Any Gauge patterns by Deb

Deb on instagram

I’m Stalled. Solution? Take something apart.

Here is a vest that I don’t wear. It fits great. I like the wool and the style. There’s just one little thing that bugs me.

That yellow band across my bust. I know, I know, it’s stupid to be self-conscious but … I am and I can’t talk myself out of it. So there it sits on the shelf, unworn, through no fault of its own.

The rainbow of colours that Dragonstrings dyed for me are terrific. So what’s a knitter to do?! Give it a tug, of course and … recycle it.

Now to figure out how to graduate the colours. Once gradient sweaters are knit the whole system seems so straight forward but I find it rather daunting. I scrounged around my stash and added one more skein to the mix of colours because more has to be better, right? The bottom multi-coloured skein is the addition and hopefully will work to help me graduate the colours.

The original vest sequence was: starting at the top, Red, Yellow, Green, Blue and into the Purple at the bottom.

This time, I’m going to reverse the circle direction.

New sequence: Yellow at the top, Red, multi-coloured, purple, blue, green.

OK, decision made. It’s in writing and I just told you all about it so here goes.

Have you done a gradient? Did it turn out like you thought it would?

Cheers, Deb

Gauge-Free and Any Gauge patterns by Deb

Deb on instagram

Two Sleeves on 2 circs

I ran across an idea, from Socks Soar on Two Circulars by Cat Bordhi, where she knits a sock on two circular needles instead of many double pointed needles. If you can knit one sock, why not two socks? So I tried it. I found it easier than I thought it might be and better for me than using the Magic Loop technique.

I put a photo up on instagram and my friend Nancy mentioned that she knits 2 sleeves at the same time. I was knitting away on my newest top down sweater and thinking, two sleeves at the same time, two sleeves at the same time. Wait one friggin’ minute. Could I knit 2 sleeves at the same time on a Top Down sweater? I just happen to have one with 2 sleeves to knit so …

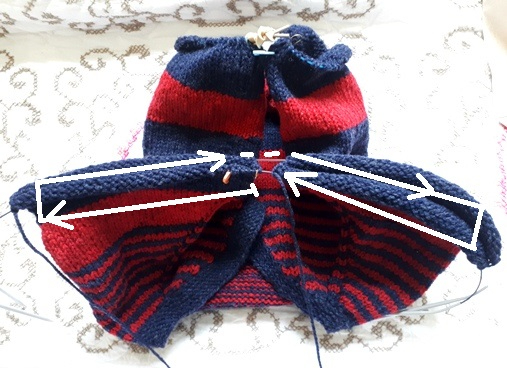
… there they are. Two sleeves being knit at the same time, on 2 circular needles with 2 balls of wool. It took some fiddling to get them going. OK, it took more than a little bit of fiddling but there they are. I’m amazed. It’s not that hard. Really it wasn’t that bad.

They work a little bit differently than the socks did because there is a whole knitted sweater body there too. I had to move the beginning of the round to the middle so the body didn’t get too munched. The orange marker in the fabric of the left sleeve is there to indicate the beginning of the round for both the sleeves. It only matters for the decrease round.

I’m finding this quite satisfying to do. Here’s my progress so far.

You’ll see at the bottom there, that they are still on the two circs. When I’m working on the sleeves I use a safety pin to hold the sleeves close to each other but I wanted to see how they were looking. Not bad, eh?

Do you know that auto-correct does not like the word circ. It wants to make it all kinds of other things. Isn’t circ a word? It is to me.

Stay safe and keep on keeping on, Deb

Any Gauge and Gauge-Free patterns by Deb

Deb on instagram because you know there has to be more knitting going on.

Cable pullover done

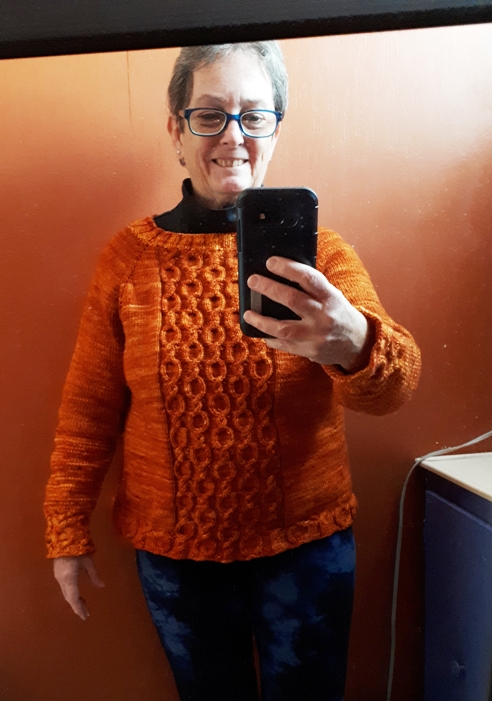
It’s done. Phew. My newest Any Gauge Raglan Pullover was made by taking apart a sweater I wasn’t wearing and turning it into this one. I put it on the day I finished, and the next day, and the one after that. I think I like it. Here’s the requisite bathroom photo.

I don’t know if you can see but I ran out of wool. Yup. I knit this pullover with a much smaller needle than the original sweater. Ouch, just one ball short. So into the stash I went.

I found one ball of orange (on the left) and yes, it doesn’t quite match but … what can you do?!

I got the bottom of the sleeves and the neckband out of it. It’s not perfect but I’m really happy with it. I keep wearing it. That’s the real test. It passed.

Now a pause. I find there is always a very uncomfortable pause after finishing a big project. Do you find that?

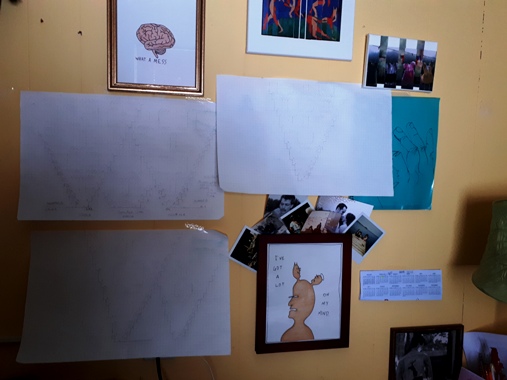
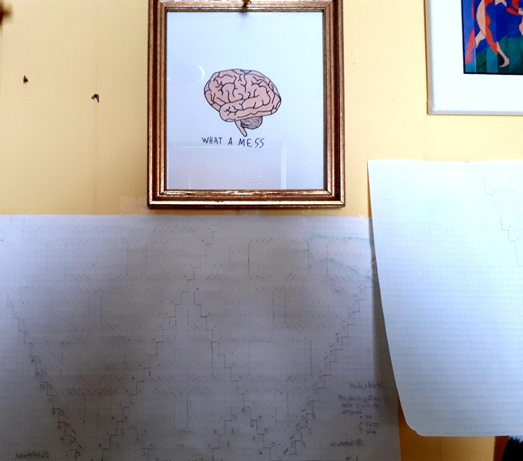
I started doodling, otherwise known as charting. And then it got out of hand.

Time to do a clean up I guess.

That’s better but I still have a lot on my mind.

How about you?

Deb

Any Gauge and Gauge-Free patterns by Deb

Deb on instagram because you know there’s more knitting going on.

Bust Darts, Top Down

Why are the fronts of women’s sweaters the same width as the back? Aren’t there two very good reasons why there should be a little more room on the front? You could work two different sizes to fix this but it needs quite a bit of fiddling to get it right. There is an easier way.

You need the extra room exactly where you need it, right? You know where. Not in the upper chest and neckline which could happen if you work two different sizes. Not below the bust either.

Here’s one of my solutions. I used on my latest Any Gauge Raglan Pullover. When working Top Down you can add an extra set of stitches to the Front of the Body starting just under the arm, after the Great Divide.

Can you see a faint line coming out of my underarm at an angle? Here, let me highlight it.

It’s not very visible. The increases are worked on every round. Each increase is worked beside the last one, working from the underarm toward the centre of the front. I added 6 extra bust stitches on each side of the Front, worked the rounds straight down past the largest part of my bust and then began working decreases at the sides of the Front every 4 rounds to get rid of some of these stitches (not all of them because, with Covid, the belly is a little larger than before!!).

I used Twin Stitches. They are the stitches used in the Shadow Short Row system which, if you don’t get rid of the double stitches (the twin stitches) as you would when working short rows, these twin stitches can become increases. It’s magic.

Here’s my video to show you how: Bust Dart for Top Down Pullover using TWK
This is how you work a Twin Stitch. If you’ve been following me for any amount of time, you’ve seen this before. I discovered this while working on the Need A Circular Yoke book. Have you tried this?

Stay safe and keep on keeping on, Deb

Any Gauge and Gauge-Free patterns by Deb

Deb on instagram, because you know there’s more knitting going on.

Ease for a Top Down Raglan

Ease is really personal. Ease is the amount the finished sweater is bigger or smaller than the measurement at your bust line. How tight or loose you wear your clothes across the bust, is entirely up to you. Two people with the same bust measurement may knit two different sizes, depending on how they want their sweater to fit.

Positive ease means the sweater is bigger than your Actual Bust Measurement. A sweater that measures 44″ around on a body with a bust measurement of 40″ has 4″ of positive ease.

You can have negative ease too. If the sweater measures 38″ around the chest on a body with a bust measurement of 40″ then the sweater is said to have 2″ of negative ease. The T-shirts you wear usually have negative ease. It does not mean it’s 2″ smaller everywhere. If the sweater is knit straight it may have positive ease on the torso even if it has negative ease at the bust line. Apparently, in the knitting industry, we are only concerned with the fit at the bust line. Go figure (pun intended).

For the Any Gauge Raglan Pullover I was attempting to fit a pullover with some positive ease. At the Bottom of the Yoke this sweater would fit like a second skin. It fits your Actual Bust Measurement + both your Actual Arm Measurements. It fits your body exactly as measured. But we don’t leave it there.
In this pattern I have you add the Ease as a cast on at each underarm.

How much ease? That’s up to you. The easiest way to determine how much is to measure the sweaters you wear. How much bigger/smaller is your favourite sweater than your Actual Bust Measurement? That’s the amount of ease you like. Half the ease is added as cast on stitches at one underarm and the other half, cast on at the other underarm. Now your sweater body has the amount of ease you wanted.

You can see that half the Body Ease will eventually also be added to the sleeve. Let’s say you want 3″ of ease for your body, then 1.5″ is cast on at each underarm. When you work your sleeve, you pick up one stitch for each underarm cast on stitch, so adding 1.5″ of ease to the sleeve.

But … you knew this was coming, there are modifications you can make here.

  1. Different ease for your sleeve: If half the Body Ease is not the right amount of ease for your sleeve, as you set up your sleeve you can pick up additional stitches in the corners beside the cast on stitches for slightly more sleeve room or for less ease, pick up fewer stitches from the cast on stitches. It won’t involve very many stitches + or – so is fairly easy to do.
  2. You miscalculated your gauge: Your pullover at this point is a little smaller than anticipated. You can cast on additional stitches to add body width plus the amount of ease you wanted, as you cast on at each underarm. If your sweater is too big at this point, sorry you’re going to have to rip back several rounds before you cast on for the underarms.
  3. Yoke is getting too long: Your pullover yoke is already level with your underarm so you don’t want to work any more increase rounds to get to your total number of stitches at the bottom of the yoke. You can cast on the extra Body stitches needed to get to the correct number of stitches at the Bottom of the Yoke at the underarms (divided between the two underarms) along with the amount of ease you want.
  4. You want Negative Ease: Work until at the Bottom of the Yoke your sweater is the number of inches of negative ease you want plus extra 1″ smaller. Then cast on 1/2″ worth of stitches at each underarm. For example, if you want 2″ of negative ease then knit until your Yoke is 3″ smaller than your Actual Bust Measurement (2″ negative ease + 1″ smaller). Cast On 1/2″ worth of stitches at each underarm. This will make your sweater come out to the amount of negative ease you wish plus add a little ease to your sleeves.
  5. Extra Bust Width: You want to add some extra width to the Front only. Take your Total Sweater Ease at the Bust – Ease added on the Front only = cast on the underarms, divided between the two underarms. For example: Total Sweater Ease at bust is 5″ – 2″ added to the Front only = 3″ ease to Body at the underarm (1.5″ cast on at each underarm).

You might guess what I did. Give up? Yes, I added extra ease across the Front only. We’ll get into that next.

Cheers and stay safe and well, Deb

Any Gauge and Gauge-Free patterns by Deb

Deb on instagram for all my other knitting

Cabled Cuffs

Sometimes it’s best to let your knitting do what it’s best at. That’s what I did with my cuffs.

Cables pull in the fabric. More than you might think. When you add cables into a sweater you need to compensate for this. At the top of my Any Gauge Raglan Pullover sweater I increased 2 stitches for every cable column: 5 columns, 10 stitches increased. I was told a rule at one time which said to increase 1 stitch for every 3 stitches of the cable. These are 8 stitch cables so a 2 (or 3) stitch increase seemed about right.

For the tight cuffs, why not just let the cables do their thing? I worked 5 cables around the cuff with the same needle I used for the sleeve. So, here it is with the same needle, same number of stitches as at the end of the sleeve. The cables pulled my cuff in quite a lot. Sometimes what the knitting wants to do is the way to go.

Apparently it’s time to reboot. My phone earphones wouldn’t work today. Reboot. My computer wouldn’t show any of my typing. Reboot. Now I just need to finish rebooting myself. I’m not quite there yet.

I think the week between Christmas and New Years is that time. I read 5 books. Knit a little less. I baked bread and cookies, my two essential life-giving foods. Have you rebooted yet? Are you ready for 2021?

Cheers, Deb

Any Gauge and Gauge-Free patterns by Deb

Deb on instagram

Playing with a chart

I’m not going to apologize. I love charts!! I think most knitters need to learn how to read them and use them. Once you can do that, a whole world of modification is open to you. Charts can be played with. Charts can be changed to suit you and your project.

I’m knitting the Any Gauge Raglan Pullover. One of the great things about this top down pattern is that it has a wide Front and Back neck opening. This gives you lots of room to place a pattern. In this one I put a large cable down the front and back (the cable is included as a variation in the pattern).

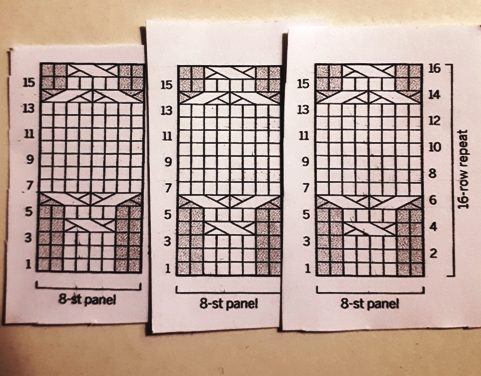
This time I wanted to work a wider panel of cables down the front and back. This is the pattern I started with. Cable #15 out of the Knitted Cable Sourcebook by Norah Gaughan. An excellent book.

To figure out how I might work multiple strands of cabling, I photocopied the chart to see what I could do with it.

I could do several strands of the same cable.

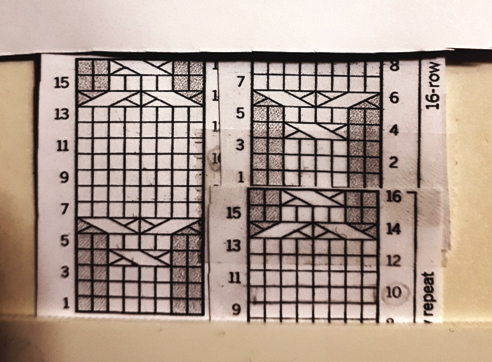
But then I thought it would be more effective if I off-set them somehow. First I had to find the centre of the round circle of the cable and the centre of the little straight section. Row 10 is the centre row of the 7 rows in the round circle and Row 2 is the centre of the 3 rows between the small crosses.

Now to line the centres up.

Oh my, this is perfect. Look at that. The big cable crosses of the circles on both strands line up. On the right cable Row 6 opening the circle and on the left cable Row 14 closing the circle. This is totally going to work.

Here’s my pattern. I’ll repeat these two cables twice and work the Right cable once more for 5 cable strands. Odd numbers rule in this case. Throw in a couple of purl stitches at the beginning, between each cable and at the end and I have a terrific cable panel.

Charts, are they the coolest or what?!

Stay safe. We’re in the covid Red zone as of today so lots of time to sit at home and knit.

Cheers, Deb

Any Gauge and Gauge-Free patterns by Deb

Deb on facebook

Deb on instagram

Raglan, No Pooling

Here we go. I’ve taken apart a sweater I don’t wear, reconditioned the wool and now I’m going to get started on a new pullover. I hope to avoid colour pooling this time.

I’m working my Any Gauge Raglan Pullover pattern with a gauge of 5 sts = 1″. This wool has a lot of colour variation in every ball so … I’m going to knit it with 5 balls at the same time!!!

Yes, 5 balls, count ’em.

OK, OK, I didn’t start with 5. I started with one. I cast on all the stitches for the raglan neck opening with ball#1, placing markers as I went.

Then I got 3 more balls out and, working the raglan increases according to the pattern, I knit the Back with ball#1, knit the first shoulder with ball#2, knit the Front with ball#3, knit the second shoulder with ball#4. That takes me back to the beginning of the round. Each section of my raglan is knit with a different ball of wool and my first set of increases have been worked.

Here is where the Helix knitting (in this case, changing the yarn in the same place each time) comes into play. With one more ball, ball#5, I knit the Back to the marker, dropped that wool and slipped the marker. With the next ball, the wool that is sitting right there, I knit across the shoulder to the next marker. Dropped that wool and slipped the marker. Knit across the Front using the wool from the next ball that is sitting there. Slipped the marker and again with the wool that is sitting there, knit the second shoulder to the end of the round.

I know this sounds complicated but the wool you need to use is right there at each marker. You drop the wool you are knitting with, slip the marker and pick up the new wool and knit.

There is, of course, a TRICK. Do Not Twist the wool at each marker. When you approach a marker, take the wool strand you were just using and hold it to the right, slip the marker and pick up the new strand of wool from underneath. It’s not twisted.

Why bother with all this?

Two reasons. Because you don’t twist the wool when changing balls, there is no pull at the raglan lines where the markers are. It’s a smooth transition. Reason Two: THE BALLS DO NOT TANGLE.

How is this possible?

When you knit you are moving the yarn from the left needle to the right needle so the circle of knitting is moving clockwise. That twists the wool like this.

Every couple of rounds, grab your circle of knitting like a steering wheel and turn it counter-clockwise, like you’re making a left turn.

This really works!! I’m a little further along now. This is how the colour is coming out on my knit shoulder. An even distribution of uneven colour.

I’m pretty happy.

Cheers, Deb

Any Gauge and Gauge-Free patterns by Deb

Deb on instagram