Why all the markers?

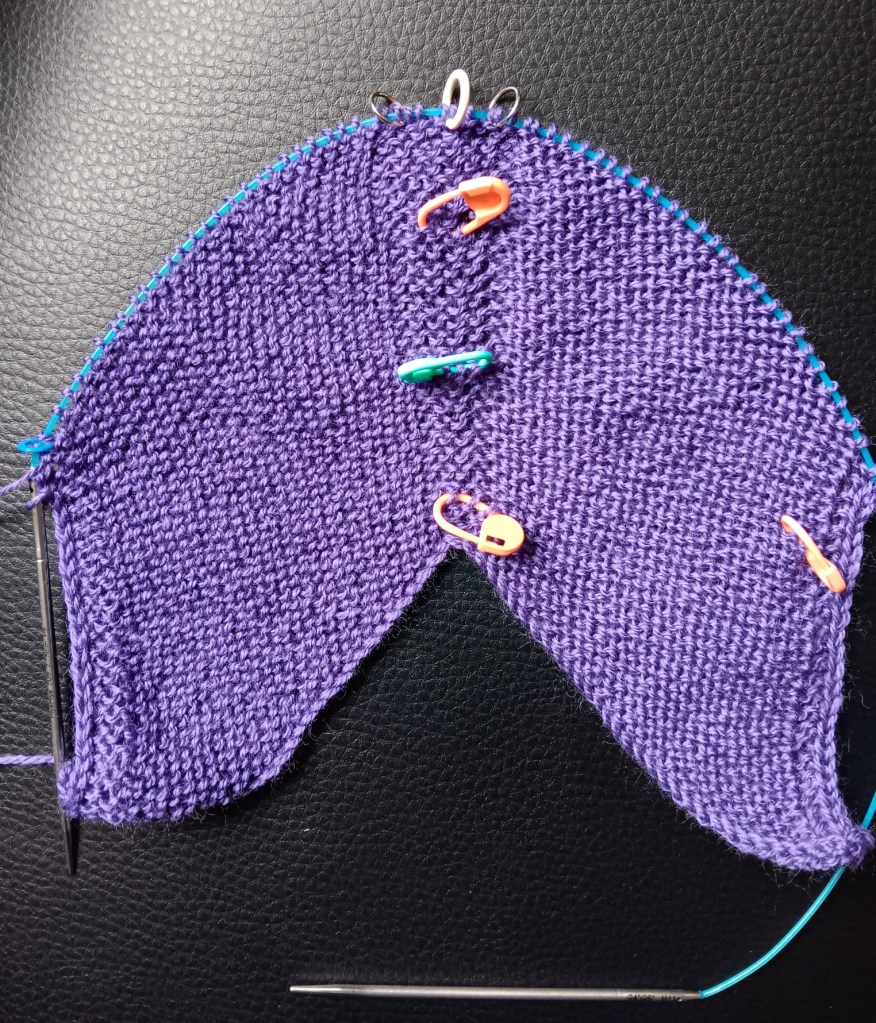
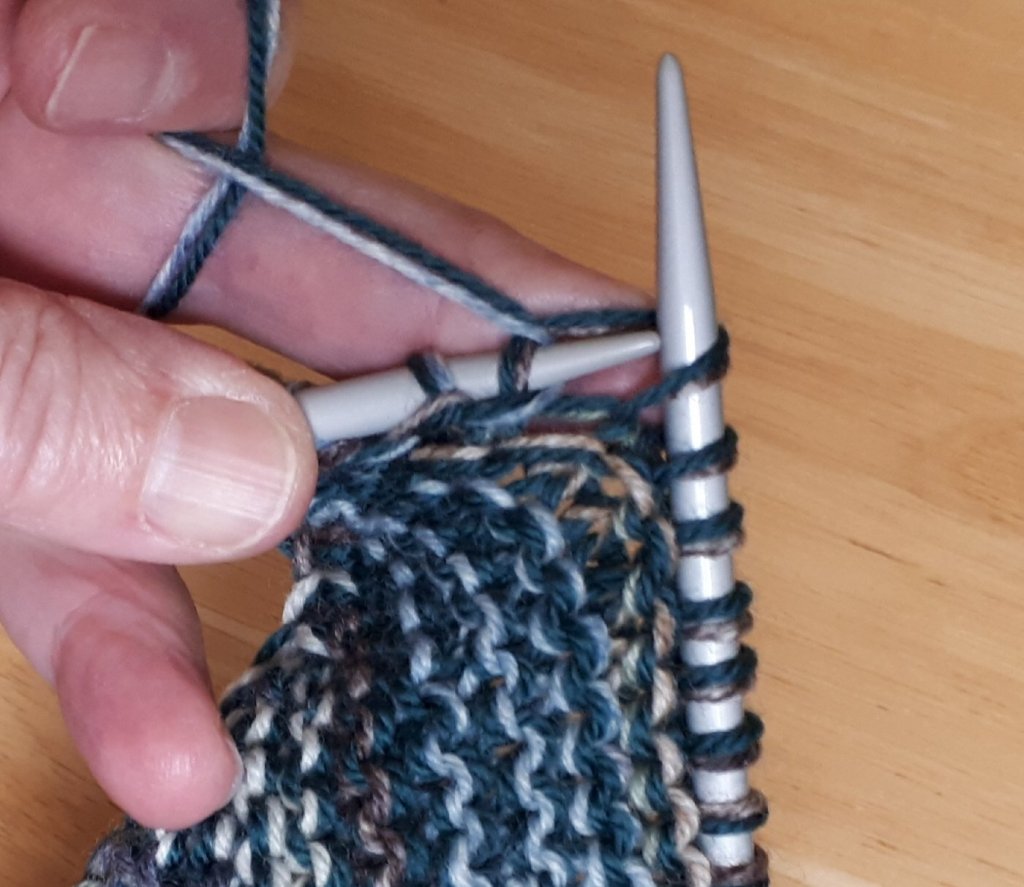
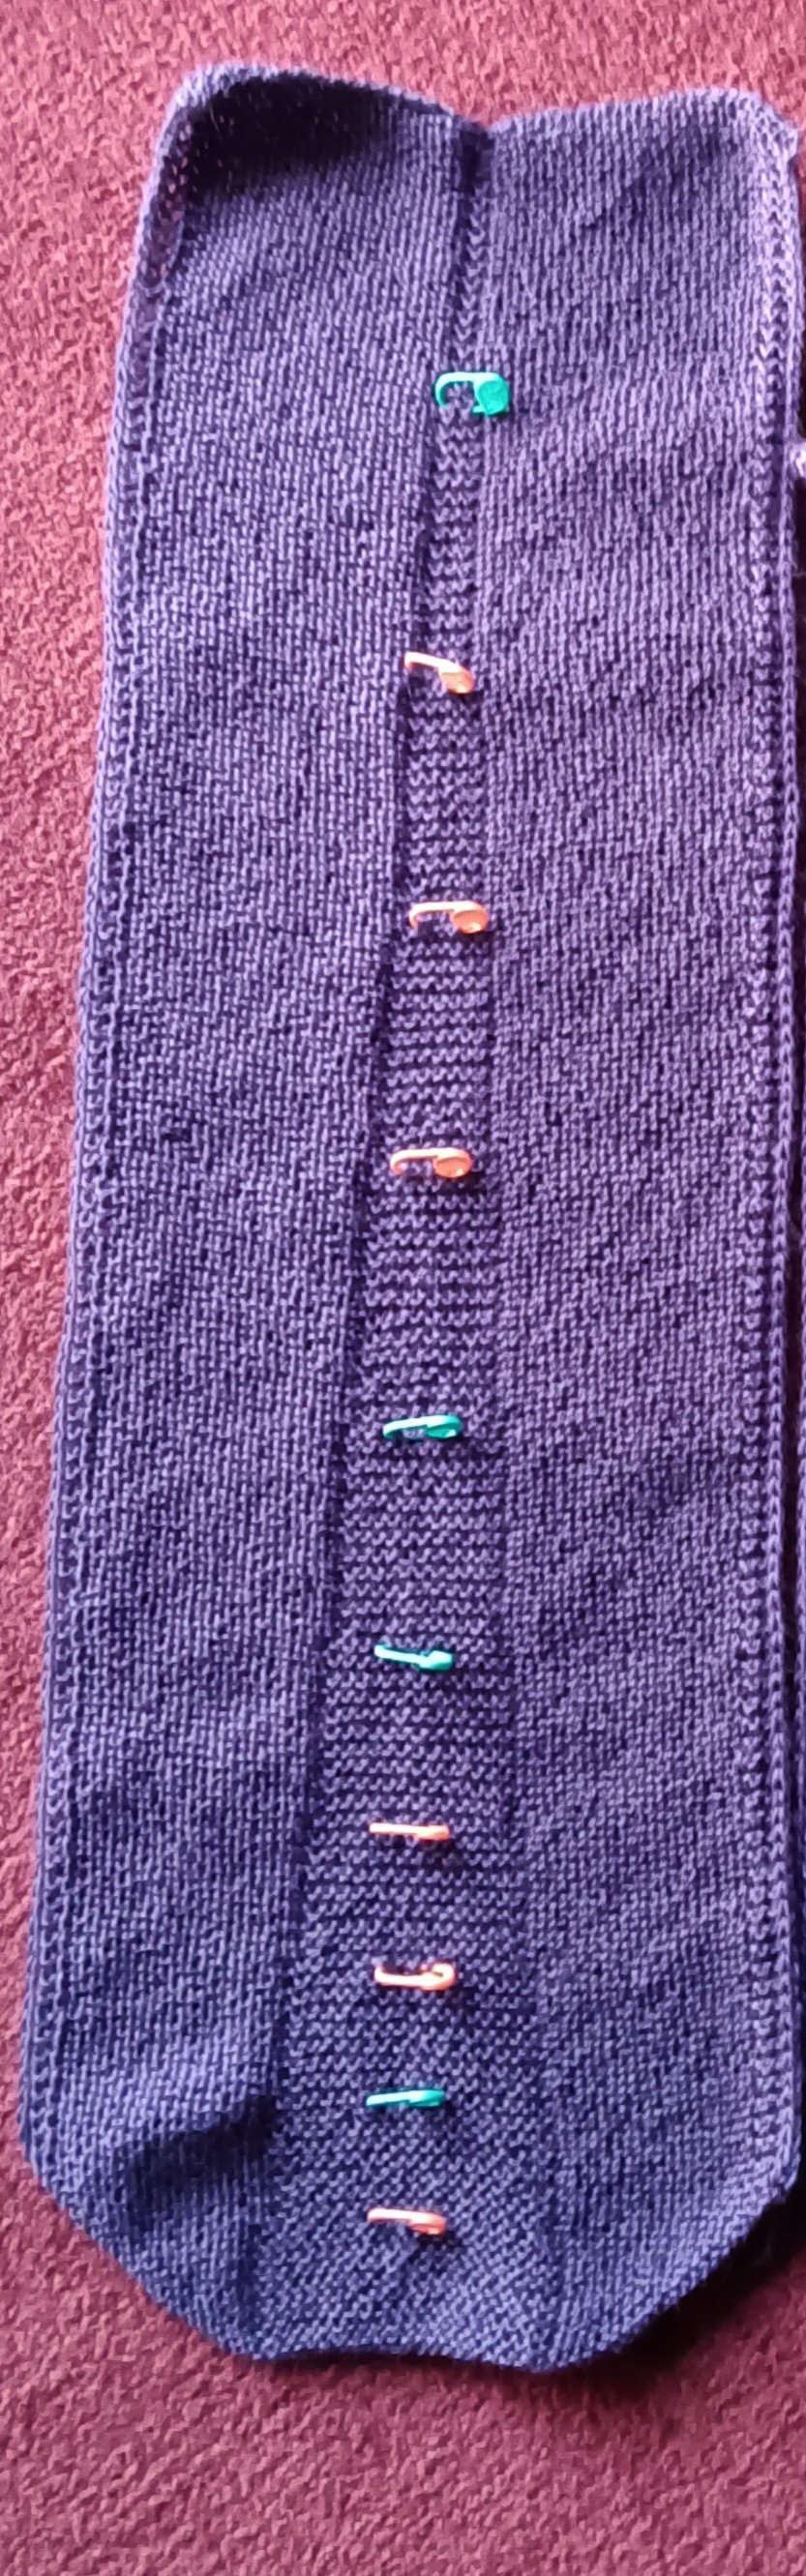
I’m working on the back panel of the Build a Vest with all those markers in place. What are they doing down the centre? I thought you’d never ask.

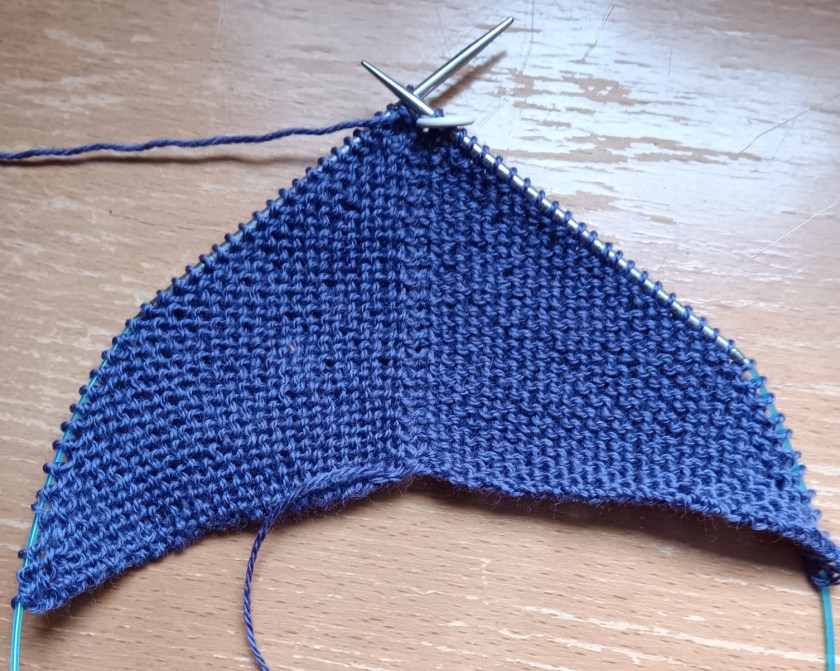
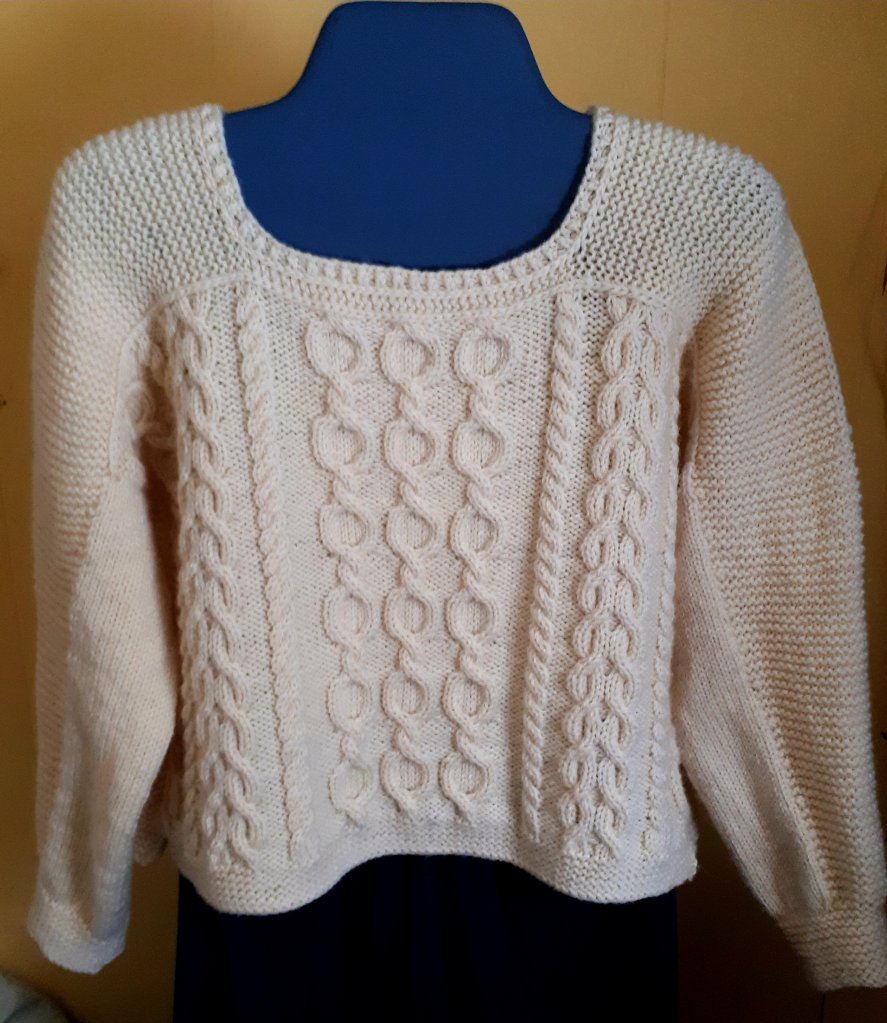
The first Build a V that I worked on was the baby version.

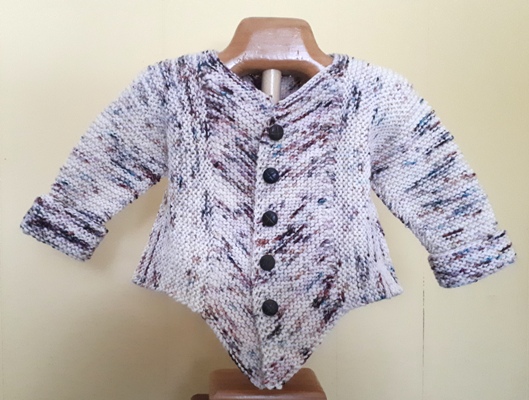
As you can see it also starts with a front and back panel, then is worked sideways for the sleeves.

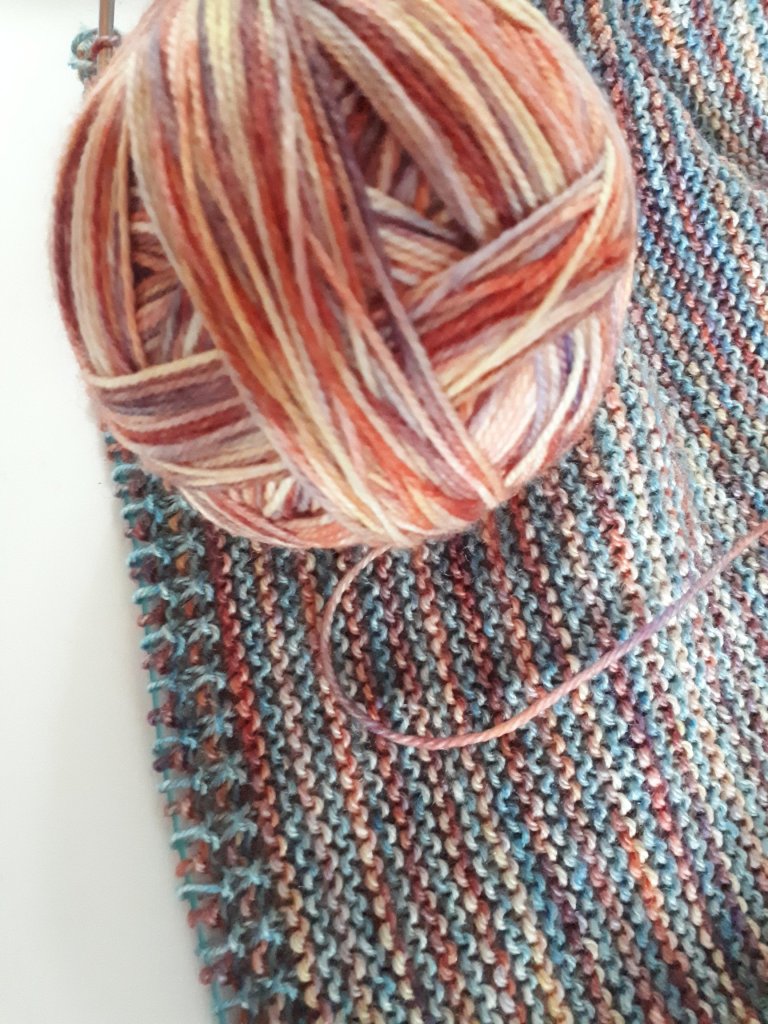
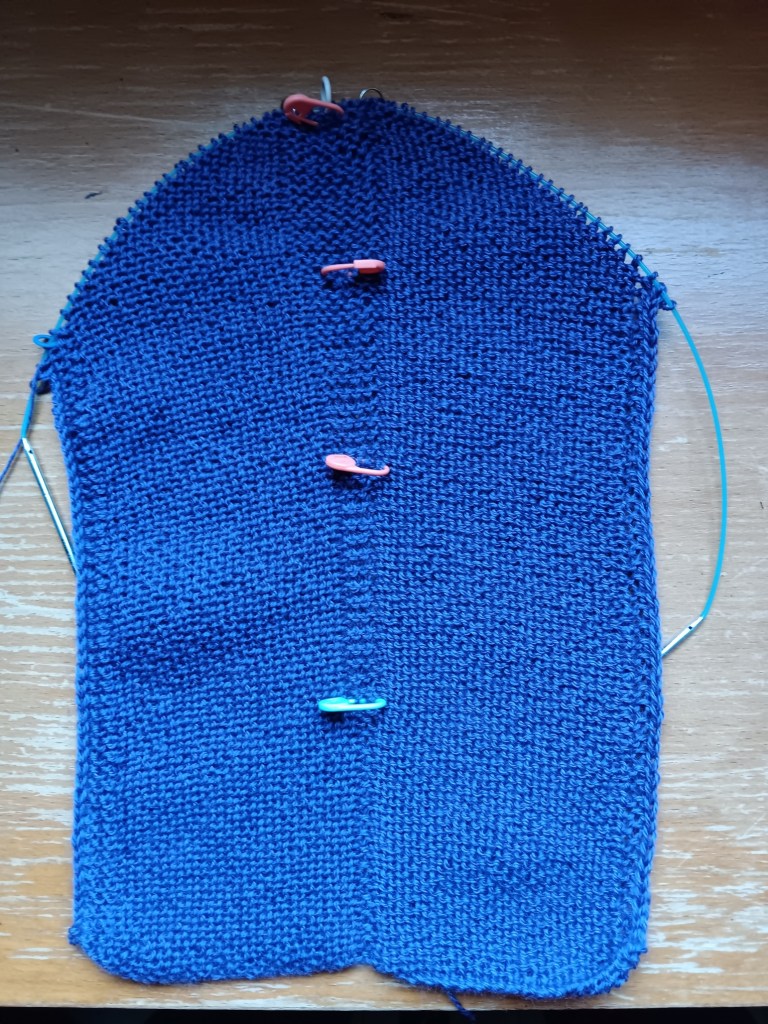
The back panel looks like this.

See that nice little pointy V at the bottom? I didn’t want that pointing at my derriere on my vest. Would you?

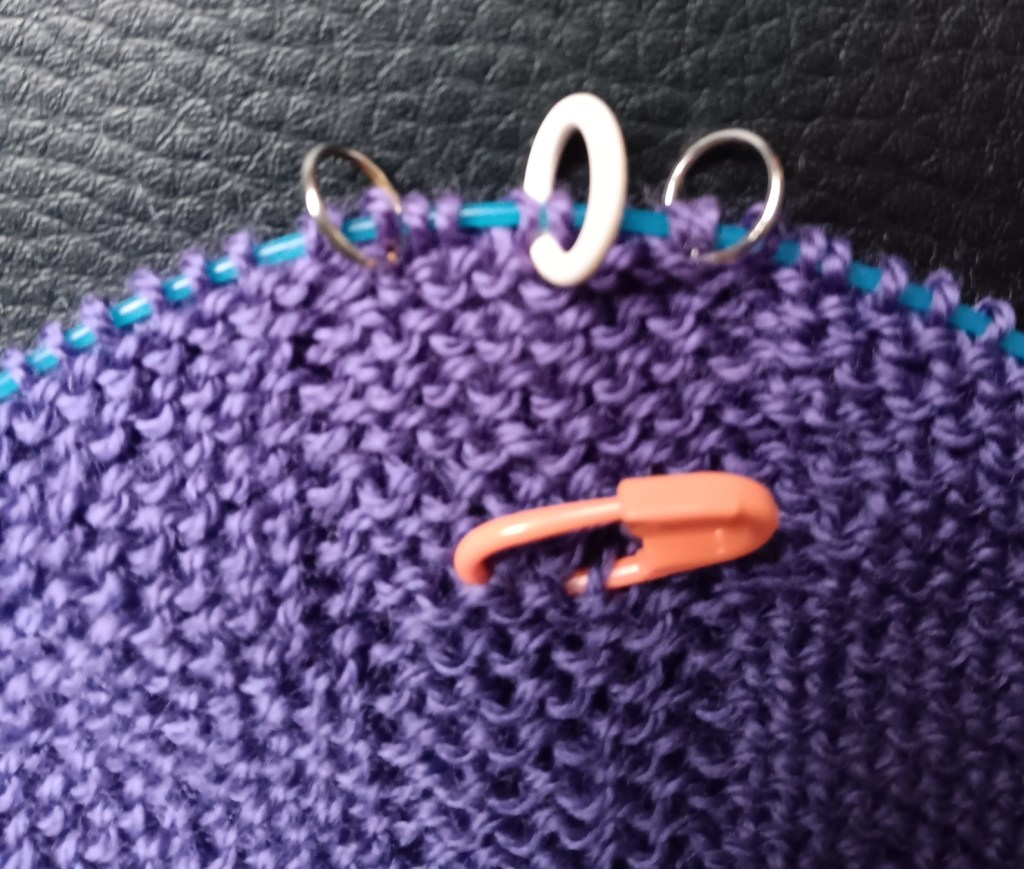
So … all those markers. They indicate x number of ridges as I worked down the back.

This is my Build A Bigger V cardigan, and you can see that the point has been taken away, creating a rounded bottom to the back panel. At every marker I moved the increases further away from the centre marker.

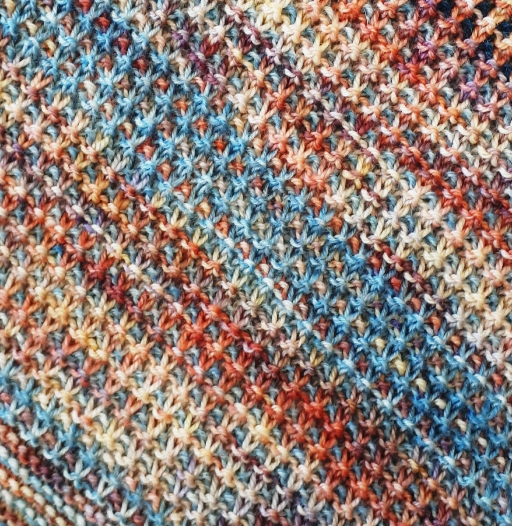
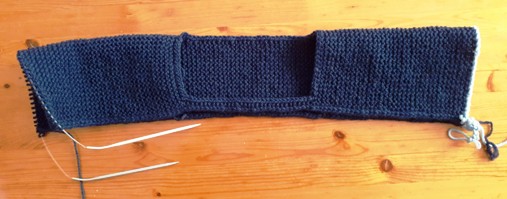
This is my finished back panel of my vest.

The centre section gets wider and wider. As I approached the bottom I started widening the centre section a little more often.

I think this would work for a triangular shawl too, if you didn’t want that sharp triangle point. What do you think?

Cheers, Deb

Any Gauge and Gauge-free patterns by Deb

Deb.gemmell on instagram

Markers, how I use them

I am using several markers for this project. Only one is required by the Build a Bigger V pattern. That’s the white marker in the centre. The rest help me keep track of the shaping and remind me when and where to do things.

There are 7 more markers here which are all for me. Yes, there are quite a few. Yes, they are different colours and types of markers on purpose.

Marker for Right Side of fabric: That orange marker on the right is pinned through the fabric to tell me this is the beginning of the right side row. It is especially helpful at the start of the project when there aren’t as many other things to tell me I’m on the right side. It’s a removable marker so I can move it up as I knit.

Markers for length: The orange, green, orange sequence up the middle are for counting ridges so I don’t have to keep counting from the cast on. I am placing the first orange marker after the first 2 ridges, then every 8 ridges as I continue down this front panel because something happens every 8 ridges in this particular pattern.

Markers delineate: The two metal markers on either side of the centre marker (white) show me where the middle section is. You can place markers on either side of a stitch pattern or some section you need to keep track of.

Markers – do something here: The metal markers on either side of the centre marker also help me find where I need to work increases. The instructions say to work an increase x number of stitches before the centre marker (white). I don’t have to keep looking ahead for those x number of stitches if I put a marker in. I work one increase before the metal marker, knit across the middle section to the other metal marker and work an increase after it.

Markers – pay attention: I have a lot of trouble remembering to do things at the ends of the rows. So the blue marker on the left edge is telling me to pay attention and work a decrease, duh. I know it’s supposed to be there but I have merrily knit right past it so many times, I needed a marker to remind me. It’s a rescue marker.

I have collected several different types of markers for this very purpose. They help me reduce the stress of paying attention, cut down on the amount of ripping back I have to do, and therefore, make my knitting so much more enjoyable.

Hope this is helpful, Deb

Any Gauge and Gauge-Free patterns by Deb

Deb.gemmell on instagram

Gauge-Free, Build A Vest

This vest, and the cardigan I’m modifying it from (Build a Bigger V), will be Gauge-Free. No swatch needed. No talk about gauge at all, none, throughout the entire pattern. How freeing is that?

How can it possibly work?

Start with a couple of stitches and build a triangle with increases worked on either side of the centre marker. Work until the solid edge of the triangle is the width of the Back of Neck. Mine is 8″ wide.

Width of Back of Neck is 8″.

That sets the number of stitches for the Back Panel. You need to count the number of stitches you set up with at this point but we don’t care how many stitches per inch you are getting here. Any number of stitches will work.

Now, I will keep the same stitch count as I knit the back panel.

The shaded part here is the Back Panel. The triangle begins at the Back of Neck and the Back Panel is knit down to the desired length.

The decision will be how long I want this vest to be. Lots of knitting for the next week.

Cheers, Deb

Any Gauge and Gauge-Free patterns by Deb

Deb.gemmell on instagram

Build A Vest, ready, set, go >>>

This is a photo of the Build A Bigger V cardigan before I knit the sleeves. This could be a vest as it is in this photo. It has 9″ of ease so if it was a little more fitted … it could work.

But I sort of like the idea of cutting in the armhole, for a sleeveless look (white line).

Better?

At any rate, I’ve started. This is the beginning of the Back Panel. I’m knitting in fingering weight yarn (80/20 fingering by Shelridge Yarns – colour Iris). Yes, this will be a lot of knitting but here I go.

The idea of Building a Vest using the Build a Bigger V cardigan intrigued several knitters. Thanks for voting. Cheers, Deb

Any Gauge and Gauge-Free patterns by Deb

Deb.gemmell on instagram

Jigsawing away

I’m obsessed! I can’t seem to stop.

Do you find that you deep dive into some projects? I do if I’m learning something new. This Jigsaw blanket is a modular workshop for me. Working with 2 strands is also new to me and coupling colours together for the marl affect is an adventure.

Have you taken on something intriguing?

I am finding that some of my pairings didn’t work well. This is a beautiful blue green with a speckled beige sock yarn. The blue shade is gone, and to my eye, it looks hunter green now with speckles. Not a fan of that one.

I love the coral and red together. I was using really tiny left over balls as the second colour. Ran out of red so added a small ball with a bit more yellow in it and the bottom is a multicolored bit with some orange in it.

Isn’t this one beautiful? Teal green and teal blue together. Yummy.

Blue plus a blue-green handpaint. This is lovely too.

Now I think I have a better idea of what’s going to happen when I pair up two colours. I’m trying not to be too smug, ha. I’m probably headed for a fall. Still quite a long way to go yet.

How are your projects coming along?

Cheers, Deb

Gauge-free and Any Gauge patterns by Deb

Purl Back Backwards: New Year, new 2023 challenge

It definitely feels like this year needs something new. So I have given myself a challenge: videos. The first one is purling back backwards (near the bottom of this post).

I’m ok with amateur-hour videos as I figure this out. But videos there will be. Let’s begin as I intend to continue, with my first 2023 project with videos.

I was gifted 2 large bags of fingering weight wool by my sister Lyn, of Shelridge Yarns. Yup, this is a lot of excellent wool.

It’s burning a hole in my project bag. Is this even a thing? You know what I mean, right? I need to use it, lots of it, right now!

I’ve chosen to work Stephen West’s Jigsaw Puzzle Blanket. It has a lot going for it. Two strands of fingering are held together throughout. It’s worked on nice big needles and it’s modular too, yahoo.

So far I am on my third section and I can already see that the turning, turning, turning for the garter rows is going to be a drag as this gets bigger.

Purling back backwards is coming to the rescue. You work it with the right side facing (no turning to the wrong side). It gives you the garter stitch bumps needed.

Here’s how it’s done. (You can skip to the video below if you want to.)

With yarn in front, insert the left needle into the back leg of the next stitch, from back to front.

Wrap the yarn around the front needle, counterclockwise.

Push your front needle through the stitch to the back. Purl bump made.

Do you want to see it in real time?

Make purl bumps of garter stitch made with the Right Side facing, no turning needed.

I am going to be soooooo good at this by the end!

Hope you have chosen a gorgeous new project to get you started on 2023.

Cheers, Deb

Any Gauge patterns by Deb https://www.ravelry.com/stores/debgemmellmods

Deb.gemmell on Instagram

Act One and Act Two

3-Act Play Scarf

I finished the first Act of the 3-Act Play scarf. All three triangles are done. I do love how all the triangles join up. Somehow the joining makes me a happy knitter.

The triangles also determine the depth of the scarf which, for this one, is 12″. I’m hoping blocking will take it to 14″ deep.

I was suffering from eyelet fatigue so the third triangle is striped.

I added in this bronze/gold/orange colourway. I will be working with this colour across the centre portion of the scarf. This is Stange Brew, colour Sedona, by Shelridge.com. Look at all those lovely colours.

I’m sorry now that I didn’t work more ridges of blue against one ridge of the new colour. The colour change is a bit more abrupt than I had expected. Too late now.

It’s definitely time for something new.

The second Act is worked on the bias. It can be done in garter stitch, but I just did a garter triangle, so I’m done with that business. The Mods pages offer 4 slip stitch patterns and right now that sounds just about perfect.

The Mods pages have this 1×1 slip stitch knitwise pattern worked over 4 rows. Two rows garter stitch and 2 rows slip stitch. I love how the colours work here.

Of course it didn’t take long before boredom set in which always leads to something fun. I kept playing with which colour was the background colour (the two knit rows). Can you see where the colour switches?

Then I changed the blue to a dark teal, just for the hell of it.

Hmm, well, it’s interesting.

Now to do some lace. Yay. Stay safe and enjoy the sun. Deb

3-Act Play Scarf on ravelry

Any Gauge and Gauge-free patterns by Deb

In between

3-Act Play Scarf

One large project is done so of course I wanted to cast on right away. But what to knit now?

It’s that between time. Almost time to think of knitting a sweater for the fall, but who wants to think about summer being over, and too late to do a summer knit.

I don’t know why but I want to knit another 3-Act Play Scarf. This will be my fourth one. Why not? I want this one to be nice and big.

It starts with 3 Triangles, joined-as-you-go. The basic pattern is written in garter stitch. This is the first one I knit out of odd balls.

This time I am diving into the Mods and working eyelets in the first triangle.

I chose to work the eyelets purlwise (one of the 4 eyelet options). I know that wouldn’t be most people’s choice. I have a good reason.

The shaping for this triangle is worked on the wrong side rows. So I combined working the eyelets with a shaping row.

Wrong side row: Shaping row + eyelets worked purlwise.

Right side row: Knit.

Wrong side row: Shaping.

Right side row: Knit.

I get those lovely angst-free knit rows. Yay.

Also there is a knit/purl/knit stockinette section with the eyelets sitting exactly in the middle row which makes my symmetrical heart happy.

So far it’s the perfect knit. Happy August. Deb

Any Gauge and Gauge-free patterns by Deb

Deb.gemmell on Instagram

It’s a new year

I am coming to you from my local library since our internet at home went out before Christmas and now won’t be up for another couple weeks. We’ve been reading lots of books. Not a bad thing but it’s somewhat unsettling to be without the world wide web.

But look, I finished my Saddle Up pullover. Yahoo.

I would have liked to make the neckband deeper but I ran out of wool. I bought it in Scotland about 30 years ago so … there is no more. Yes, it was a deep dive into my stash but I’m so glad to finally have a sweater out of it. Ha, ha, about time, wouldn’t you say!

Did you make a knitting New Years resolution?

This is my New Years resolution for 2022: knit only from my stash. I’ve unfollowed all wool dryers from my Instagram account so I won’t be tempted. Ugh, that was really hard to do. How about you? Do you have knitting plans for the new year?

It’s a new year. All the best to you and yours in 2022. Cheers, Deb

Any Gauge and Gauge-Free patterns by Deb: https://www.ravelry.com/stores/debgemmellmods

Saddle Up for a new sweater

If you can’t think of anything else to do, start a new project. That’s a good motto, don’t you think?
I’m trying to convince myself to sew in the ends of the two V-Neck Cardigans I have finished. And that’s the trouble, right there. I think they’re finished. They are not. They require some after-knitting care and I struggle to do this with every single project I do. Every. Single. Project.

So of course, I started something new. A new sweater. It’s an idea I’ve been thinking about: a saddle shoulder, drop sleeve pullover with cables. Worked from the top down, of course.

So here we go. I started with a provisional cast on for an 8″ saddle which will be 4″deep on the front and 4″ deep on the back. I worked the shoulder in garter stitch to the width I wanted to the neck opening edge. Then I put the Front Stitches on hold and knit across the Back of Neck first.

Next I worked a small number of stitches for the bottom of the Front neck opening. This is going to give me a 3″ deep neck opening. I will pick up for the neckband later. Then I cast on for the other side of the neck opening and knit the other shoulder.

When it’s folded at the top of the shoulder it will work like this.

I hope this works because I’m quite captivated by this idea. Cables are coming up next.  What do you think?

Cheers,  Deb

Any Gauge and Gauge-Free patterns by Deb