What if … the bust and sleeve could both fit?

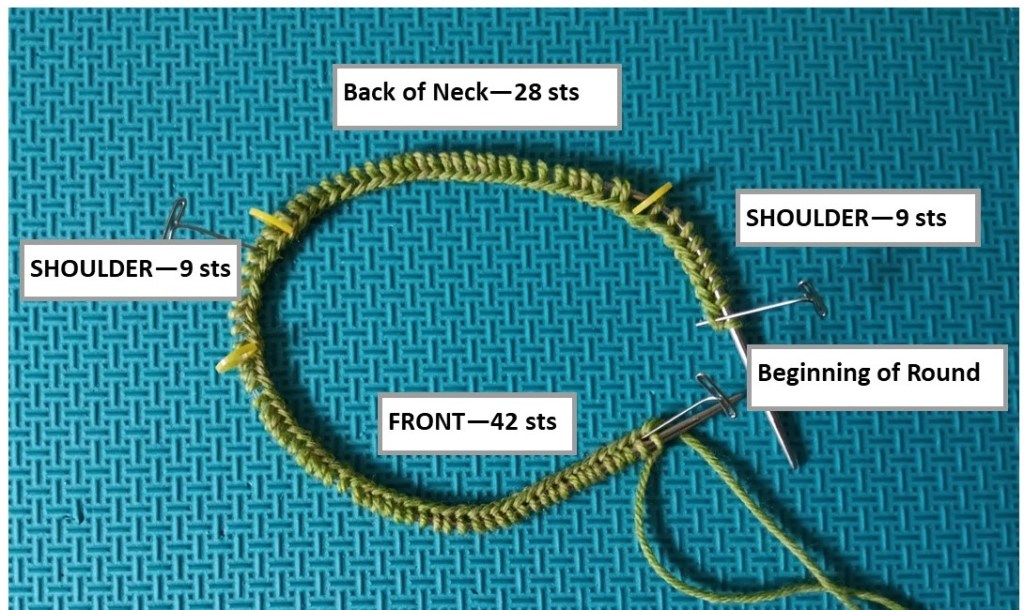
What if … the raglan markers on your Top Down sweater were only a guideline for the size of your sleeve and not the exact size of the sleeve?

“Why don’t you knit sweaters for yourself?” I have asked this question of a lot of knitters. The answer, quite often, is that the sleeves never fit. A lot of knitting pattern sizes are based primarily on the measurement around your bust. If your bust measurement and your arm measurement don’t agree with the size chart the designer is using, then you are not getting a good fit.

This is one of the problems I wanted to solve in the adult sizes of my series of Any Gauge Raglan patterns. I have written these patterns for one person at a time – you. You don’t have to compare yourself to a size chart.

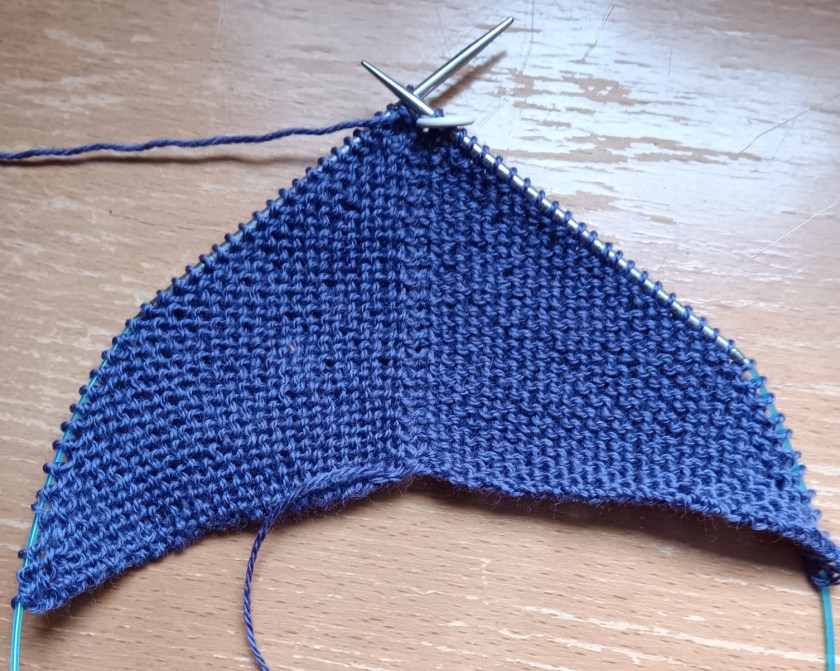
In these patterns, you take your bust measurement and arm measurement with a tape measure, and, after converting to the number of stitches, make the raglan yoke to these measurements (Bust + Arm + Arm). Yes, when you finish the yoke,it would fit you like a second skin.

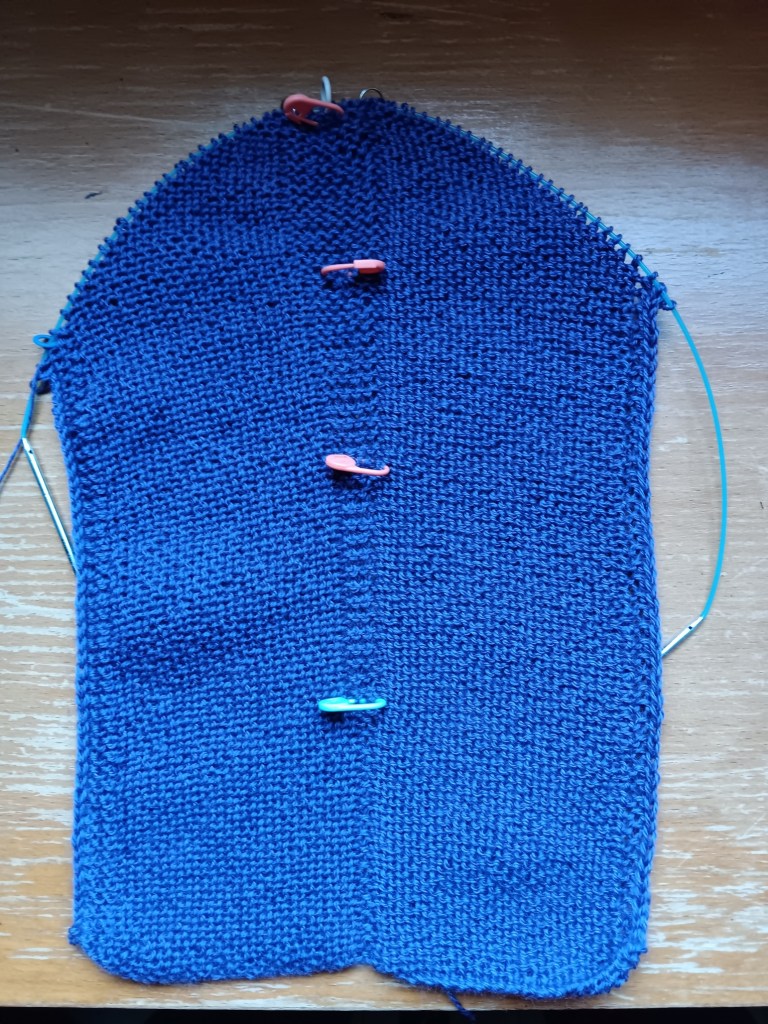
Then you put the exact number of stitches for your arm on spare yarn for your sleeve.

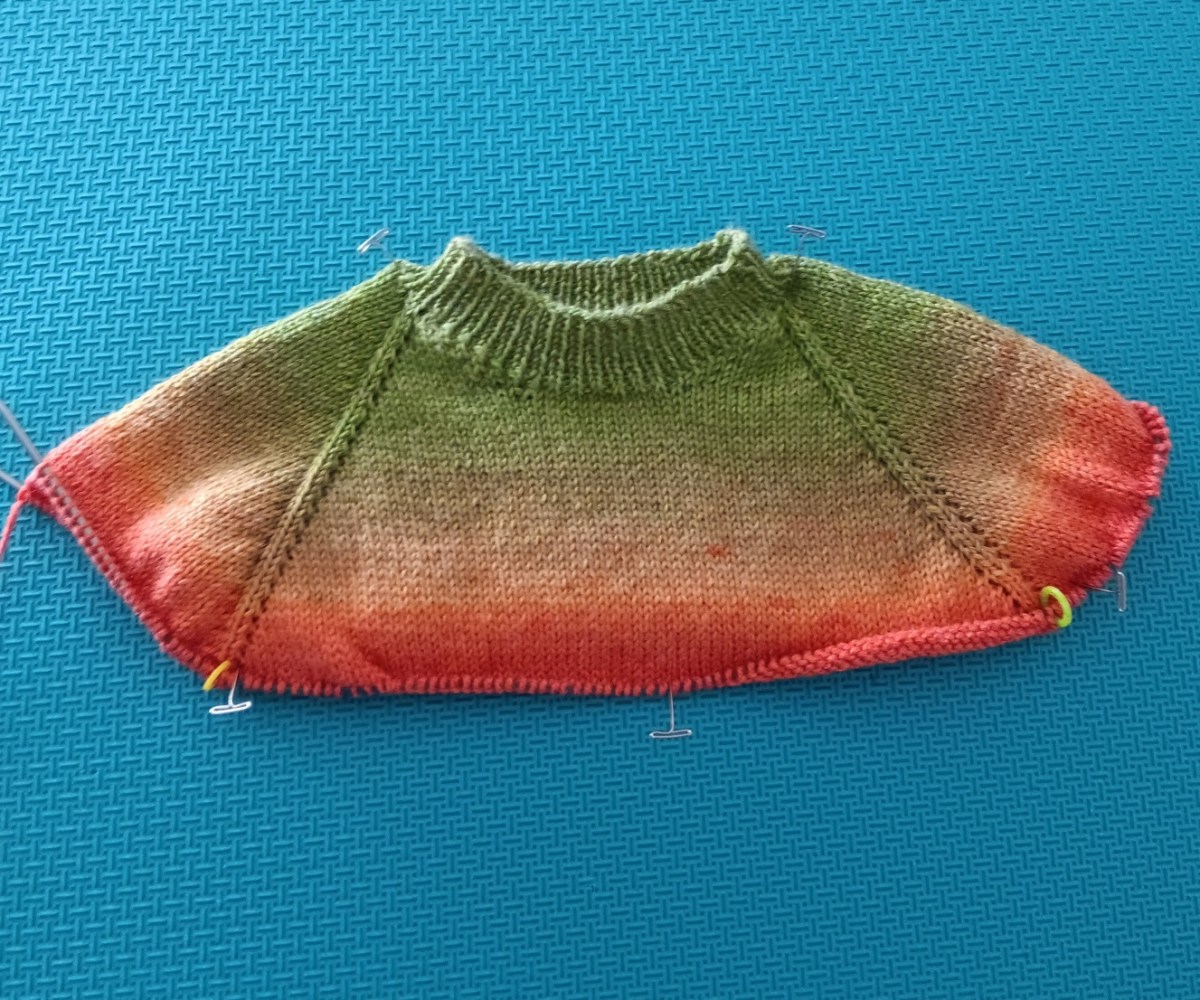
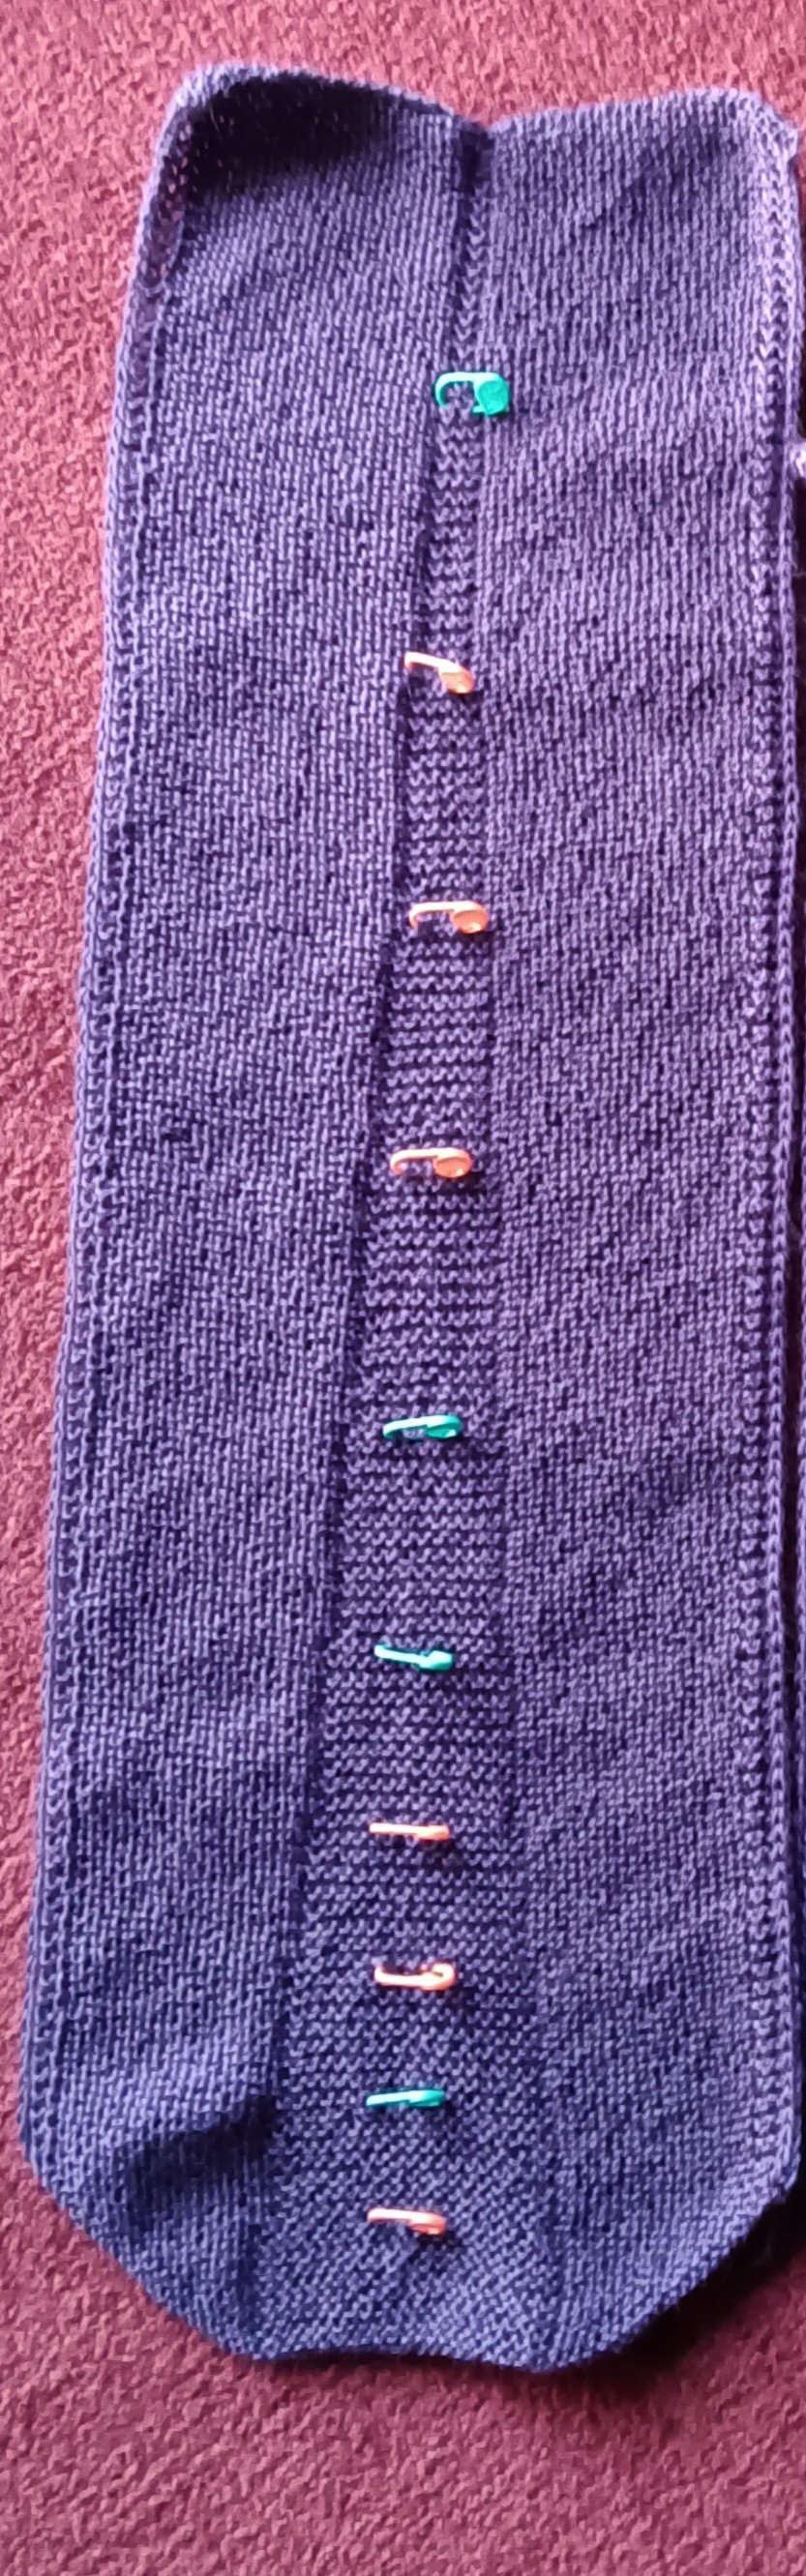
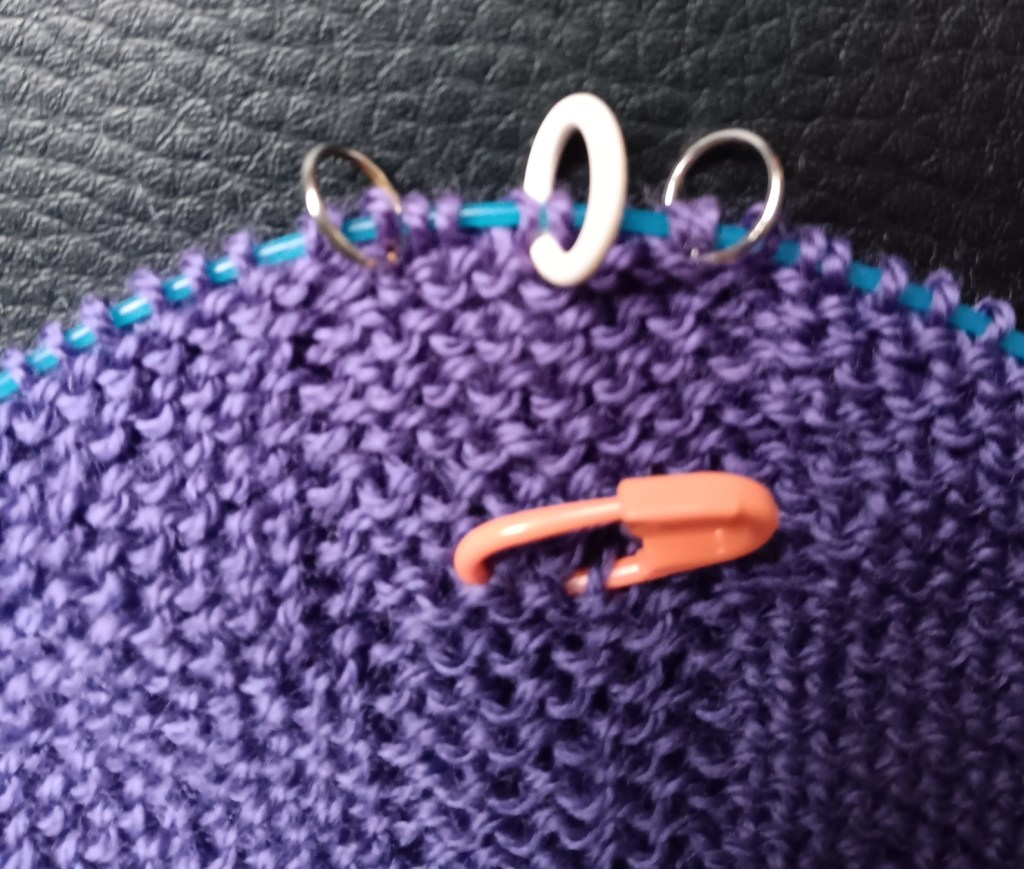
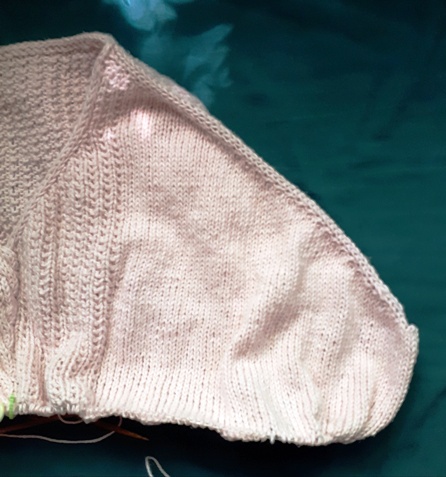
Here is the bottom of my Family Crew Neck yoke with one set of sleeve stitches on spare (red) yarn.

My sleeve stitches on the spare yarn are inside the raglan markers.

In this case my sleeve stitches are 6 sts narrower (1.25″ narrower) than where the raglan markers would indicate. Whether the sleeve stitches end up inside or outside the raglan markers depends on where the markers are set up in the neckline and the size of your arm, of course.

But it fits like a second skin? How is that going to work?

Wait, there’s more. Cast on the number of stitches you need for the amount of ease you want on the body. It could be anywhere between 4″- 7″ or even more, if you wish. Cast on 1/2 the ease at one underarm and the other 1/2 at the other underarm.

Now this sweater body has been knit to your specific measurements at the bust and arm. Ease has been added. This sweater body will fit you and only you.

Is this a really radical idea? Questions?

Cheers, Deb

Any Gauge and Gauge-Free patterns by Deb

Deb.gemmell on instagram

Settling In

There are parts of sweater knitting that I enjoy over others. Settling in to knit a raglan yoke is one of the most enjoyable parts of the sweater for me. I love keeping track of the increases, seeing it get bigger and bigger, wider and wider, knowing it’s going to be so great.

Both of my Family Crew Neck sweaters are progressing well. The child size 4 is way ahead.

The colouring of the yarn is a great incentive to keep going. This is Maravilla by Katia, a wool & acrylic blend.

My navy version (Shelridge Yarns, W4 worsted, navy) is coming along. The short rows are done here. I was knitting on a train trip to Ottawa. Perfect knitting conditions: travel mug of tea, audio book and ear buds, hours of quiet knitting time.

Now I’m ready to really go for it. I will be introducing a pattern into the front 20 stitches between the ends of the short rows. Fun, fun, fun. Isn’t knitting just the greatest!

Cheers, Deb

Any Gauge and Gauge-Free knitting patterns by Deb

Deb.gemmell on instagram

Family Crew Neck, let’s Cast On

This will be my first sweater of 2024 and I am so excited to get started. If you want to knit along with me, the Family Crew Neck is on ravely. I am going to make videos for most of the sections of the sweater so you can see how this pattern works. It’s an Any Gauge pattern so I don’t know what yarn or what size you are knitting, that was the challenge of writing this pattern.

I am going to knit a 4 year old size for my grandson and an adult size for myself. I had knit one for my son-in-law, my grandson (both in the photo), one for my daughter-in-law (also in photo), and one for my daughter. I didn’t knit one for myself!!! It’s obviously time.

This is a longish post. Getting started always takes a bit of time. Hang on, there are videos and photos of the Cast On for both sizes.

Here we go. Because this pattern is for Any Gauge of yarn, you do have to do some math. Sorry, but there is no avoiding it. You need your gauge (# of sts in 1″) and a couple more numbers. Nothing your calculator can’t handle.

Here is my cast on. Gauge is DK weight yarn (5.5 sts = 1″), 4 year old size with 5″ Back of Neck (BofN).

Yes, there are a lot of Front sts, that’s totally correct. The extra Front sts will form a dropped front to the crewneck.

Here is my cast on for an adult size in worsted weight yarn (gauge is 5 sts = 1″) with an 8″ Back of Neck.

And now, how can you cast on when you will be beginning with the neck band and it needs to go over your head easily? I learned this from Cat Bourdhi and now use it all the time.

OR watch Crocodile Cast On by Cat Bordhi

OK, I’m on my way. Two versions of the Family Crew Neck are on the needles. Join me and knit along or just cheer me on.

Cheers, Deb

Any Gauge and Gauge-Free patterns by Deb

Deb.gemmell on instagram

Geeky Short Row placement

As I have been knitting away on my vest version of the Build A Bigger V cardigan I have been thinking about the armhole. They are rather a big deal when knitting a sleeveless garment, right?

My other concern was getting some extra bust width on the front. Short rows to the rescue. The mods pages for the cardigan has instructions for short rows to make an A-line cardigan. I used the same idea except for where I began my short rows.

I want the extra width to begin high up so I get an outward slant to the line from the shoulder. High on the front (the top pine) and lower on the back (lower pin).

I worked the short rows with 2 ridges in between. I think it worked.

I can almost see it finished now.

Almost!!!

Hope your knitting is going well too, Deb

Any Gauge and Gauge-Free patterns by Deb

Deb.gemmell on instagram

Why all the markers?

I’m working on the back panel of the Build a Vest with all those markers in place. What are they doing down the centre? I thought you’d never ask.

The first Build a V that I worked on was the baby version.

As you can see it also starts with a front and back panel, then is worked sideways for the sleeves.

The back panel looks like this.

See that nice little pointy V at the bottom? I didn’t want that pointing at my derriere on my vest. Would you?

So … all those markers. They indicate x number of ridges as I worked down the back.

This is my Build A Bigger V cardigan, and you can see that the point has been taken away, creating a rounded bottom to the back panel. At every marker I moved the increases further away from the centre marker.

This is my finished back panel of my vest.

The centre section gets wider and wider. As I approached the bottom I started widening the centre section a little more often.

I think this would work for a triangular shawl too, if you didn’t want that sharp triangle point. What do you think?

Cheers, Deb

Any Gauge and Gauge-free patterns by Deb

Deb.gemmell on instagram

Markers, how I use them

I am using several markers for this project. Only one is required by the Build a Bigger V pattern. That’s the white marker in the centre. The rest help me keep track of the shaping and remind me when and where to do things.

There are 7 more markers here which are all for me. Yes, there are quite a few. Yes, they are different colours and types of markers on purpose.

Marker for Right Side of fabric: That orange marker on the right is pinned through the fabric to tell me this is the beginning of the right side row. It is especially helpful at the start of the project when there aren’t as many other things to tell me I’m on the right side. It’s a removable marker so I can move it up as I knit.

Markers for length: The orange, green, orange sequence up the middle are for counting ridges so I don’t have to keep counting from the cast on. I am placing the first orange marker after the first 2 ridges, then every 8 ridges as I continue down this front panel because something happens every 8 ridges in this particular pattern.

Markers delineate: The two metal markers on either side of the centre marker (white) show me where the middle section is. You can place markers on either side of a stitch pattern or some section you need to keep track of.

Markers – do something here: The metal markers on either side of the centre marker also help me find where I need to work increases. The instructions say to work an increase x number of stitches before the centre marker (white). I don’t have to keep looking ahead for those x number of stitches if I put a marker in. I work one increase before the metal marker, knit across the middle section to the other metal marker and work an increase after it.

Markers – pay attention: I have a lot of trouble remembering to do things at the ends of the rows. So the blue marker on the left edge is telling me to pay attention and work a decrease, duh. I know it’s supposed to be there but I have merrily knit right past it so many times, I needed a marker to remind me. It’s a rescue marker.

I have collected several different types of markers for this very purpose. They help me reduce the stress of paying attention, cut down on the amount of ripping back I have to do, and therefore, make my knitting so much more enjoyable.

Hope this is helpful, Deb

Any Gauge and Gauge-Free patterns by Deb

Deb.gemmell on instagram

Build A Vest, ready, set, go >>>

This is a photo of the Build A Bigger V cardigan before I knit the sleeves. This could be a vest as it is in this photo. It has 9″ of ease so if it was a little more fitted … it could work.

But I sort of like the idea of cutting in the armhole, for a sleeveless look (white line).

Better?

At any rate, I’ve started. This is the beginning of the Back Panel. I’m knitting in fingering weight yarn (80/20 fingering by Shelridge Yarns – colour Iris). Yes, this will be a lot of knitting but here I go.

The idea of Building a Vest using the Build a Bigger V cardigan intrigued several knitters. Thanks for voting. Cheers, Deb

Any Gauge and Gauge-Free patterns by Deb

Deb.gemmell on instagram

Act One and Act Two

3-Act Play Scarf

I finished the first Act of the 3-Act Play scarf. All three triangles are done. I do love how all the triangles join up. Somehow the joining makes me a happy knitter.

The triangles also determine the depth of the scarf which, for this one, is 12″. I’m hoping blocking will take it to 14″ deep.

I was suffering from eyelet fatigue so the third triangle is striped.

I added in this bronze/gold/orange colourway. I will be working with this colour across the centre portion of the scarf. This is Stange Brew, colour Sedona, by Shelridge.com. Look at all those lovely colours.

I’m sorry now that I didn’t work more ridges of blue against one ridge of the new colour. The colour change is a bit more abrupt than I had expected. Too late now.

It’s definitely time for something new.

The second Act is worked on the bias. It can be done in garter stitch, but I just did a garter triangle, so I’m done with that business. The Mods pages offer 4 slip stitch patterns and right now that sounds just about perfect.

The Mods pages have this 1×1 slip stitch knitwise pattern worked over 4 rows. Two rows garter stitch and 2 rows slip stitch. I love how the colours work here.

Of course it didn’t take long before boredom set in which always leads to something fun. I kept playing with which colour was the background colour (the two knit rows). Can you see where the colour switches?

Then I changed the blue to a dark teal, just for the hell of it.

Hmm, well, it’s interesting.

Now to do some lace. Yay. Stay safe and enjoy the sun. Deb

3-Act Play Scarf on ravelry

Any Gauge and Gauge-free patterns by Deb

Did the Steeks work?

Any Gauge and Gauge-Free patterns by Deb

I know you’ve been waiting with baited breath to see if picking up around my steeked sleeve opening would hold as I knit my sleeves. You haven’t?!

Well, I was holding my breath, even as I did it. And, guess what, I found one more skein of the pink. Yay.

On the inside you can see the crochet work I did and the cut ends.

On the outside, the pick up is very neat and tidy. I picked up 3 stitches for every 4 rows.

One 3/4 length sleeve finished. I have to say that this construction sure makes short work of sleeve knitting. I love that.

As I approach the end of this large experiment I cast on for a new project. I’m holding it as a carrot in front of this sweater so that I get it done.

I can’t be the only one who does this, am I?

Cheers, Deb

Any Gauge and Gauge-Free Patterns by Deb

Deb.Gemmell on instagram

Celebrate as you go

It has occurred to me lately that working on two pullovers at the same time is not the best idea I have ever had. It seems like very little progress is made on either one. I am missing that satisfying feeling of getting something done. So today I am celebrating getting the lace section of the Corbis Sweater by Natasja Hornby DONE.

The left side is on waste yarn. The right side is ready to work. Short rows here I come. I’m excited.

My other project, the slope-shoulder pullover, is also coming along slowly. I decided to take MP’s advice to keep knitting and see how I felt about continuing or if it was time rip it out. It felt good so I’m carrying on.

I solved the problem of the centre front join by working a 6 stitch cable. That divides what was the beginning and the end of the rows when I was working the top of the yoke flat. The beginning of the round is still in the centre front, which is a little weird, but this is working.

Next is the long section for the sleeve openings. Usually you would work the front and back flat for the length of the sleeve opening. I had a car trip coming up (navigator and passenger only, of course) so I decided to continue to work in the round. It’s easier to be looking at the right side all the time. Not so much attention needed. This requires a steek. Eeek, a steek!

Yes, I’m going to cut the fabric to make the sleeve openings. To get started I cast on 5 sts at the end of each of the shoulders. These 5 sts are my steek stitches and the hole makes the machine sewing easier to work. Then I will cut. I can’t wait. I love this technique.

Lots of excitement to come. I’m looking forward to feeling like I’m getting somewhere on these two projects.

Cheers, Deb

Any Gauge and Gauge-Free patterns by Deb

Deb.Gemmell on instagram