
Would you like the front of your sweater to be wider than the back? There are two obvious reasons why you might need that. Knit to Fit: Do I Need Bust Darts?
If you are working a casual Raglan sweater from the Top Down here is an easy way to get some extra width across the Front just where you need it: not over the entire front of the sweater and expecially not around the top of the shoulders and neckline, just at the bust.
As you work down your yoke, you are working increases at the raglan lines.
As you approach the bottom of the yoke, what would happen if you doubled up the increases on the Front only? Wouldn’t there be more width on the Front?
In the bottom couple of inches of the yoke, on the Front only, you could work an additional M1 increase beside the raglan increases you are already working, separated by a stitch or two. This could easily add an extra 2″- 3″ to the Front.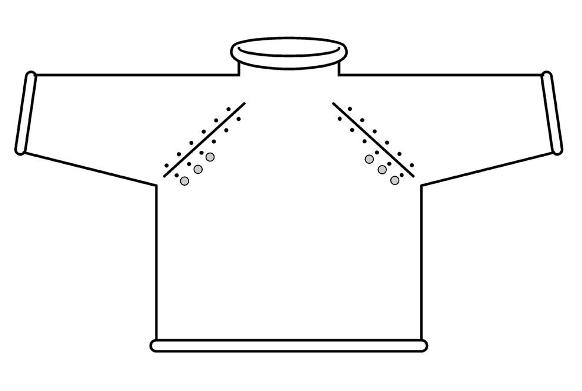 Would the extra increases show? Not really. You can put them in just before the underarm. Can you see them?
They’re right there.
At my gauge of 5 sts = 1″, 5 extra increases on each side of my front (yes I did work 5 extra increases but I can’t find the 5th one) for a total of 10 extra stitches, which gives me 2″ of extra width across the front, above my bust. Great for my casual cardigan.
Now for the nitty gritty details. Here is an example of how it works for a cardigan:
Double Increases on Fronts for Bust Shaping
Increase Row: (RS) Work across the Front to 2 stitches before Marker#1, M1L (extra increase for bust), K1, work your regular raglan increase, K1, slip Marker#1, K1, work raglan increase, work across Sleeve to 1 stitch before Marker#2, work raglan increase, K1, slip Marker, K1, work raglan increase, knit across Back to 1 stitch before Marker#3, work raglan increase, K1, slip Marker#3, K1, work raglan increase, work across Sleeve to 1 stitch before Marker#4, work raglan increase, K1, slip Marker#4, on the Front work K1, work raglan increase, K1, M1R (extra increase for bust), knit across remaining stitches of Front to end of row. – increase of 10 sts, 8 raglan increases + 2 extra bust increases on Fronts only.
You can use this in addition to other bust shaping techniques for more width or shaping. You can add this shaping to any Top Down Raglan sweater pattern where the front and back are the same width.
You can decrease these extra bust stitches away as you work towards your waist or leave them there. It’s a casual cardigan so I just left them there. It helps to prevent button gap.
There it is. One easy way to make some extra width for your bust.
Thanks for reading,
Deb
M1L: Work before the Raglan line: With Left needle, lift the running thread between the stitch just worked and the next stitch, from front to back, and knit into the back of the resulting loop.
M1R: Work after the Raglan line: With Left needle, lift running thread between the stitch just worked and the next stitch, from back to front, and knit into the front of the resulting loop (this is tight to work).
ANY GAUGE and GAUGE-FREE patterns by Deb
Cabin Fever No-Sew patterns
Deb on instagram

7 thoughts on “Knit to Fit: Top Down Easy Bust Shaping”